

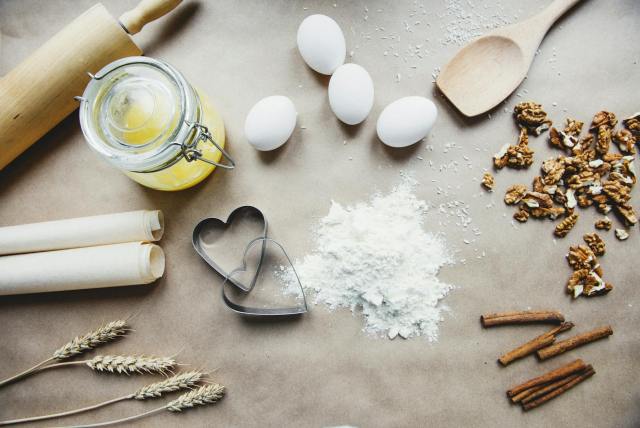
Who has not fantasized about sinking their teeth into a hot, gooey cinnamon roll, fresh from the oven, with that typical swirl of cinnamon sugar and added assist from rich icing? The aroma alone is enough to get your mouth watering, sending you back to a warm bakery or early childhood memory. But come on unless you have one nearby that’s a Cinnabon, that ideal roll is an experience in itself, and making them from scratch? That’s a labor of love that takes time, patience, and a feel for dough not everyone possesses. Enter Pillsbury’s canned cinnamon rolls, the trusty kitchen hack that brings the bakery-fresh delight with minimal effort, making it welcoming to busy mornings or spontaneous craves.
Kelsandra’s Pumpkin Cinnamon Rolls
Equipment
- 1 Large Mixing Bowl
- 1 9×13 inch Baking Dish
- 1 Rolling Pin
- 1 Serrated Knife
- 1 Small Bowl For mixing filling and glaze
Ingredients
Main
- ¼ cup warm water 100 degrees F/38 degrees C
- 1 .25 ounce package active dry yeast
- 1 15 ounce can pumpkin puree
- ¾ cup white sugar
- 1 5 ounce can evaporated milk
- 3 tablespoons olive oil
- 1 large egg beaten
- 2 teaspoons pumpkin pie spice
- 5 cups all-purpose flour or more if needed
- ¼ cup melted butter
- 1 ¼ cups brown sugar packed
- 2 tablespoons pumpkin pie spice
- 1 cup confectioners’ sugar
- ¼ cup milk
- 2 tablespoons butter melted
- 1 3 ounce package cream cheese, softened
- ½ teaspoon vanilla extract
Instructions
- Gather all ingredients. Dotdash Meredith Food Studios
- To make the dough: Pour warm water into a large mixing bowl and sprinkle yeast over top. Allow to stand until yeast begins to form a creamy foam, 5 to 10 minutes. Dotdash Meredith Food Studios
- Add pumpkin puree, sugar, evaporated milk, olive oil, and egg to the yeast mixture; mix until thoroughly combined. Stir in pumpkin pie spice, then mix in about 5 cups of flour, or as needed, until a stiff dough forms. Dotdash Meredith Food Studios
- Turn dough out onto a floured work surface and knead until smooth and elastic, but still slightly sticky, about 8 minutes. Form dough into a ball, then place in an oiled bowl, cover with a cloth, and let rise in a warm place for about 45 minutes. (The dough will rise, but it won’t double.) Dotdash Meredith Food Studios
- Preheat the oven to 350 degrees F (175 degrees C). Grease a 9×13-inch baking dish.
- Punch down the dough, then roll it out on a floured work surface to an 18×26-inch rectangle. Brush the top with melted butter. Make the filling: Mix together brown sugar and pumpkin pie spice in a small bowl; sprinkle evenly over the buttered dough. Dotdash Meredith Food Studios
- Start at the longer edge and roll dough over filling into a log. Pinch the seam closed, then use a serrated knife to cut the log into 12 equal rolls. Dotdash Meredith Food Studios
- Transfer rolls to the prepared baking dish with the cut-sides facing up. Bake in the preheated oven until light golden brown on the edges, 30 to 40 minutes. Dotdash Meredith Food Studios
- While the rolls are baking, make the glaze: Beat confectioners’ sugar, milk, butter, cream cheese, and vanilla in a bowl until well combined. Dotdash Meredith Food Studios
- Remove pumpkin rolls from the oven and immediately spread glaze over top. Serve and enjoy! Dotdash Meredith Food Studios
Notes
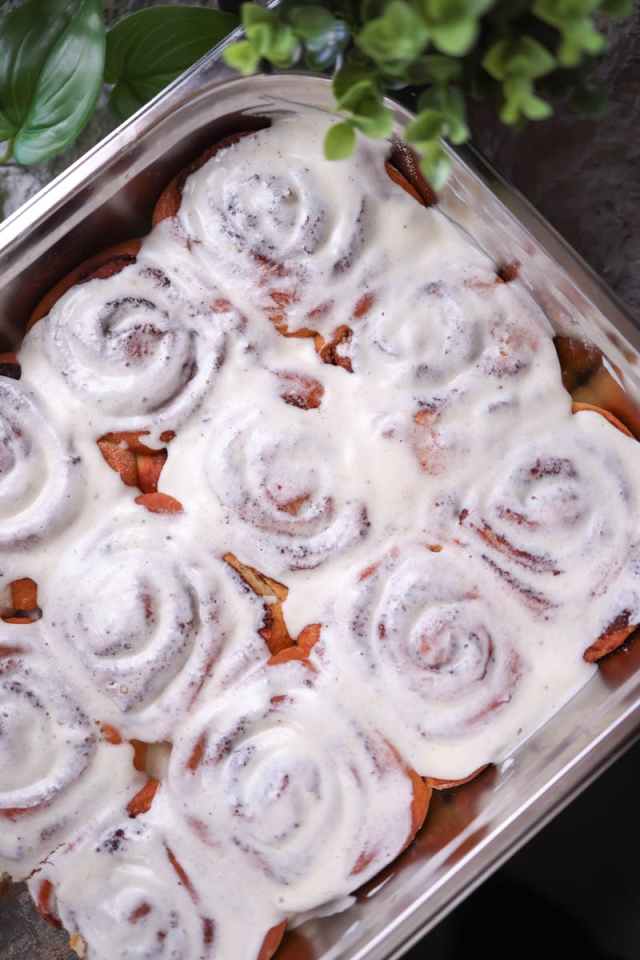
These iconic blue cans have been a breakfast hero for years, turning ordinary moments into something extraordinary with just a pop, a bake, and a slather of icing. Whether you’re a novice cook or a seasoned baker looking for convenience, Pillsbury’s Grands! Cinnamon Rolls, with Cinnabon’s special cinnamon filling and cream cheese icing, add a little indulgence to your countertop. They’re a godsend if you’re hankering for that warm, comforting pastry but you don’t have the hours of kneading and proofing time to devote.
But despite these canned rolls being truly tasty, occasionally they fail short of the rich, soft decadence of a real bakery roll. That slight dryness tempts you to want more until this point. Thanks to a going-viral TikTok trick, there is a trick that will take these rolls to record-breaking heights, and they’ll be competitive with even the most decadent bakery creations. The magic trick is almost absurdly simple, and it’s going to revolutionize your cinnamon roll life.

1. The Viral Heavy Cream Hack: A Game-Changer for Canned Rolls
The trick to making your Pillsbury cinnamon rolls bakery-perfect is hidden in one unlikely ingredient: heavy cream. This TikTok staple, extensively tested and greatly praised by Kitchn’s Patty Catalano, is as easy as it is genius. You literally place your five Pillsbury Grands! Cinnamon Rolls in a baking dish the way you would normally, then pour half a cup of heavy cream over top and bake. That’s it no additional steps, no secret tricks, just one addition and that does the magic.

Blended Baked Oats Recipe
Equipment
- 1 Blender Or food processor
- 1 Small Oven-Safe Ramekin or Baking Dish
- 1 Measuring Cups/Spoons
Ingredients
Main
- Cooking spray
- 1 large egg
- 3 tablespoons milk or non-dairy milk
- 1 tablespoon honey or maple syrup
- 1/2 cup rolled oats
- 1/4 teaspoon baking powder
- 1 pinch salt
- 1 ripe banana
- 2 tablespoons mini chocolate chips
- 1/2 teaspoon cinnamon sugar optional
Instructions
- Preheat your oven to 375°F (190°C).
- Lightly grease a small oven-safe ramekin or baking dish with cooking spray to prevent sticking.
- In a blender, combine the large egg, milk (or non-dairy milk), honey (or maple syrup), rolled oats, baking powder, salt, and ripe banana.
- Blend the mixture until it is completely smooth and creamy, scraping down the sides of the blender as needed.
- Carefully stir in the mini chocolate chips by hand, ensuring they are evenly distributed throughout the batter.
- Pour the blended oat mixture into the prepared ramekin or baking dish.
- Optionally, sprinkle the top with cinnamon sugar for an extra layer of flavor and a slightly caramelized crust.
- Bake for 20-25 minutes, or until the top is golden brown and a toothpick inserted into the center comes out clean.
- Remove the baked oats from the oven and allow them to cool slightly for a few minutes before serving.
- Enjoy warm directly from the ramekin as a nutritious breakfast or a comforting dessert.
Notes
How and why? The heavy cream gets incorporated into the dough when baked, which creates a steaming effect that leaves the rolls very soft and moist. The cream fat contributes a luxurious, deep richness, and the excess combines with cinnamon sugar at the pan bottom to create a gooey, caramel sauce that sticks to every bite. The outcome? Soft, plush rolls that are so rich they could be mistaken for homemade with texture and flavor that remain long after the last bite from the plate.
Patty’s praise was effusive: “The rolls were soft, rich, and plush, just like Cinnabon’s!” Best of all, these miracle rolls remain tasty when reheated a day later, making them ideal to enjoy over a succession of mornings. This trick does not merely enhance the rolls but completely transforms them, elevating a humble snack into a stunning treat certain to delight family, friends, or even simply your own palate.
Amazingly Good Eggnog
Equipment
- 1 Saucepan
- 2 Large Mixing Bowls One for egg yolks, one for combining mixtures.
- 1 Whisk For aerating eggs and tempering.
- 1 Fine-Mesh Strainer To remove whole spices.
- 1 Wooden Spoon or Spatula For stirring custard while cooking.
Ingredients
Main
- 4 cups milk
- 1 teaspoon ground cinnamon
- 5 whole cloves
- 2 ½ teaspoons vanilla extract divided
- 12 large egg yolks
- 1 ½ cups white sugar
- 4 cups light cream
- 2 ½ cups light rum Optional
- ½ teaspoon ground nutmeg
Instructions
- Gather all ingredients. ALLRECIPES / ANA CADENA
- Combine milk, cinnamon, 1/2 teaspoon vanilla, and cloves in a saucepan over the lowest heat setting; stir and heat for 5 minutes. Increase heat to medium-low and slowly bring to a boil. Remove from the heat. ALLRECIPES / ANA CADENA
- Whisk egg yolks in a large bowl until light yellow in color. Add sugar and whisk until light and fluffy. ALLRECIPES / ANA CADENA
- Pour some of the hot milk mixture into the egg yolk mixture, whisking quickly to avoid scrambling the eggs. Continue adding hot milk and whisking to combine until all milk is incorporated. ALLRECIPES / ANA CADENA
- Pour the mixture back into the saucepan. Cook over medium heat, stirring constantly, until thick, about 3 minutes; do not allow the mixture to boil. ALLRECIPES / ANA CADENA
- Strain to remove cloves and let cool for about 1 hour, then stir in cream, rum, remaining 2 teaspoons vanilla, and nutmeg. Refrigerate before serving, 8 hours to overnight. ALLRECIPES / ANA CADENA
- Serve and enjoy! ALLRECIPES / ANA CADENA
Notes
Key Advantages of the Heavy Cream Trick:
- Adds extra moisture, so the rolls won’t be dry.
- Delivers rich, creamy taste that replicates bakery rolls.
- Develops gooey, caramel sauce for added luxury.
2. Mastering the Basics: Getting Your Pillsbury Cinnamon Rolls Flawless
Before getting into creative shortcuts, it’s crucial to master the basics of baking Pillsbury cinnamon rolls. The can instructions are easy enough to follow, but knowing the reason behind every step guarantees consistent, scrumptious results every time. Being either a newbie or an experienced baker, these basics are the precursor to all your cinnamon roll escapades.
Walnut-Cream Roll
Equipment
- 1 Electric Mixer With whisk attachments for beating eggs and cream.
- 1 Jelly Roll Pan A 15 1/2×10 1/2×1-inch pan is essential for the correct cake thickness.
- 2 Mixing Bowls At least two are needed for separating and beating egg whites and yolks.
- 1 Wire Rack For cooling the cake properly after baking and rolling.
- 1 Sifter For enriching flour and evenly dusting confectioners’ sugar.
Ingredients
Main
- 4 egg whites
- 1 teaspoon vanilla extract
- ½ teaspoon salt
- ½ cup white sugar
- 4 egg yolks
- ¼ cup sifted enriched flour
- ½ cup chopped walnuts
- 1 tablespoon sifted confectioners’ sugar or as needed
- 1 cup cold heavy cream
- 1 tablespoon white sugar or to taste
- 1 tablespoon walnut halves or as needed
Instructions
- Preheat the oven to 375 degrees F (190 degrees C). Line the bottom and sides of a 15 1/2×10 1/2×1-inch jelly roll pan with waxed paper.
- Beat egg whites, vanilla extract, and salt using an electric mixer in a mixing bowl until soft peaks form. Beat in 1/2 cup white sugar gradually until combined.
- Beat egg yolks in a separate bowl using an electric mixer until thick and lemon-colored. Fold into egg white mixture. Fold in flour and chopped walnuts carefully until combined. Spread batter into the prepared jelly roll pan.
- Bake in the preheated oven until cake springs back when lightly touched and a toothpick inserted into the center comes out clean, about 12 minutes.
- Remove from the oven and let cool for 5 minutes. Loosen sides of cake; turn out onto a towel sprinkled with sifted confectioners’ sugar. Peel off wax paper and let cool to lukewarm, 5 to 10 minutes.
- Roll cake and towel together starting at the narrow end. Let cool completely on a wire rack, 15 to 20 minutes.
- While cake cools, beat cold heavy cream and 1 tablespoon white sugar together in a mixing bowl using an electric mixer just until stiff peaks form.
- Unroll cake and spread with whipped cream, reserving some for topping. Re-roll cake and let chill in the refrigerator for at least 30 minutes. Top with dollops of whipped cream and walnut halves. Slice and serve.
Notes
Begin by preheating your oven to 400°F (200°C) on regular pans, or 375°F (190°C) on dark or nonstick pans to prevent over-browning. Grease your baking pan lightly with butter or cooking spray for even browning and non-stick reasons. Then, open the can relish and get to savor that sweet hiss and place rolls swirl-side up with a little space between them for room to expand. Bake for 13-17 minutes or until golden brown, and let them cool just so before icing them for that perfect melt-in-the-nooks effect.
For the heavy cream hack, simply add it to the mix. When placing the rolls in the pan, drizzle the cream evenly over each roll, covering them comprehensively. Bake according to package instructions, but watch them, as the additional moisture can take an additional minute or two in the oven. If too dark on top, cover loosely with foil to allow centers to cook through. This simple deviation from the standard approach yields phenomenal results with increased ease.

“LOOK AT HER BIG BUNS!” Cinnamon Rolls
Equipment
- 1 Rolling Pin
- 1 Baking Dish 9×13 inch or similar size
- 1 Mixing Bowl Small, for filling
- 1 Spatula or Off-set Spatula For spreading butter and frosting
- 1 Sharp Knife or Dental Floss For cutting rolls cleanly
Ingredients
Main
- 1 loaf frozen sweet dough thawed overnight in fridge (located in the frozen section, near the frozen ready to bake cinnamon rolls)
- 1/4 cup white sugar
- 1/4 cup brown sugar
- 6-7 tb. butter softened
- 1 tb. cinnamon
- 1/2 can pillsbury classic white frosting or your favorite recipe
Instructions
- Ensure frozen sweet dough is thawed overnight in the refrigerator and brought to room temperature before use.
- Preheat oven as directed on the sweet dough package (typically around 375°F/190°C). Lightly grease a baking dish.
- In a small bowl, combine the 1/4 cup white sugar, 1/4 cup brown sugar, and 1 tablespoon cinnamon to create the filling mixture.
- On a lightly floured surface, roll the thawed dough into a large rectangle, approximately 12×18 inches.
- Spread the 6-7 tablespoons of softened butter evenly over the entire surface of the rolled-out dough.
- Evenly sprinkle the prepared sugar-cinnamon mixture over the buttered dough, leaving a small border.
- Starting from one long edge, tightly roll the dough into a log.
- Cut the log into 1 to 1.5-inch thick slices using a sharp knife or unflavored dental floss, forming individual rolls.
- Place the cut rolls into the greased baking dish, leaving a small space between each for expansion.
- Bake for 15-20 minutes, or until golden brown. Immediately spread the 1/2 can of Pillsbury classic white frosting over the warm rolls and serve.
Notes
Tips for Perfect Baking:
- Bake in a light-colored pan for uniform heat distribution.
- Look for a golden-brown crust and springy feel to test for doneness.
- Allow rolls to cool briefly before icing for maximum flavor absorption.

3. Taking the Experience to the Next Level: Innovative Toppings and Turns
The cream hack is revolutionary, but why not go farther? Decorating your Pillsbury cinnamon rolls with innovative toppings and flavors can transform them into a customized masterpiece. The toppings allow you to customize the rolls according to your mood, occasion, or food choices, so every batch can be a delight.
Ooey-Gooey Cinnamon Buns
Equipment
- 1 Large Mixing Bowl For preparing and proofing the dough.
- 1 Small Saucepan For warming milk and preparing the sticky glaze.
- 1 9×13 inch Baking Pan Essential for baking the cinnamon buns.
- 1 Rolling Pin For flattening the dough evenly.
- 1 Whisk For blending ingredients and making the glaze smooth.
Ingredients
Main
- ½ cup warm water 110 degrees F/45 degrees C
- 1 teaspoon white sugar
- 1 0.25 ounce package active dry yeast
- ½ cup milk
- ¼ cup white sugar
- ¼ cup unsalted butter
- 1 teaspoon salt
- 2 large eggs beaten
- 4 cups all-purpose flour
- ¾ cup unsalted butter
- ¾ cup brown sugar
- ½ cup chopped pecans
- ¼ cup unsalted butter melted
- ¾ cup brown sugar
- ½ cup chopped pecans
- 1 tablespoon ground cinnamon
Instructions
- To make the dough: Pour water into a liquid measure. Add 1 teaspoon of sugar and active dry yeast; stir until dissolved. Let stand until foamy, about 10 minutes. Dotdash Meredith Food Studios
- Meanwhile, warm milk in a small saucepan over medium heat until it just starts to bubble around the edges; do not boil. Remove from the heat and stir in 1/4 cup sugar, 1/4 cup unsalted butter, and salt until melted. Let cool until lukewarm. Dotdash Meredith Food Studios
- Lightly whisk eggs in a large bowl. Add yeast mixture, lukewarm milk mixture, and 1 ½ cups flour; stir until well combined. Dotdash Meredith Food Studios
- Mix in remaining 2 ½ cups flour (1/2 cup at a time), mixing well after each addition, until dough comes together.
- Turn dough out onto a lightly floured surface and knead until smooth, silky, and elastic, about 8 minutes. Dotdash Meredith Food Studios
- Place dough in an oiled bowl and turn to coat with oil. Cover with a damp cloth and let rise in a warm place until doubled in volume, about 1 hour. Dotdash Meredith Food Studios
- While the dough is rising, make the glaze: Melt 3/4 cup of unsalted butter in a small saucepan over medium heat. Add 3/4 cup brown sugar and whisk until smooth.
- Grease a 9×13-inch pan. Pour glaze mixture into the pan; sprinkle pecans over top. Dotdash Meredith Food Studios
- Make the filling: Place 1/4 cup melted butter in a small bowl. Combine 3/4 cup of brown sugar, pecans, and cinnamon in a separate bowl.
- When the dough has doubled in size, turn it out onto a lightly floured surface. Roll into a 14×18-inch rectangle. Brush 1/2 of the melted butter over the dough, leaving a 1/2-inch border unbuttered. Sprinkle brown sugar mixture over top. Dotdash Meredith Food Studios
- Start at the long edge and roll the dough tightly, pinching the seams to seal. Brush remaining butter over the dough. Cut dough into 15 equal rolls. Dotdash Meredith Food Studios
- Place rolls, cut-sides down, into the glaze in the prepared pan. Cover and let rise until double in size, about 1 hour. Dotdash Meredith Food Studios
- Preheat the oven to 375 degrees F (190 degrees C).
- Uncover and bake in the preheated oven until golden brown, 25 to 30 minutes.
- Let cool in pan for 3 minutes, then invert onto a serving platter so the glaze is on top. Scrape any remaining glaze from the pan onto the rolls. DOTDASH MEREDITH FOOD STUDIOS
Notes
Experiment with brushing the unbaked rolls with melted butter and cinnamon-nutmeg sprinkled on them before baking for a stronger crust and deeper flavor. For a sticky bun effect, melt butter in pan, sprinkle brown sugar and chopped pecans on surface, then top rolls on after baking, flip upside down for caramelized, nutty dessert. You can even take the icing to the next level by topping it with a homemade cream cheese frosting: mix together 4 oz cream cheese, ¼ cup butter, 1 cup powdered sugar, and a pinch of vanilla for an indulgent, tangy spread that trumps the packet.
For a finishing touch, try adding toppings such as salted nuts, caramel or chocolate flurries, or fresh fruit for pops of color. Want to get adventurous? Try a sprinkle of flaky sea salt for an upscale sweet-salt contrast, or crispy bacon bits for a decadent savory kick. These add-ins are your secret, making a plain can of dough a gourmet treat.
Classic Dinner Rolls
Equipment
- 1 Large Mixing Bowl
- 1 Saucepan
- 1 Electric Mixer (handheld or stand mixer)
- 1 8-inch Round Baking Pan
- 1 Measuring Cups and Spoons
Ingredients
Main
- 2 cups all-purpose flour divided, or as needed
- 2 tablespoons white sugar
- 1 .25 ounce envelope Fleischmann’s RapidRise Yeast
- ½ teaspoon salt
- ½ cup milk
- ¼ cup water
- 2 tablespoons butter plus more for brushing
Instructions
- Gather the ingredients. Dotdash Meredith Food Studios
- Combine ¾ cup flour, sugar, undissolved yeast, and salt in a large bowl. Dotdash Meredith Food Studios
- Heat milk, water, and 2 tablespoons butter in a saucepan until very warm (120 degrees to 130 degrees F). Dotdash Meredith Food Studios
- Add warm milk mixture to the flour mixture. Beat for 2 minutes on medium speed of an electric mixer, scraping the bowl occasionally. Add ¼ cup flour; beat for 2 minutes at high speed. Stir in enough remaining flour to make soft dough. Dotdash Meredith Food Studios
- Knead dough on a lightly floured surface until smooth and elastic, about 8 to 10 minutes. Cover; let rest for 10 minutes. Dotdash Meredith Food Studios
- Divide dough into 12 equal pieces. Dotdash Meredith Food Studios
- Shape pieces into balls and place in a greased 8-inch round pan. Cover and let rise in warm, draft-free place until doubled in size, about 30 minutes. Preheat the oven to 375 degrees F (190 degrees C). Dotdash Meredith Food Studios
- Bake rolls in the preheated oven until golden brown on top, about 20 minutes. Dotdash Meredith Food Studios
- Brush with melted butter if you like. DOTDASH MEREDITH FOOD STUDIOS
- Serve warm and enjoy! Allrecipes/France C
Notes
Creative Topping Ideas:
- Toasted walnuts or pecans for crunch from nuts.
- Ripe raspberries or strawberries for sweet contrast.
- A splash of bourbon in the cream for a grown-up twist.

4. Other Cooking Methods: Outside the Oven
Not everyone wants to fire up the oven for a quick cinnamon roll fix, and thankfully, Pillsbury rolls are versatile enough to shine in other appliances. Whether you’re in a small apartment or just love your air fryer, these alternative methods offer flexibility without sacrificing flavor. Plus, they’re perfect for small batches or energy-saving cooking.
Easy Cinnamon Roll Casserole
Equipment
- 1 9×13 inch Baking Dish Heat-resistant glass or ceramic is ideal for even baking and presentation.
- 1 Large Mixing Bowl For whisking the egg and cream mixture.
- 1 Whisk Essential for thoroughly combining the wet ingredients.
- 1 Chef’s knife For efficiently cutting cinnamon rolls into even pieces.
- 1 Measuring Cups/Spoons For accurate ingredient portions.
Ingredients
Main
- ¼ cup butter melted
- 2 12.4 ounce cans refrigerated cinnamon rolls with icing
- 4 large eggs
- ½ cup heavy cream
- 2 teaspoons ground cinnamon
- 2 teaspoons vanilla extract
- 1 cup chopped pecans
- ¼ cup maple syrup
Instructions
- Gather all ingredients. Preheat the oven to 350 degrees F (175 degrees C). Pour melted butter into a 9×13-inch heat-resistant glass baking dish. Dotdash Meredith Food Studios
- Cut each cinnamon roll into 8 pieces and spread over the bottom of the dish. Set icing aside. Dotdash Meredith Food Studios
- Whisk eggs in a large bowl. Whisk in heavy cream, cinnamon, and vanilla until combined; pour over cinnamon rolls. Sprinkle with pecans and drizzle with maple syrup. Dotdash Meredith Food Studios
- Bake in the preheated oven until golden brown, about 25 minutes. Remove from the oven and let cool for 15 minutes. Dotdash Meredith Food Studios
- Microwave icing for 10 to 15 seconds; drizzle over cooled casserole. Dotdash Meredith Food Studios
- Serve warm, enjoy! Dotdash Meredith Food Studios
Notes
Air fryer is also a good choice, with rolls that are crunchy on the outside and fluffy on the inside. Preheat to 330°F (165°C), line the basket with parchment paper, and fit 2-4 rolls, leaving some space between them. Air fry at 8-10 minutes, checking at 7 minutes to ensure they are not overcooked. The result is a beautiful baked roll with excellent texture, perfect for solo indulgence or impromptu snacks. Just don’t be a slob and sprinkle in the heavy cream for that stringy yum! Toaster ovens are regular ovens in miniature form and need to be handled with care because of their small heat source. Use package guidelines, but put the rolls on the center rack to avoid burning. Microwaving, however, is best saved for left-over bake it steams the dough and makes it gummy. Re-season the microwave solely to reheat previously baked rolls (15-20 seconds) in order to bring them back to their warm, delicious state. These tips enable cinnamon rolls regardless of your kitchen situation.
Other Baking Tips:
- Use parchment paper in air fryers to avoid sticking.
- Keep an eye on toaster oven rolls in order not to over-brown.
- Reserve microwaving for reheating, not just fresh from the oven.
5. Troubleshooting Common Cinnamon Roll Challenges
Even with a foolproof product like Pillsbury, baking mishaps can happen. Whether it’s doughy centers or burnt bottoms, these common issues can be easily fixed with a little know-how. Armed with these troubleshooting tips, you’ll be ready to tackle any cinnamon roll challenge and ensure perfect results every time.
Easy Homemade Pasta
Equipment
- 1 Large Mixing Bowl For combining ingredients
- 1 Pasta Machine Essential for rolling and cutting the dough evenly
- 1 Set of Measuring Cups and Spoons For precise ingredient measurements
- 1 Bench Scraper Helpful for dough handling, dividing, and cleaning the work surface
- 1 Damp Kitchen Towel or Plastic Wrap For resting the dough to prevent drying
Ingredients
Main
- 2 cups flour
- 3 large eggs at room temperature
- 2 tablespoons olive oil
- 1 teaspoon salt
- 2 tablespoons water or as needed
Instructions
- Gather all ingredients. Dotdash Meredith Food Studios
- Mix flour, eggs, olive oil, and salt in a bowl until combined. Add water, 1 teaspoon at a time, to flour mixture until a smooth, thick dough forms. Dotdash Meredith Food Studios
- Turn dough out onto a lightly floured work surface and knead for 10 minutes. Let dough rest for 5 to 10 minutes. Dotdash Meredith Food Studios
- Divide dough into 8 balls; use a pasta machine to roll and cut dough into desired pasta shape. Dotdash Meredith Food Studios
Notes
Doughy middles typically result from overloading the pan, preventing heat transfer. Roll them out in adequate space for even cooking, and check with light touch to see if done if center springs back, they’re done; if it indents, they need more time. An oven thermometer will also indicate if your oven is running cooler than its temperature, which will cause rolls to be undercooked. Either change to a different temperature or add baking time proportionally.
For preventing burnt bottoms, cook with a light metal pan, one that radiates heat for more subtle cooking. Line your pan with parchment paper for a double buffer, and drop the oven rack if bottoms caramelize too quickly. Decrease the temperature by 25°F for dark or nonstick pans to prevent scorching. These minor changes keep your rolls from becoming golden brown and tender from bottom to top.
Troubleshooting Solutions:
- Space out evenly for even heat flow.
- Check for correct temperature with an oven thermometer.
- Reduce the oven temperature for dark pans to avoid burning.

6. Storing and Reheating for Long-Term Enjoyment
One of the best things about this heavy cream hack is that rolls remain moist and tasty on the second day of baking. Adequate storage and reheating procedures enable you to enjoy that fresh-from-the-bakery flavor whenever you want. Storing leftovers or preparing a head of time for a future indulgence, these tricks stretch your rolls as long as possible.
Keep leftover rolls refrigerated in a covered container for a week. Reheat by placing in a 350°F oven or air fryer for 3-5 minutes to regain their heat and gooey texture. To fix more quickly, microwave a single roll 20-30 seconds, but watch so they don’t overheat, which causes them to become chewy. Freezing is also an option wrap tightly in plastic wrap and place in a resealable bag for 2 months.
To reheat from frozen, thaw overnight in the refrigerator and oven or air fryer heat. This prevents the rolls from becoming hard and tacky. You may also make ahead unbaked rolls overnight: in a greased pan, cover, and refrigerate. In the morning, remove the chill by letting them sit at room temperature for 30-45 minutes and then bake as instructed. This make-ahead trick is ideal for simple brunches.
Storage and Reheating Tips:
- Refrigerate leftovers in a covered dish for 7 days.
- Tightly wrap in the freezer for 2 months.
- Allow refrigerated rolls to come to room temperature before baking for best results.

7. The Pillsbury Lineup: Choosing the Perfect Roll for You
Pillsbury provides a range of cinnamon rolls, each with its own character, so that selecting the proper one can make your baking experience even better. From the traditional Original to the decadent Grands!, knowing what to look for makes it simple to find the ideal roll for your celebration. Check out the inside information below.

Poached Pears in Honey, Ginger and Cinnamon Syrup
Equipment
- 1 Saucepan Large enough to hold all pears submerged
- 1 Vegetable Peeler
- 1 Sharp Knife For peeling ginger and splitting vanilla bean
- 1 Slotted Spoon To remove pears from hot liquid
- 1 Measuring Cups and Spoons
Ingredients
Main
- One 750-ml bottle Moscato wine or other sweet dessert wine
- 2 cups Simple Syrup recipe follows
- 1 cinnamon stick broken in 1/2
- 2 tablespoons honey
- One 3/4-inch piece fresh ginger peeled, and finely chopped
- 1 vanilla bean split lengthwise
- 6 small firm, ripe Anjou pears, peeled
- Serving suggestion: Vanilla ice cream or gelato
- 2 cups sugar
- 2 cups water
Instructions
- In a saucepan large enough to hold all the pears, combine the wine, Simple Syrup, cinnamon stick halves, honey, and ginger. Scrape in the seeds from the vanilla bean and add the bean and seeds to the saucepan. Bring the mixture to a simmer, stirring occasionally, until the honey has melted. Add the pears and simmer for 15 to 20 minutes, turning occasionally, until the pears are tender. Remove the pears from the liquid and allow to cool.
- Continue to simmer the liquid until it thickens and is reduced by half, about 15 to 20 minutes. Cool to room temperature. Remove the cinnamon stick halves and the vanilla bean and discard.
- Place each pear on a small serving plate with a scoop of vanilla ice cream. Drizzle with the honey, ginger and cinnamon syrup. Serve immediately.
Notes
Pillsbury Original Cinnamon Rolls, 8-count, are leaner, more compact, and perfect for a crowd or with strong toppings such as caramel or nuts. Their traditional texture is warm and comforting. Pillsbury Grands! (5-count) are taller, puffier, and perfect for the heavy cream hack, reminiscent of eating a light and airy cloud. They also have a creamier cream cheese frosting for extra indulgence.
For a creative twist, consider Pillsbury’s Orange Cinnamon Rolls, which replace the usual glaze with a citrusy orange frosting, or look for seasonal flavors such as pumpkin spice. Each variety has its own twist, so try them all to discover your favorite. For a grab-and-go treat or a brunch centerpiece, Pillsbury offers a roll to meet your needs.
Pillsbury Roll Options:
- Less heavy, bite-sized, perfect for a crowd or old-fashioned sticky buns.
- Grands!: Bigger, fluffier, great for rich, bakery-quality outcomes.
- Orange or Seasonal: Holiday or citrusy flavors for shake-up.

8. Why This Hack Is a Kitchen Revolution
This heavy cream cinnamon roll hack is not a recipe, it’s a home baker game-changer. It capitalizes on Pillsbury cinnamon rolls and turns them into rich, bakery-style dessert with zero additional effort. For the busy mom, the college kid, or really just anyone in need of comfort food, this hack makes indulging simple for all.

Cinnamon Roll Monkey Bread recipes
Equipment
- 1 Bundt Pan
- 1 Mixing Bowl for glaze
- 1 Whisk for glaze
- 1 Kitchen Shears or Knife for cutting cinnamon rolls
- 1 Measuring Spoons for glaze ingredients
Ingredients
Main
- cooking spray
- 2 cans Pillsbury Grands Cinnamon Rolls
- 1 cup powdered sugar
- 2 tbsp milk
Instructions
- Preheat your oven to the temperature specified on the cinnamon roll packaging, typically around 350-375°F (175-190°C).
- Thoroughly coat a Bundt pan with cooking spray, ensuring all nooks and crannies are well-greased.
- Open the cans of cinnamon rolls. Separate each roll and cut into 4-6 pieces using kitchen shears or a knife.
- Distribute the cut cinnamon roll pieces evenly into the prepared Bundt pan. Optionally, you can layer them with any loose cinnamon-sugar mixture from the cans.
- Bake for 30-35 minutes, or until the monkey bread is golden brown and cooked through, referring to the cinnamon roll package for specific baking times.
- While baking, prepare the glaze: In a small mixing bowl, combine the powdered sugar and milk. Whisk until smooth, adjusting milk as needed for desired consistency. Alternatively, use the icing packets from the cinnamon rolls.
- Once baked, remove the monkey bread from the oven and let it cool in the pan for 5-10 minutes. This allows it to set slightly before inverting.
- Carefully place a serving plate upside down over the Bundt pan, then invert the pan to release the monkey bread onto the plate.
- Immediately drizzle the prepared glaze generously over the warm monkey bread, allowing it to melt and seep into the crevices.
- Serve warm and enjoy the pull-apart goodness!
Notes
The best part about it is how simple and versatile it is. It works with any brand canned cinnamon roll Pillsbury, Annie’s, Trader Joe’s, name the brand and even on homemade dough. It’s perfect for lazy weekend breakfasts, brunch-worthy show-stoppers, or midnight snack attacks. And it’s endlessly customizable, so you can play around with flavors and toppings to suit your taste.
Aside from the tasty outcome, this trick captures the magic of cooking: turning something mundane into something divine with one brilliant flip. It’s a reminder that you don’t have to be some genius of a baker in order to produce something frankly spectacular. Pick up a can, slop on the cream, and be open to getting your teeth into cinnamon rolls as sticky, decadent, and permanent as any bakery at its finest.
Why You’ll Love This Hack:
- Effortless: One extra step for bakery-quality results.
- Versatile: Works with any canned or homemade dough.
- Crowd-Pleasing: Perfect for breakfast, brunch, or dessert.


