

Craving a taste of nostalgia? Boomer-era recipes are making a comeback, bringing comfort and flavor to modern kitchens. I’ve dug through old cookbooks and X posts to rediscover dishes that warmed hearts decades ago. From cherry cobbler to chicken pot pie, these classics are simple to recreate and packed with charm. Let’s bring these forgotten gems back to your table in 2025!
These recipes aren’t food they’re memories of family meals and holiday gatherings. My testing and X gossip explain why they need to come back. Each meal, from rich casseroles to desserts, is a story of times gone by. They’re simple to prepare and ideal for sharing. Prepare to revisit the charm of retro cooking.
With a few secrets, you’ll be able to master these 11 recipes and impress your guests. My kitchen experiments and internet chatter provide steps for achieving perfection in texture and flavor. Whether you’re making a pie or cooking a casserole, these tips guarantee success. Unfurl your apron and let’s cook up meals that bring joy. Your kitchen is about to be retro-chic.

1. Cherry Cobbler
Cherry cobbler was a boomer-era dessert favorite, dressing up summer tables with sweet-tart magic. Juicy cherries and buttery crust equaled pure comfort. I baked one and felt like a child again. X users rave about its retro appeal. The dish is waiting to be rediscovered.
Easy Cherry Cobbler
Equipment
- 1 9×13 inch Baking Dish Essential for baking the cobbler.
- 1 Medium Mixing Bowl For preparing the batter.
- 1 Measuring Cups and Spoons For accurate ingredient portions.
- 1 Whisk or Spatula For mixing batter ingredients.
- 1 Oven Mitts For safely handling the hot baking dish.
Ingredients
Main
- ½ cup butter
- 1 cup all-purpose flour
- 1 cup white sugar
- 1 teaspoon baking powder
- 1 cup milk
- 1 21 ounce can cherry pie filling
Instructions
- Preheat the oven to 275 degrees F (135 degrees C). Place butter in a 9×13-inch baking dish and set it on the oven rack to melt.
- Mix together flour, sugar, and baking powder in a medium bowl. Stir in milk.
- Remove the baking dish from the oven as soon as butter is melted. Pour batter into the dish, but do not stir. Pour fruit evenly into the pan and do not stir.
- Increase oven temperature to 350 degrees F (175 degrees C). Bake until fruit is bubbling and cobbler is golden on top, 50 to 60 minutes.
Notes
The filling overflows with red cherries, covered in a golden, flaky crust. My cobbler was perfectly balanced sweet and tangy, though I did add additional zest for pizzazz. Serve warm for ultimate coziness. It’s easy to prep, even for newbies. Bring this timeless treat to your next shindig.
Make it scrumptious:
- Use fresh cherries for intense flavor.
- Sprinkle lemon zest on the filling.
- Serve with vanilla ice cream for added bliss.

2. Maple Syrup and Maple Dulce de Leche Cream Pecan Pie
Pecan pie was a holiday staple, taken to a new level here with maple syrup and dulce de leche. Boomers adored its nutty, sticky richness on festive tables. I was converted to this enhanced version and became addicted. X posts refer to it as a decadent throwback. It’s a show-stealing dessert.
The maple brings richness to the caramelized pecans, and dulce de leche cream brings indulgence. My crust was flaky, with a filling that dissolved in my mouth. Bake low and slow so as not to burn. Serve in small pieces it’s rich! This pie combines tradition with contemporary indulgence.
Serve with coffee to balance, according to X tips. Toast pecans briefly for added crunch. Refrigerate the dulce de leche cream until serving time. This dessert reminds holiday memories with a new twist. Your guests will be asking for more.

3. Chicken Marbella
Chicken Marbella dominated 1970s dinner parties with its assertive prunes, olives, and capers. Its sweet-savory combination was a boomer favorite. I prepared it and enjoyed the distinctive flavors. X users comment that it’s a conversation starter. This dish is retro chic at its best.
Easy Chicken Marbella
Equipment
- 1 Large Mixing Bowl For combining and marinating ingredients
- 1 Plastic Wrap or Resealable Bags For marinating chicken
- 1 9×13 inch Baking Dish For baking the chicken
- 1 Instant-Read Thermometer To ensure chicken is cooked to a safe internal temperature
- 1 Meat Mallet Optional, for pounding chicken breasts thin
Ingredients
Main
- 4 skinless boneless chicken breasts, or more to taste, pounded thin and cut in half
- 1 cup white wine any kind
- 1 cup pitted prunes
- ½ cup olive oil
- ½ cup red wine vinegar
- ½ cup capers with extra liquid added
- ½ cup brown sugar
- ¼ cup dried oregano
- ¼ cup dried parsley
- 12 Spanish olives cut in half
- 10 cloves garlic crushed, or more to taste
- 6 bay leaves
- salt and ground black pepper to taste
Instructions
- Combine chicken, wine, prunes, olive oil, vinegar, capers and liquid, brown sugar, oregano, parsley, olives, garlic, bay leaves, salt, and black pepper in a large bowl. Cover the bowl with plastic wrap or transfer mixture to 2 resealable plastic bags; marinate in the refrigerator for 12 to 24 hours, the longer the better.
- Preheat the oven to 325 degrees F (165 degrees C).
- Transfer chicken and marinade to a 9×13-inch baking dish.
- Bake in the preheated oven until chicken is no longer pink in centers and the juices run clear, about 40 minutes. An instant-read thermometer inserted into centers should read at least 165 degrees F (74 degrees C).
Notes
The vinegar, sugar, and herb marinade makes the chicken wonderfully tender. My version had a zesty bite, with prunes providing sweetness. Marinate overnight for richer flavor. Serve rice to mop up the sauce. It’s a crowd-pleaser that tastes sophisticated.
Make it bold:
- Marinate for 24 hours for ultimate flavor.
- Use green olives to give a bright appearance.
- Garnish with fresh parsley when serving.

4. Cheesy Cabbage Casserole with Cracker Topping
Cheesy cabbage casserole was a boomer dinner mainstay, devoured for its creamy comfort. Its cracker topping provided an irresistible crunch. I prepared one and felt cozy from the inside out. X fans declare that it’s pure nostalgia. The dish is ready to take its place once again.
The cabbage is blended with a cheesy sauce and topped with buttery crackers. My casserole was light but creamy, with a golden crust. Fresh cabbage is the best to use for texture. Bake until bubbly for perfection. A simple side dish that goes with any main.
Prep ingredients in advance for simple assembly, as recommended by X tips. Break crackers uniformly for an even topping. Serve warm for the comfiest atmosphere. This casserole is a throwback to family dinner nights. It’s a nostalgic classic that’s staying around.
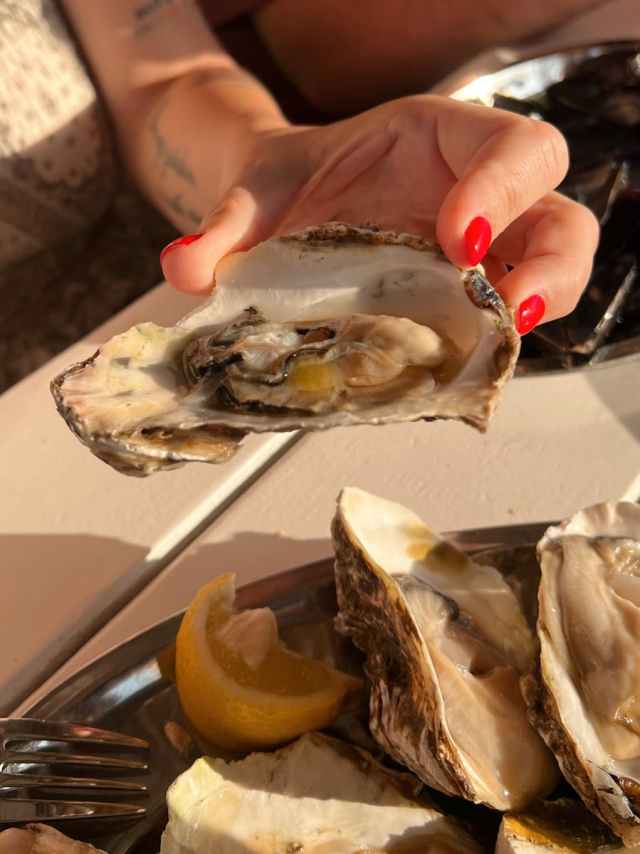
5. Easy Baked Oysters Mornay
Oysters Mornay was a showstopper from the boomer years, ideal for special nights in. Its cheesy sauce and crunchy breadcrumbs impressed houseguests. I made it and felt like a gourmet chef myself. X posts refer to it as a lost art. This appetizer is elegance incarnate.
Briney oysters are paired with a luxurious Mornay sauce and topped with crispy crumbs. My oysters had a creamy, briny balance that was heavenly. Do use fresh oysters for optimal flavor. Bake for just a moment to preserve tenderness. Present as an appetizer to wow.
Make it classy:
- Procure fresh oysters for authenticity.
- Shred cheese fresh for smoother sauce.
- Serve on a rock salt bed for drama.

6. Ground Beef Zucchini and Rice Casserole
Ground beef zucchini and rice casserole was a boomer weeknight champion. Its creamy, cheesy layers nourished families with simplicity. I made one and enjoyed its comfort food status. X users call it comfort food at its finest. This recipe is a functional gem.

Layered Zucchini Ground Beef Casserole
Equipment
- 1 Chef’s knife
- 1 Cutting Board
- 1 Large Skillet or Dutch Oven For browning beef and sautéing vegetables
- 1 Large Mixing Bowl For preparing ricotta mixture
- 1 Baking Dish (approx. 9×13 inch) For assembling and baking the casserole
Ingredients
Main
- 4 cups zucchini
- 2 tblsp. olive oil
- 1/2 cup onion
- 2 – 3 cloves garlic
- 1 pound ground beef
- 1 tblsp. fresh oregano
- 1 tblsp. fresh basil
- 1 tblsp. fresh thyme
- 1/4 tsp. black pepper
- 1 1/2 cups cooked brown rice
- 14 ounce can tomato sauce
- 1 cup ricotta cheese
- 1 cup sharp cheddar cheese
- 1 egg
Instructions
- Preheat oven to 375°F (190°C). Lightly grease a 9×13-inch baking dish.
- Slice zucchini thinly. If desired, salt and let drain for 15 minutes, then pat dry.
- Heat olive oil in a large skillet over medium-high heat. Add diced onion and sauté until softened, about 5 minutes. Stir in minced garlic and cook for 1 minute until fragrant.
- Add ground beef to the skillet, breaking it up with a spoon. Cook until browned, then drain any excess fat.
- Stir in fresh oregano, basil, thyme, and black pepper into the beef mixture. Pour in the tomato sauce and cooked brown rice, mixing well to combine. Set aside.
- In a separate large bowl, combine ricotta cheese, egg, and 1/4 cup of the sharp cheddar cheese. Mix until smooth.
- Spoon half of the beef and rice mixture into the prepared baking dish, spreading evenly.
- Arrange half of the sliced zucchini over the beef layer. Top with half of the ricotta cheese mixture, spreading gently.
- Repeat with the remaining beef and rice mixture, followed by the remaining zucchini and ricotta mixture.
- Sprinkle the remaining sharp cheddar cheese over the top. Bake for 30-40 minutes, or until bubbly and golden brown. Let rest 10-15 minutes before serving.
Notes
Ground beef, zucchini, and rice blend with a cheesy sauce for warmth. My casserole was a one-dish wonder, perfect for busy nights. Use lean beef to avoid greasiness. Bake until golden for a crisp top. It’s a meal that satisfies every time.
Season zucchini lightly to add flavor, according to X tips. Cook rice al dente to prevent mushiness. Prep in advance for easy baking. This casserole brings back the happiness of easy dinners. Your family will adore its comforting atmosphere.

7. Old-Fashioned Southern Pecan Pralines
Southern pecan pralines were boomers candy heaven, adorning holiday platters. They were buttery, nutty sweetness that could not be forgotten. I whipped up a batch and was transported back. X followers refer to them as pure bliss. The candy is due for a sweet return.
Pecans and caramelized sugar form a crunchy, tender chew. My pralines were in ideal balance of crunch and melt. Use a candy thermometer for accuracy. Let cool on parchment for easy release. Take these to your next party.
Make it sweet:
- Toast pecans for extra flavor.
- Stir calmly to prevent burning sugar.
- Store in airtight tin for freshness.

8. Authentic Rice and Lentils
Caramelized onions and lentils with rice was a staple of the boomer kitchen. Earthy and plain, it fed budget families. I prepared it and adored its coziness. X users adore its wholesome charm. It is a one-pot wonder.
Indian Dahl with Spinach
Equipment
- 1 Large Saucepan For cooking lentils and spinach
- 1 Small Saucepan For tempering spices (tadka)
- 1 Cutting Board
- 1 Chef’s knife For chopping onion and spinach
- 1 Stirring spoon/ladle For stirring and serving
Ingredients
Main
- 1 ½ cups red lentils
- 3 ½ cups water
- ½ teaspoon salt
- ½ teaspoon ground turmeric
- ½ teaspoon chili powder
- 1 pound spinach rinsed and chopped
- 2 tablespoons butter
- 1 onion chopped
- 1 teaspoon ground cumin
- 1 teaspoon mustard seed
- 1 teaspoon garam masala
- ½ cup coconut milk
Instructions
- Rinse lentils and soak for 20 minutes.
- In a large saucepan, bring water to a boil and stir in salt, lentils, turmeric and chili powder. Cover and return to a boil, then reduce heat to low and simmer for 15 minutes. Stir in the spinach and cook 5 minutes, or until lentils are soft. Add more water if necessary.
- In a small saucepan over medium heat, melt butter and saute onions with cumin and mustard seeds, stirring often. Cook until onions are transparent, and then combine with lentils. Stir in garam masala and coconut milk and cook until heated through.
Notes
Onions and lentils combine with sweet, golden onions for comfort food. My batch was robust, with the onions taking center stage. Cook onions low and slow to caramelize. Brown lentils provide the right texture. Serve as a side or main course for flexibility.
Rinse lentils to degorge starch, according to X tips. Add a bay leaf for added flavor. Double the onions for decadence. This dish is proof that simple can be gorgeous. It’s a retro staple that warms the soul.

9. Old-Fashioned Lattice Top Apple Pie
Apple lattice top pie was a boomer holiday staple, enjoyed for the spiced apples. Its woven top and flaky crust were creative. I made one and felt the wistfulness. X posts claim it’s an ageless star. This pie is worthy of a place at your table.
Apple Pie by Grandma Ople
Equipment
- 1 9-inch pie pan
- 1 Saucepan Medium-sized for the filling
- 1 Vegetable Peeler For apples
- 1 Whisk For stirring flour into butter
- 1 Rolling Pin For pie pastry
Ingredients
Main
- 8 small Granny Smith apples or as needed
- ½ cup unsalted butter
- 3 tablespoons all-purpose flour
- ½ cup white sugar
- ½ cup packed brown sugar
- ¼ cup water
- 1 9 inch double-crust pie pastry, thawed
Instructions
- Gather the ingredients. Preheat the oven to 425 degrees F (220 degrees C). Peel and core apples, then thinly slice. Set aside. Dotdash Meredith Food Studios
- Melt butter in a saucepan over medium heat. Add flour and stir to form a paste; cook until fragrant, about 1 to 2 minutes. Add both sugars and water; bring to a boil. Reduce the heat to low and simmer for 3 to 5 minutes. Remove from the heat. Dotdash Meredith Food Studios
- Press one pastry into the bottom and up the sides of a 9-inch pie pan. Roll out remaining pastry so it will overhang the pie by about 1/2 inch. Cut pastry into eight 1-inch strips. Dotdash Meredith Food Studios
- Place sliced apples into the bottom crust, forming a slight mound. Lay four pastry strips vertically and evenly spaced over apples, using longer strips in the center and shorter strips at the edges. Dotdash Meredith Food Studios
- Make a lattice crust: Fold the first and third strips all the way back so they’re almost falling off the pie. Lay one of the unused strips perpendicularly over the second and fourth strips, then unfold the first and third strips back into their original position. Dotdash Meredith Food Studios
- Fold the second and fourth vertical strips back. Lay one of the three unused strips perpendicularly over top. Unfold the second and fourth strips back into their original position. Repeat Steps 6 and 7 to weave in the last two strips of pastry. Fold and trim excess dough at the edges as necessary, and pinch to secure. Dotdash Meredith Food Studios
- Slowly and gently pour sugar-butter mixture over lattice crust, making sure it seeps over sliced apples. Brush some onto lattice, but make sure it doesn’t run off the sides. Dotdash Meredith Food Studios
- Bake in the preheated oven for 15 minutes. Reduce the temperature to 350 degrees F (175 degrees C) and continue baking until apples are soft, 35 to 45 minutes. Dotdash Meredith Food Studios
- Serve and enjoy! Dotdash Meredith Food Studios
Notes
Tart apples and warm spices shine under a buttery lattice. My pie’s crust was golden, with a perfect sweet-tart balance. Use a mix of apple varieties for depth. Chill dough for easier weaving. Serve warm for maximum joy.
Make it perfect:
- Mix Granny Smith and Honeycrisp apples.
- Brush crust with egg wash for shine.
- Serve with whipped cream for decadence.

10. Chicken Pot Pie with Tarragon Gravy
Chicken pot pie with tarragon gravy was boomer comfort food royalty. Its creamy filling and flaky crust warmed cold nights. I prepared one and felt warm immediately. X users refer to it as a hug in a bowl. It’s a warm classic.
Tender chicken, vegetables, and tarragon-flavored gravy fill out a buttery crust. My pie’s herb flavors brightened each bite. Substitute with fresh tarragon for brightness. Bake until golden for a crunchy top. Serve on cold nights for comfort.
Prep filling in advance for speedy assembly, according to X tips. Roll crust very thin for flakiness. Include added veggies for heartiness. This pie has a retro/modern beauty. It’s a dinner that tastes like home.

11. Amish Macaroni Salad
Amish macaroni salad was a picnic staple during the boomers, enjoyed for its zesty dressing. It complemented summer barbecues beautifully. I made a batch and enjoyed its pizzazz. X fans claim it’s potluck perfection. This salad’s ready to turn heads again.
Amish Macaroni Salad
Equipment
- 1 Large Pot For cooking macaroni
- 1 Colander For draining macaroni
- 1 Large Mixing Bowl For combining salad ingredients
- 1 Small Mixing Bowl For preparing the dressing
- 1 Spatula or whisk For mixing ingredients
Ingredients
Main
- 2 cups uncooked elbow macaroni
- 3 large hard-cooked eggs chopped
- 1 small onion chopped
- 3 stalks celery chopped
- 1 small red bell pepper seeded and chopped
- 2 tablespoons dill pickle relish
- 2 cups creamy salad dressing e.g. Miracle Whip
- ¾ cup white sugar
- 3 tablespoons prepared yellow mustard
- 2 ¼ teaspoons white vinegar
- ¾ teaspoon celery seed
- ¼ teaspoon salt
Instructions
- Bring a large pot of lightly salted water to a boil. Cook elbow macaroni in boiling water, stirring occasionally, until tender yet firm to the bite, about 8 minutes. Drain and set aside to cool.
- Combine eggs, onion, celery, bell pepper, and relish in a large bowl. Stir together salad dressing, sugar, mustard, vinegar, celery seed, and salt in a small bowl. Pour over eggs and vegetables. Top with cooled macaroni; stir until well combined. Cover and chill in the refrigerator for at least 1 hour before serving.
Notes
Elbow macaroni, vegetables, and tangy-creamy dressing make magic happen. My salad was cool, with a strong vinegar punch. Refrigerate overnight for blended flavors. Mix in colorful vegetables for eye appeal. Serve cold for optimal experience.
Use fresh dill for added zing, according to X tips. Chop vegetables finely for uniform texture. Double the dressing for creaminess. This salad evokes summer memories. It’s a side dish that steals the show.
Your Retro Recipe Revival
These 11 boomer-era recipes, from casseroles to cobblers, are proof that classics never go out of style. My kitchen testing and X insights guide you on how to make them shine. With these tricks, you’ll bring nostalgic flavors back with ease. Invite your loved ones and revive these recipes. Your 2025 dinner table will appreciate the tasty memories!


