
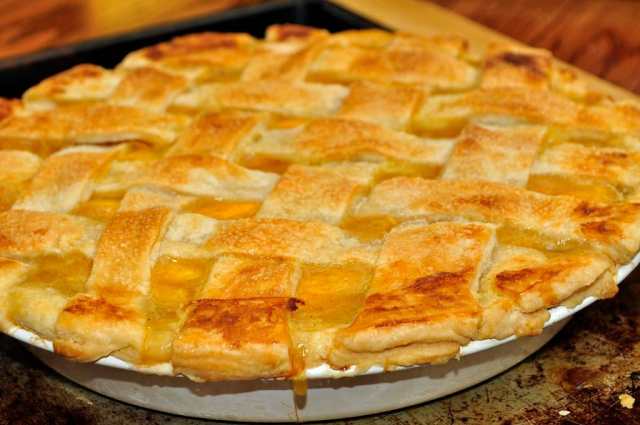
There’s something enchanted about the aroma of a pie baking in the oven, its golden crust enveloping a foaming filling that guarantees comfort and delight. For most home bakers, however, the crust presents itself as a fear-provoking obstacle, soggy bottoms or crunchy textures looming to ruin the party. But what if you could conquer a simple, 3-ingredient pie crust that’s essentially foolproof, serving flaky perfection every time? This is not only a recipe it’s a holiday baking and beyond game-changer.
Decades of experimentation in the kitchen, from experimenting with shortening to indulging in the rich beauty of an all-butter crust, culminate here: simplicity and science are the path to pie crust perfection. Grasping the “why” in every step will turn pie-making from a daunting process into a celebratory ritual. This book will guide you through every step, turning you into the hero of your next Thanksgiving dinner or cozy Saturday night dessert.
With this knowledge, you’ll not only bake a crust that’s light, flavorful, and irresistibly flaky but also gain the confidence to tackle any pie recipe. We’ll break down the science, debunk myths, and share practical tips to ensure your crust is the star of the show. Let’s roll up our sleeves and dive into the art of crafting the perfect pie crust, one delicious layer at a time.

The Revelation of a 3-Ingredient (or 4!) All-Butter Pie Crust
The key to this pie-making revolution lies in a seemingly straightforward recipe most commonly known as the “3-ingredient pie crust.” It is based on nothing more than flour, butter, and salt, although ice water crops up as a vital fourth ingredient to hold it all together. These fundamental ingredients flour for structure, butter for flavor, and salt for balance all function together to form a crust that’s tender and flaky. The elegance of its simplicity makes it perfect for beginners but strong enough for professional bakers.
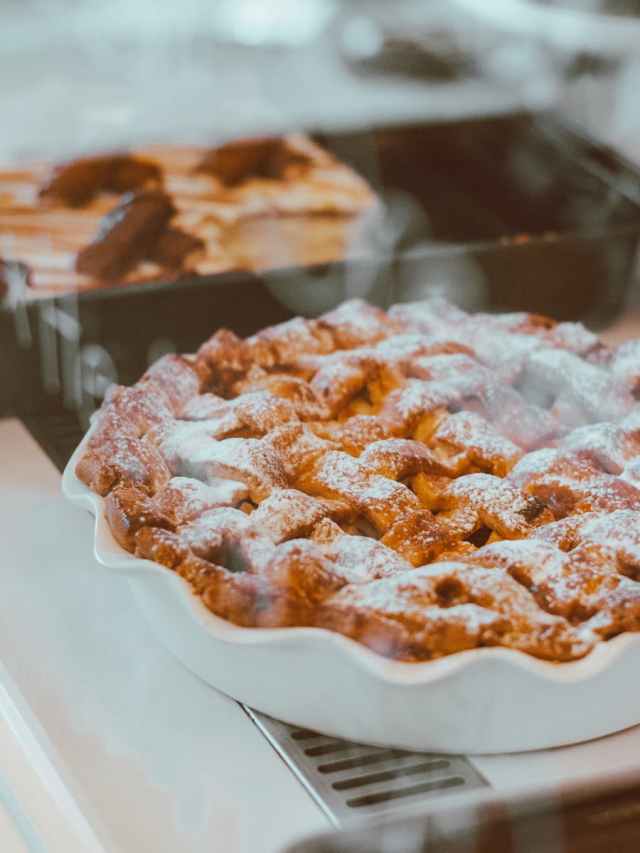
This crust’s versatility is its superpower, pairing beautifully with everything from tart apple fillings to savory quiches. Its simplicity doesn’t compromise on quality; instead, it delivers a rich, buttery flavor and a texture that practically melts in your mouth. Whether you’re baking for a festive Thanksgiving table or a quiet Sunday supper, this crust is your ticket to pie perfection, offering reliability without complexity.
- Why it works: The all-butter method creates maximum flavor and flakiness.
- Versatility: Ideal for sweet or savory pie, whether pumpkin or chicken pot pie.
- Beginner-friendly: Fewer ingredients leave less opportunity for error.
The shift to an all-butter crust was a revelation after years of experimenting with shortening. Butter’s water content creates steam during baking, forming delicate, airy layers that define a great crust. While shortening offers tenderness, it lacks the depth of flavor butter brings, and the trade-off is well worth it. Just keep that butter cold more on that later and you’re on your way to a crust that’s as delicious as it is beautiful.

The Foundation: Learning All-Purpose Flour Measurement and Preparation
The quest for an ideal pie crust begins with humble all-purpose flour, the foundation of your dough. Selecting the proper flour and measuring it accurately is paramount to prevent a dense or crumbly catastrophe. All-purpose flour is the ideal balance, offering sufficient gluten structure without hardening the crust, in contrast with bread flour, which might be too weighty for this sensitive job.
Measuring flour may appear simple, but it’s where most bakers fall short. Scooping from the bag packs down the flour, adding extra in excess and disrupting the balance. Gently spoon flour into your measuring cup and level off with a knife or better still, measure it with a kitchen scale for exact accuracy. This keeps your crust light and tender.
- Spoon-and-level: Avoids packing to ensure uniform measurements.
- Weigh for accuracy: Utilize a scale for precise quantities (approximately 120g for each cup).
- Whisk for aeration: Whip flour and salt to make the texture light.
After measuring, whisking the flour and salt (and added sugar for sweet pies) is an easy but impressive step. It not only distributes the salt evenly for uniform flavor but also aerates the flour, making for a lighter dough. Picture it as building a strong foundation for your crust, paving the way for buttery, flaky triumph.

The Heart of Flavor: The Irresistible Force of All-Butter
Butter is the essence of this pie crust, giving it a rich, unbeatable flavor that makes every bite amazing. Through countless experiments, it’s evident that a complete butter crust beats shortening blends, providing a depth of flavor and flakiness that can’t be beat. It’s the key ingredient that turns your pie from great to legendary, and every bite is a party.
Salted butter is especially nice for its subtle savory flavor that adds depth to both sweet and savory fillings. If you don’t have salted butter, don’t worry just add a little pinch of salt to the batter to replicate the effect. The secret is the water content in butter, which evaporates in the oven to form those fabled flaky layers. This natural sorcery is what turns butter into our crust’s hero.
- Salted butter advantages: Adds flavor with subtle savory punch.
- Steam power: Buttermilk creates airy, flaky textures.
- Keep it cold: Cold butter is absolute when it comes to texture.
But you have to use it quickly and under cold conditions to maintain those individual butter pockets. Blending warm butter with flour causes it to become too soft and lose its flakiness. Controlling the temperature will unlock the full power of butter, creating a crust that’s as delicious as it is stunningly layered.

The Key Ingredient: The Role of Ice Water
Ice water may appear to be a mere supporting player in this 3-ingredient pie crust, but its contribution is instrumental to that ideal flaky texture. Its main task is to maintain the coldness of the butter so it doesn’t melt into the flour during baking. This cold temperature is the reason why those pockets of butter remain intact and will expand to produce steam and lighten in the oven.
Adding water requires a delicate touch. Drizzle it in gradually whether by hand or with a food processor until the dough just holds together when pinched. Overdo it, and you’ll activate too much gluten, resulting in a tough crust. Too little, and the dough will crumble, making it impossible to roll. The “pinch test” is your guide to getting it just right.
- Chill it: Refrigerate water to keep butter solid.
- Go slow: Gradually add water so as not to over-hydrate.
- Pinch test: Stop when the dough will hold together lightly.
For an extra edge, chill your water in the freezer for a few minutes before using, ensuring it’s as cold as possible. If using ice cubes, remove them before measuring to avoid diluting the dough. This careful balance of hydration and temperature is the secret to a crust that’s pliable yet primed for flakiness.

Equipping Your Kitchen: The Right Tools for Effortless Pie Crusts
You don’t require a high-end kitchen to create an award-winning pie crust, just a few essential tools to make the process go so smoothly and be stress-free. A rolling pin and a food processor are the MVPs, making the most time-consuming steps easy. The food processor chops butter into flour in seconds, keeping it cold and uniform, and a rolling pin helps create an even, smooth crust.
If you don’t have a food processor, you can use a pastry cutter or two forks, but they take more elbow grease. The desired result is a coarse, crumbly mixture with pea-sized pieces of butter, and to be able to keep the butter cold, you have to be quick. A lightly floured surface or silicone mat keeps things from sticking, and rolling and transferring is easy.
- Food processor: Quickest means to chop in butter uniformly.
- Pastry cutter: Trustworthy manual substitute for small quantities.
- Silicone mat: Inhibits sticking and facilitates dough transfer.
A 9-inch deep dish pie plate is perfect for this recipe, allowing your crust to bake evenly. Throw in a whisk for creaming flour and a measuring cup set for accuracy, and you’re all set. These basic tools make pie-making an achievable, fun task, allowing you to focus on delivering deliciousness.

The Golden Rule: Envisioning a Cold Environment for Flaky Success
The key to a flaky pie crust reduces down to one golden rule: cold. From butter to water to your mixing bowl, keeping everything cold is not optional. Cold butter produces steam in the oven, which puffs the dough into tender, flaky layers. Warm butter? It melts into the flour, resulting in a dense, uninspired crust.
Begin by cubing and refrigerating your butter while you prepare other ingredients. Refrigerate your water for a few minutes, and cool your mixing bowl in the refrigerator. Simple steps that create significant results, keeping the butter firm until it goes into the oven, where it does its steamy thing.
- Freeze butter: Cube and refrigerate for at least 15 minutes.
- Cool tools: Refrigerate your bowl and processor blade.
- Work fast: Minimize heat exposure during mixing.
This focus on cold isn’t just a tip it’s the cornerstone of pie crust success. By prioritizing temperature control, you’re setting the stage for a crust that’s light, airy, and irresistibly flaky, turning your pie into a showstopper that wows every guest.

The Art of Incorporation: Perfectly Cutting in the Fat for Layers
Cutting in the butter is where the magic of a flaky crust begins. The goal is to mix cold butter into the flour until it resembles coarse crumbs with pea-sized butter pieces. These chunks are the architects of flakiness, melting in the oven to create steam that lifts the dough into delicate layers. Get this step right, and you’re halfway to pie perfection.
A food processor renders the process speedy and foolproof, pulsing in the butter into flour in seconds. If you are doing it manually, forks or a pastry cutter do just fine just be slow and careful not to overwork the dough. The trick is to leave it when you note those pea-sized bits so the butter remains separate for ultimate flakiness.
- Pulse carefully: Don’t over-process in a food processor.
- Test texture: Search for coarse crumbs with observable butter bits.
- Work fast: Avoid warming the butter using your hands.
If using fingers, work quickly to prevent melting the butter with body heat. This is all about finesse and efficiency, maintaining those precious butter pockets that will turn your crust into a flaky beauty when baked.

Hydration Harmony: Mixing Ice Water with Accuracy
Adding ice water is a subtle jig that can make or destroy your pie crust. Too much water overworks the gluten and results in a hard crust, and too little and you’ve got a crumbly disaster. The secret is to add just enough water so the dough just holds together when pinched, employing the “pinch test” as your gauge.
Drizzle the water gradually, whether pulsating in a food processor or tossed with a fork by hand. Humidity and other environmental factors can influence how much water your flour will absorb, so set measures don’t always work. Go by feel and stop as soon as the dough is cohesive but not sticky.
- Pinch test: Stop when dough holds together lightly.
- Adjust for humidity: Use less water on humid days.
- Fraisage option: Press dough for extra flakiness.
For an advanced touch, try the fraisage method: smear the dough with the heel of your hand to create thin butter layers. This boosts flakiness but requires care to avoid overworking. With practice, you’ll master this balance, crafting a crust that’s both workable and wonderfully tender.

The Non-Negotiable Chill: Rest for Perfection
Once you’ve mixed your dough, refrigeration is one step you can’t avoid. That rest time isn’t only convenient it’s a scientific requirement that will help your crust be tender and flaky. Refrigeration softens the gluten developed when you mix the dough, making it more pliable to roll out and resisting a hard texture.
Chilling also firms the butter up, which keeps those layers of flakiness intact. Wrap the dough in plastic wrap and chill for a minimum of 2 hours, but up to 3 days is also okay. Any 30-minute chill will work, but longer rests work the best, particularly for rolling and baking.
- Minimum chill: 2 hours for the ultimate texture.
- Long-term option: Store up to 3 days in the fridge or freeze for months.
- Wrap tightly: Avoid drying or odor absorption.
This chill time is your ace in the hole, turning good dough into great dough. It’s a time to take a pause, allow the dough to settle, and position yourself for a crust that rolls like silk and bakes into a flaky, golden work of art.

Rolling Out the Dough with Confidence
Rolling out your cooled dough is where your pie crust forms, and executing it correctly provides a smooth, professional finish. Begin with a lightly floured board or silicone mat so that the dough will not stick. Use consistent, even pressure from the center outward, turning the dough to keep it circular and from sticking to the surface.
If it resists or begins to stick, don’t push it. A speedy return to the refrigerator should make it workable again. After rolling it into a 10-inch circle, fold it gently in quarters to carry it to the pie plate without ripping. Gently push it into the plate, allowing it to relax and settle naturally to prevent stretching.
- Light flouring: Prevent sticking without drying the dough.
- Rotate often: Maintain an even, round shape.
- Gentle relocation: Fold in quarters to transport without tears.
Patience and accuracy rule this step. An even-rolling crust will cook evenly, preventing raw or overcooked areas. Roll with ease and success with practice, preparing an ideal canvas for your pie’s wonderful filling.
Challah Bread
Equipment
- 2 Large Mixing Bowls For mixing ingredients and primary dough rise
- 1 Measuring Cups and Spoons For accurate ingredient measurement
- 2 Baking Trays For baking the braided challah loaves
- 1 Pastry Brush For egg wash application
- 1 Wire Rack For cooling the finished bread
Ingredients
Main
- 2 ½ cups warm water 110 degrees F/45 degrees C
- 1 tablespoon active dry yeast
- ½ cup honey
- 4 tablespoons vegetable oil
- 3 large eggs divided
- 1 tablespoon salt
- 8 cups unbleached all-purpose flour
- 1 tablespoon poppy seeds Optional
Instructions
- Gather all ingredients. ALLRECIPES / DIANA CHISTRUGA
- Pour warm water into a large bowl; sprinkle yeast over water. Let stand until yeast softens and begins to form a creamy foam, about 5 minutes. ALLRECIPES / DIANA CHISTRUGA
- Beat in honey, oil, 2 eggs, and salt. Add flour, 1 cup at a time, beating after each addition until dough has pulled together. ALLRECIPES / DIANA CHISTRUGA
- Turn it out onto a lightly floured surface and knead until smooth and elastic. ALLRECIPES / DIANA CHISTRUGA
- Place dough in a large, lightly-oiled bowl and turn to coat. ALLRECIPES / DIANA CHISTRUGA
- Cover with a towel and let rise in a warm place until doubled in volume, about 1 ½ hours. ALLRECIPES / DIANA CHISTRUGA
- Punch down dough and turn onto a lightly floured surface. Divide in half and knead each half for 5 minutes or so, adding flour as needed to keep it from getting sticky. ALLRECIPES / DIANA CHISTRUGA
- Divide each half into thirds and roll into a long snake about 1 ½ inches in diameter. ALLRECIPES / DIANA CHISTRUGA
- Pinch the ends of the three snakes together firmly and braid from middle. Either leave as a braid or form into a round braided loaf by bringing ends together, curving the braid into a circle, and pinching ends together. ALLRECIPES / DIANA CHISTRUGA
- Grease two baking trays and place the finished braid or round on each. Cover with a towel and let rise for about 1 hour. Preheat the oven to 375 degrees F (190 degrees C). ALLRECIPES / DIANA CHISTRUGA
- Beat the remaining egg and brush a generous amount over each braid; sprinkle with poppy seeds. ALLRECIPES / DIANA CHISTRUGA
- Bake in preheated oven until golden brown, about 40 minutes. Cool on a wire rack for at least one hour before slicing. ALLRECIPES / DIANA CHISTRUGA
- Serve and enjoy! ALLRECIPES / DIANA CHISTRUGA
Notes

The Art of Blind Baking: Why and How
Blind baking is your protection against the abomination of the soggy bottom, particularly with custards or no-bake pies. By baking the crust first, you have a firm, crispy base that can withstand wet fillings. This method ensures your pie is as pleasing to eat as it is pretty to behold, with each bite delivering a satisfying crunch.
Begin by freezing the developed crust 15 minutes to ensure against slumping. Line with parchment paper and fill with pie weights, dried beans, or rice to keep shape. Bake until the edges are set, then lift out the weights and cook until golden for a half-blind bake, or entirely crisp for a full blind bake.
- Freeze initially: 15 minutes to keep shape.
- Use weights: Avoid bubbles and shrinkage.
- Two-stage baking: Set edges, then finish for crispness.
This process ensures a strong crust that adds quality to your pie overall. Whether creating a creamy pumpkin pie or a cold lemon tart, blind baking is the secret to a professional touch that never fails.

Reducing Common Pie Crust Problems
Even the most skilled bakers experience the occasional glitch, but almost all pie crust problems have easy solutions. Sticky dough usually indicates it’s too warm or too hydrated dust your counter lightly with flour and refrigerate the dough for a few minutes. Tears or cracks? Patch them with additional dough and a spot of water, celebrating the homespun beauty of a hand-crafted crust.
Temperature is a common culprit. If the dough warms up during rolling, pop it back in the fridge for 10 minutes. On humid days, flour absorbs more moisture, so reduce water slightly to maintain balance. With practice, you’ll develop a knack for sensing when the dough is “just right.”
- Sticky dough: Chill and flour lightly.
- Tears: Patch with dough and water.
- Humidity tweak: Use less water on humid days.
These speed solutions keep your baking in line, converting potential frustrations into learning experiences. Each imperfection is a step closer to mastering the pie-making art, making your crusts one-of-a-kind.

Saving and Freezing Your Pie Crust for Special Events
The beauty of this 3-ingredient pie crust is its make-ahead wonder, ideal for frantic holiday periods. Store it airtight in the refrigerator for 3 days or freeze for 3 months, to thaw and bake as and when inspiration hits you. That flexibility allows you to spend your time on making great fillings without last-minute frustration.
For maximum convenience, freeze rolled-out crusts in pie pans, ready to go straight out of the freezer. Thaw overnight in the refrigerator, then allow it to rest for a short time at room temperature before rolling. Date and mark your packages to monitor freshness, so your crust is always perfect.
- Refrigerate: Short-term, 3 days.
- Freeze: Long-term, 3 months planning.
- Pre-form: Freeze in pie plates for instant use.
This prep-ahead strategy is a lifesaver, turning pie-making into a seamless, enjoyable process. Whether it’s Thanksgiving or a spontaneous dessert night, you’ll have a perfect crust ready to shine.
Dispelling the ‘321 Dough Theory’
321 dough theory 3 parts flour, 2 parts fat, 1 part water is a baker’s go-to secret, providing an foolproof formula for well-balanced crust. For instance, 300 grams flour, 200 grams butter, and 100 grams water yield a soft, flaky dough time after time. The easy equation removes guesswork from pie-making, providing consistent results.
This ratio is flexible, allowing you to adjust a little for humidity or desired richness. On a humid day, cut water a little; for a richer crust, add a wee bit more butter. The 321 theory is a reference point, giving you the power to scale recipes or play around with assurance.
- Easy ratio: 3:2:1 flour, fat, water.
- Scalable: Scale for any batch size.
- Flexible: Adjust for environmental conditions.
By becoming expert in this theory, you develop a richer appreciation of your dough, and every pie becomes a testament to your art. It’s a tool that matures with you, helping you along the path to pie crust perfection.

The Chemistry of Salted Butter and Flakiness
Salted butter isn’t only a flavor booster it’s a flakiness enhancer as well. Its higher water content than unsalted butter produces more steam during baking, raising layers of dough for a lighter crust. That subtle advantage puts salted butter in the unlikely position of being a helper in delivering that ideal, flaky texture.
The salt enhances the butter’s rich taste as well, making your crust a crowning jewel of your pie. It complements sweet fillings such as apple or enhances savory fillings such as quiche, adding richness to each bite. When using unsalted butter, add a pinch of salt to achieve the same result without skipping a beat.
- More steam: Higher water content increases flakiness.
- Flavor boost: Salt enhances richness of butter.
- Easy swap: Add salt to unsalted butter if necessary.
Learning this chemistry allows you to make better ingredient decisions, taking your crust from great to sublime. It’s a reminder that even tiny details can release grand rewards in your baking.

Make the Crown Roast of Lamb from ‘Lessons in Chemistry’ This Weekend
Equipment
- 1 Roasting pan Large, oven-safe for the lamb crown roast
- 1 Large Saucepan or Dutch Oven For preparing the rice stuffing
- 1 Meat Thermometer Essential for precise lamb doneness
- 1 Chef’s knife For chopping aromatics and carving lamb
- 1 Cutting Board For prep work and resting the lamb
Ingredients
Main
- 4 tablespoons unsalted butter
- 1 small 5-ounce yellow onion , finely chopped (3/4 cup)
- 1/2 cup 2 ounces slivered almonds
- 1/2 teaspoon ground turmeric
- 1/2 teaspoon ground cumin
- 1 fresh bay leaf
- 3 cups chicken stock
- 1 1/2 cups long grain rice 10 ounces, rinsed well
- 1/2 cup 3 ounces golden raisins
- 1/4 cup 1 1/4 ounces dried currants
- 2 tablespoons extra-virgin olive oil
- 1 2 1/2- to 3 1/2-pound lamb crown roast (about 12 to 16 ribs)
- 3 teaspoons kosher salt divided
- 1 1/2 teaspoons freshly cracked black pepper divided
- 1/2 cup finely chopped fresh parsley
- Flaky sea salt
Instructions
- In a large saucepan, melt butter and sauté finely chopped yellow onion until softened. Add slivered almonds and toast until golden. Stir in ground turmeric, ground cumin, and a fresh bay leaf, cooking until fragrant.
- Add well-rinsed long-grain rice and chicken stock to the saucepan. Bring to a boil, then reduce heat to low, cover, and simmer until all liquid is absorbed and rice is tender.
- Once the rice is cooked, remove the bay leaf. Gently stir in the golden raisins and dried currants. Fluff the rice with a fork and set aside to cool slightly.
- Preheat your oven to 375°F (190°C). Pat the lamb crown roast thoroughly dry with paper towels. Rub the lamb all over with extra-virgin olive oil, then season generously with 2 teaspoons of kosher salt and 1 teaspoon of freshly cracked black pepper.
- Place the seasoned lamb crown roast in a large roasting pan. Roast in the preheated oven for 60-75 minutes, or until a meat thermometer inserted into the thickest part of the lamb (avoiding bone) reaches 130-135°F (54-57°C) for medium-rare.
- Remove the lamb from the oven, transfer it to a cutting board, and loosely tent with aluminum foil. Allow the roast to rest for at least 15-20 minutes; the internal temperature will continue to rise during this time.
- While the lamb rests, gently fold the finely chopped fresh parsley into the jeweled rice stuffing, along with the remaining 1 teaspoon kosher salt and 1/2 teaspoon black pepper.
- Carefully transfer the prepared jeweled rice stuffing into the center cavity of the rested lamb crown roast, mounding it attractively.
- For final presentation, sprinkle the lamb and stuffing with flaky sea salt and additional fresh parsley, if desired.
- Carve the lamb between the ribs and serve immediately with generous portions of the jeweled rice stuffing.


