")

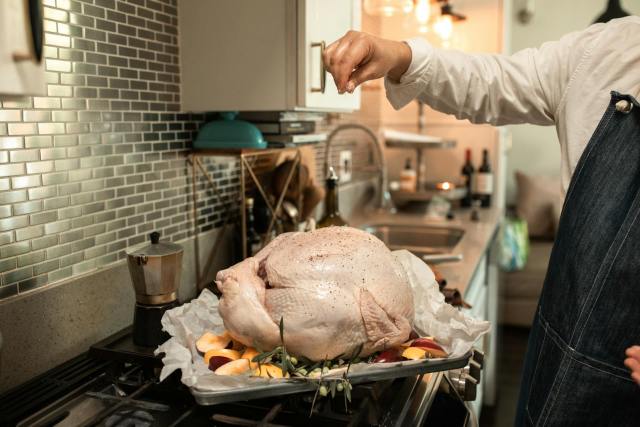
Oh, Thanksgiving! Thanksgiving always has a certain kind of expectation. The image of loved ones gathered around a table, the air scented with roasting vegetables, buttery rolls, and, of course, the ubiquitous turkey, seems ageless. For years, my enthusiasm for cooking that central bird was accompanied by horror. No amount of I tried with brines of every variety from plain salted water to elaborate apple juice baths with cinnamon and citrus flavorings still left me thinking something was missing. The bird was tender but oftentimes lacked the rich, savory flavor I was searching for. Each holiday season had me certain that there must be a better way.
Later on, as I found out, those high-falutin’ brines were not cutting it. The salt did serve a purpose, yes, but what I didn’t realize was that I was really over-saturating the turkey with water. All that juiciness that I had told myself was really just an illusion, the bird heavy with thinned-out flavor instead of thick, heavy turkey yumminess. It was maddening, because no matter how creative I was being with what I was doing, the end product never seemed to be worth it. It was that realization that set me off on a different path one in which I traded finicky rituals for something simpler, neater, and far more effective: a salt dry brine. Letting the turkey sit overnight under nothing more than salt worked like a gentle cure, softening fibers without letting it lose its own personality.
That finding in and of itself was revolutionary, but mastering the spatchcocking art changed everything. At first, the term sounded like a intimidating cooking fad, but it was anything but and turned out to be easy, logical, and flat-out genius. Butterflying the turkey, which is cutting out the backbone so the bird will cook flat, was the missing piece I didn’t know I needed. By spatchcocking, I freed myself from hours of cooking and achieved the impossible balance: succulent breast meat, soft thighs, and crackly skin edge to edge. The method transformed my Thanksgiving experience, turning distress into pleasure and regaining time to actually enjoy the holiday.
Roast Spatchcock Turkey
Equipment
- 1 Heavy-duty Kitchen Shears Essential for spatchcocking the turkey.
- 1 Roasting rack Ensures even airflow and crispier skin.
- 1 Baking Sheet To hold the roasting rack and catch drippings.
- 1 Instant-Read Thermometer Crucial for verifying doneness and food safety.
- 1 Cutting Board For preparing and carving the turkey.
Ingredients
Main
- 1 10 pound whole turkey
- ½ cup olive oil
- 1 tablespoon chopped fresh sage
- 1 tablespoon fresh thyme leaves
- 1 tablespoon finely chopped fresh rosemary
- 1 tablespoon salt
- 1 teaspoon crushed black pepper
Instructions
- Gather ingredients. Allrecipes/Oana Ennis
- Preheat the oven to 350 degrees F (175 degrees C). Place a roasting rack on a baking sheet.
- Place turkey, breast-side down, on a cutting board. Using a pair of sharp heavy-duty kitchen shears, cut along one side of the backbone. Allrecipes/Oana Ennis
- Repeat on the other side of the backbone. Remove backbone and reserve for making turkey stock for gravy. Allrecipes/Oana Ennis
- Press firmly down onto both sides of turkey to flatten. Allrecipes/Oana Ennis
- Flip turkey breast-side up and put on the roasting rack. Tuck wing tips under turkey (behind breast). Pat skin dry and rub olive oil over entire turkey. Season with sage, thyme, rosemary, salt, and pepper. Allrecipes/Oana Ennis
- Roast in the preheated oven for 1 hour 30 minutes, rotating the baking sheet every 30 minutes.
- Increase the oven temperature to 400 degrees F (200 degrees C) and continue to roast until skin is crisp and golden, about 15 minutes more. An instant-read thermometer inserted into the thickest part of the thigh should read 165 degrees F (74 degrees C). Allrecipes/Oana Ennis
- Remove turkey from the oven, cover loosely with a doubled sheet of aluminum foil, and allow to rest for 10 to 15 minutes before slicing. Allrecipes/Oana Ennis
- Serve hot and enjoy! Allrecipes/Oana Ennis
Notes

1. Why Spatchcocking Works So Well
When you roast a whole bird upright in the oven, the different cuts of meat never cook at the same rate. Breasts go dry while waiting for thighs to come. Spatchcocking fixes the whole thing. Laying out the turkey permits legs and thighs to come under the hot heat of the oven just like the breast. This balanced exposure makes use of the long-standing issue of dry white meat or raw dark meat. Every bite is evenly seasoned, juicy, and nestled in golden skin.
Spatchcocking works because it saves time, improves oven efficiency, and makes holiday cooking less stressful. The method exposes more surface area to heat, allowing a bird that would normally take over three hours to roast in just 90 minutes to two hours. For cooks and hosts, this means less time tied to the kitchen and more time to enjoy the celebration.
- Time efficiency: Traditional 10–12 pound turkey takes 3+ hours; spatchcocked version finishes in 90 minutes–2 hours.
- Scientific reason: Greater surface area exposed to heat, leading to faster cooking without flavor loss.
- Host advantage: No early-morning prep, no endless basting, no constant oven checks.
- Nicole McLaughlin’s insight: The method allows cooks to be present during the holiday instead of stuck in the kitchen.
- Practical oven benefit: Flatter bird takes up less vertical space.
- Cooking coordination: Makes room for casseroles, vegetables, or pies avoids “oven Tetris.”
- Overall result: Reduces stress, boosts efficiency, and creates a celebratory atmosphere.
This small adjustment not only saves precious time but also transforms the entire holiday cooking experience. By reducing stress, increasing control, and freeing up oven space, spatchcocking makes the process feel smooth and celebratory rather than overwhelming. For many cooks, this blend of practicality and efficiency makes it the clear choice.

Ferran Adrià’s Roasted Chicken
Equipment
- 1 Roasting pan Large enough for two chickens
- 1 Mortar and Pestle For grinding spices, essential for flavor
- 1 Chef’s knife
- 1 Cutting Board
- 1 Meat Thermometer Crucial for ensuring doneness
Ingredients
Main
- 2 whole chickens 4 1/2 pounds each
- 2 tablespoons olive oil
- 2 lemons
- 20 dried bay leaves
- 3 3/4 teaspoons dried rosemary
- 1/3 cup dried thyme
- 2/3 teaspoon black peppercorns
- 4 garlic cloves
- 4 tablespoons white wine
- 1/3 cup water
- 1 1/2 teaspoons salt
Instructions
- Preheat your oven to 400°F (200°C) to prepare for roasting.
- In a mortar and pestle, coarsely grind the black peppercorns, dried rosemary, and dried thyme until fragrant. Mix in the salt.
- Pat the two whole chickens thoroughly dry with paper towels. Rub the olive oil evenly over the skin of both chickens.
- Generously rub the prepared spice mixture over the entire surface of each chicken, ensuring even coverage.
- Cut the lemons in half. Place two lemon halves, two garlic cloves, and ten dried bay leaves inside the cavity of each chicken.
- Place the seasoned chickens in a large roasting pan. Pour the white wine and water into the bottom of the pan.
- Roast in the preheated oven for approximately 60 minutes, or until an internal temperature of 165°F (74°C) is reached in the thickest part of the thigh, without touching the bone.
- During roasting, periodically baste the chickens with the pan juices to keep them moist and encourage browning.
- Once cooked, remove the chickens from the oven, tent them loosely with foil, and let them rest for 10-15 minutes before carving. This allows the juices to redistribute for a moister result.
- Carve the rested chickens into desired portions and serve immediately, drizzled with the flavorful pan juices.
Notes

2. The Tools and Prep You’ll Need
The beauty of this method is that it doesn’t require any specialized equipment. Most home cooks already have what they need. Heavy-duty kitchen shears or poultry shears are the most important tool. These make cutting through the backbone manageable, even for larger birds. For particularly stubborn areas, a very sharp chef’s knife is called upon, especially when combined with a rolling pin to help exert extra pressure. The rolling pin trick of pressing the spine of the knife to lever through bone is safer and easier than using pure muscle.
Preparing a spatchcocked turkey requires a few essential tools and some careful prep. With the right equipment, proper thawing, and a clear step-by-step process, the task becomes straightforward and efficient. A good setup not only ensures crisp, evenly cooked skin but also makes gravy-making and roasting coordination much easier.
- Essential equipment: Large sheet pan with wire rack for airflow and drippings.
- Additional tools: Sturdy, non-slip cutting board or surface.
- Thawing method: In the fridge, about 24 hours per four pounds.
- Prep step: Remove giblets and neck from the cavity; set aside for stock.
- Spatchcocking process:
- Cut out the backbone with shears.
- Open the bird like a book.
- Flip breast-side up and crack the breastbone until flat.
- Tuck wings under breasts to secure for roasting.
Although it might sound complicated in writing, the process is straightforward when broken into four steps. With the right preparation and tools, spatchcocking becomes a manageable technique that sets the stage for a beautifully cooked turkey.
Spatchcocked Butter-Roasted Lemon and Herb Turkey with Gravy
Equipment
- 1 Poultry Shears Essential for spatchcocking the turkey efficiently and safely.
- 1 Large Rimmed Baking Sheet For roasting the turkey and collecting drippings for the gravy.
- 1 Wire Rack Fits inside the baking sheet to allow air circulation around the turkey for even cooking and crispy skin.
- 1 Meat Thermometer Crucial for accurately checking the turkey’s internal temperature to ensure it’s cooked safely and perfectly.
- 1 Large Saucepan For preparing the rich, flavorful gravy from scratch.
Ingredients
Main
- 1 cup salted butter softened
- 2 tablespoons Dijon mustard
- 1 ½ tablespoons chopped fresh thyme leaves
- 1 tablespoon fresh lemon juice
- 1 teaspoon grated lemon zest
- 1 teaspoon chopped fresh rosemary
- 1 teaspoon kosher salt divided, plus more to taste
- 1 teaspoon ground black pepper divided, or more to taste
- 3 cups coarsely chopped sweet onion
- 2 cups coarsely chopped carrot
- 2 cups coarsely chopped celery
- 1 12 pound turkey, thawed if purchased frozen
- ½ cup dry white wine
- 2 tablespoons finely chopped shallot
- ¼ cup all-purpose flour
- 4 ½ cups chicken stock or more as needed
Instructions
- Preheat the oven to 450 degrees F (230 degrees C) with an oven rack in the lower third of the oven. Locate a rack that fits inside a large rimmed baking sheet, and set aside.
- Stir together softened butter, mustard, thyme, lemon juice and zest, rosemary, 1/2 teaspoon salt, and 1/2 teaspoon pepper in a medium bowl until mixture is well blended. Set aside. Spread chopped onion, carrots, and celery in an even layer on the baking sheet, and top the baking sheet with the rack. Set aside while you prepare the turkey.
- To spatchcock (or butterfly) the turkey, create a workspace by placing a clean kitchen towel underneath a large cutting board. Place thawed and well-drained turkey on the work surface, and pat as dry as you can with a few paper towels. Arrange bird so backbone is facing up. Use a sharp pair of poultry shears to cut next to the backbone on one side from the tail end to the neck. You will be cutting through bones, so a firm grasp and sharp shears are a must. Use a paper towel or clean kitchen towel to ensure you have a good grasp of the bird if you are having any trouble.
- Grasp the bird with a paper towel on the cut side of the backbone and make another cut with poultry shears along the other side to free the backbone, removing it from the bird. Use your shears to cut the backbone into 3 to 4 pieces crosswise, and place on a plate to use later to make the gravy. Pick the bird up (you will now have a U-shaped turkey), flip it, and place turkey on the work surface with the breast facing up. Use the palms of your hands with fingers interlaced, and press quickly and firmly down on the breast bone of the bird to flatten it. You should hear a slight crack, as the breastbone breaks and bird flattens.
- Place turkey breast side up on the prepared rack above the layer of vegetables on the baking sheet. Pat the outside of the turkey dry with paper towels, and tuck wing tips underneath the bird. Gently slide your hands underneath the skin of the turkey along the breasts, being careful to keep skin intact. With your hands, evenly place half of the herb butter mixture (about 2/3 cup) underneath the loosened skin, pressing butter into an even layer by gently smoothing the top of the skin with your other hand to evenly distribute butter.
- Wash your hands, then melt the other half of the herb butter mixture in the microwave on high power for 20 seconds. Using a basting brush, brush some of the melted butter over the surface of prepared turkey, and sprinkle evenly with remaining salt and pepper. Add 1 tablespoon of the remaining herb butter mixture to a large saucepan (for the gravy), and reserve remaining butter for basting while roasting.
- Roast turkey in the preheated oven until the thickest part of the thigh meat registers 165 degrees F (74 degrees C) on a meat thermometer, about 1 hour and 30 minutes. Turn baking sheet halfway through to ensure even browning and baste with the melted herb butter every 30 minutes. Tent with foil if any of the skin begins to brown too much.
- While turkey roasts, begin to prepare the gravy. Place the large saucepan with the reserved butter mixture over medium-high heat. Add reserved cut backbone pieces; cook, stirring often, until browned all over, about 8 minutes. Reduce heat to low and add just enough water to barely cover the backbone pieces (about 2 cups). Cover saucepan and simmer mixture on lowest heat while turkey finishes roasting.
- When turkey is done, carefully transfer the rack with the turkey from the baking sheet to a cutting board to rest, tenting with foil to keep it warm. Spoon vegetables and all drippings from the baking sheet into the saucepan with backbone pieces. Place the baking sheet over two burners of the stove, over medium heat. Carefully pour white wine and 1/2 cup of the chicken stock onto the baking sheet, and gently scrape surface of baking sheet with a spoon as the liquids bubble to remove any browned bits that have baked on. Carefully pour contents of baking sheet into the saucepan with the roasted vegetables and drippings. Add 2 additional cups of chicken stock to the saucepan, and bring to a boil over medium-high heat. Cook, stirring occasionally, until flavors meld, about 15 minutes.
- Set a fine mesh strainer over a large bowl or measuring cup. Drain gravy through strainer to separate solids from the broth; press on the solids to release as much of the liquid as you can from them. Discard solids. Allow strained liquid to stand for 5 minutes and then skim the fat from the top of the surface. Keep 3 tablespoons of the fat and discard the rest.
- Lightly wipe the same large saucepan clean with a paper towel, then add reserved fat to saucepan over medium-high. Add shallots to saucepan, and cook, stirring often, until softened, about 2 minutes. Add flour to saucepan, and stir constantly until well-combined with fat, about 1 minute. Add strained liquid and enough chicken stock to measure a total of 6 cups liquid (about 2 additional cups of stock) to saucepan over medium-high. Bring mixture to a boil, stirring constantly while boiling, for 1 minute. Reduce heat to medium, and allow mixture to simmer and reduce by half, 25 to 30 minutes. Season gravy with any additional salt and pepper as needed.
- Remove turkey from rack, and place on a work surface to slice as you wish; serve with hot gravy.
Notes
3. Seasoning to Get the Best Flavor
Spatchcocking gives you the starting point, but seasoning is where you can make the turkey legendary. After all those years of experimentation, I’ve discovered that less is more. Instead of submerging the bird in gallons of liquid brine, overnight dry brining with salt and pepper adds more flavor and texture. The salt penetrates deeply, locking in moisture without diluting the natural richness of the meat. A pinch of brown sugar can provide an extra push to caramelization, letting the skin become a beautiful golden brown while roasting.
Seasoning is the key to maximizing flavor and achieving crispy, golden skin on a spatchcocked turkey. Proper drying, careful salting, and allowing time for the seasoning to penetrate deeply will transform the bird into something rich and flavorful before it even hits the oven.
- Drying step: Pat turkey thoroughly with paper towels; moisture prevents crispy skin.
- Salt application: Rub salt mixture generously over the surface and under the skin.
- Resting time: Leave uncovered in the fridge for 12+ hours to dry the skin and infuse seasoning.
- Flavor boost: Slip softened butter or infused olive oil under the skin.
- Herbs: Thyme, sage, and rosemary provide balanced flavor without overpowering.
- Self-basting effect: Fat under the skin bastes as it roasts, keeping the turkey moist without constant basting.
- Flexibility: Works for both traditional seasoning or experimenting with new spices.
By giving the bird time to dry and absorb flavors, you ensure crisp skin and a seasoned interior. Adding fat and herbs creates a natural self-basting system that saves time while enhancing taste, making the approach both practical and adaptable for any cook’s style.
Juicy Thanksgiving Turkey
Equipment
- 1 Roasting pan Large enough for a 15lb turkey
- 1 Small Bowl For mixing herbs
- 1 Kitchen String Food-safe, for trussing
- 1 Instant-Read Thermometer Essential for accurate doneness
- 1 Aluminum Foil Heavy-duty for wrapping
Ingredients
Main
- 2 tablespoons dried parsley
- 2 tablespoons ground dried rosemary
- 2 tablespoons rubbed dried sage
- 2 tablespoons dried thyme leaves
- 1 tablespoon lemon-pepper seasoning
- 1 tablespoon salt
- 1 15 pound whole turkey, neck and giblets removed
- 1 medium orange cut into 8 wedges
- 1 medium onion chopped into large pieces
- 1 medium carrot cut into ½-inch slices
- 2 stalks celery cut into ½-inch slices
- 1 750 milliliter bottle champagne
- 1 14.5 ounce can chicken broth
Instructions
- Gather all ingredients. Preheat the oven to 350 degrees F (175 degrees C). Line a roaster with sheets of aluminum foil long enough to wrap around turkey. ALLRECIPES / KAREN HIBBARD
- Stir parsley, rosemary, sage, thyme, lemon-pepper seasoning, and salt together in a small bowl. ALLRECIPES / KAREN HIBBARD
- Rub herb mixture into turkey cavity, then stuff with orange wedges, onion, carrot, and celery. Tie turkey legs together with kitchen string, then tuck the wings under the body. ALLRECIPES / KAREN HIBBARD
- Place turkey on the foil in the roasting pan. Pour champagne and chicken broth over turkey, making sure to get some liquid in the cavity. ALLRECIPES / KAREN HIBBARD
- Bring aluminum foil up and over the top of turkey and seal; try to keep the foil from touching the turkey. ALLRECIPES / KAREN HIBBARD
- Roast turkey in the preheated oven until juices run clear, 2 ½ to 3 hours. Uncover turkey and continue baking until the skin turns golden brown, 30 to 60 more minutes. An instant-read thermometer inserted into the thickest part of thigh, near the bone, should read 180 degrees F (80 degrees C). ALLRECIPES / KAREN HIBBARD
- Remove turkey from the oven, cover with two sheets of aluminum foil, and allow to rest in a warm area before slicing, 10 to 15 minutes. ALLRECIPES / KAREN HIBBARD
- Serve and enjoy! ALLRECIPES / KAREN HIBBARD Recipe Tip You can use white wine in place of Champagne if desired.
Notes

4. Roasting to Perfection
After seasoning, the spatchcocked turkey goes into the oven. Preheat to 350°F (175°C) and place the bird on its wire rack and sheet pan. The flattened profile allows the oven heat to envelop the bird evenly, and you’ll quickly see why this method is so reliable. Rotate the pan every 30 minutes to ensure consistent browning, but that’s the extent of your active involvement. The butter or oil trapped beneath the skin takes care of the rest, melting slowly and enveloping flavors. Once around an hour and a half for a 10-pound bird, the turkey will be nearly there. Complete with that irresistible crunchy skin by increasing the temperature to 400°F (200°C) for the last 15 minutes. Keep a close eye on it during this stage, as ovens vary, but it’s well worth it. The skin will be rich, crackling golden brown, your kitchen filled with aromas that signal the feast is almost upon you.
Roasting a spatchcocked turkey to perfection comes down to precision and patience. Using a thermometer and allowing the bird to rest are the two key steps that guarantee a moist, flavorful result.
- Thermometer use: Always rely on an instant-read thermometer for accuracy.
- Placement: Insert probe into the thickest part of the thigh, avoiding the bone.
- Target temperatures: Thigh should reach 165°F (74°C); breast will read 150–155°F, ensuring juiciness and safety.
- Resting step: After roasting, remove turkey and cover loosely with foil for 10–15 minutes.
- Result: Resting redistributes juices, keeping all cuts moist and flavorful.
By checking the internal temperature carefully and letting the turkey rest before carving, you lock in juiciness and ensure that every bite of the spatchcocked bird is tender and satisfying.
A Simply Perfect Roast Turkey
Equipment
- 1 Roasting Pan with Rack Essential for proper air circulation and even cooking.
- 1 Meat Thermometer Crucial for ensuring internal temperature reaches 165°F (75°C) for food safety.
- 1 Basting Bulb or Ladle For consistent moistening of the turkey during roasting.
- 1 Aluminum Foil For tenting to prevent over-browning of the skin.
- 1 Carving knife A sharp, long knife is indispensable for clean, presentable slices.
Ingredients
Main
- 1 18 pound whole turkey
- 8 cups prepared stuffing
- ½ cup unsalted butter softened
- salt and freshly ground black pepper to taste
- 1 ½ quarts turkey stock divided
Instructions
- Gather all ingredients. Preheat the oven to 325 degrees F (165 degrees C). Place a rack in the lowest position of the oven. ALLRECIPES / ANA CADENA
- Remove turkey neck and giblets. Rinse turkey and pat dry with paper towels, and place breast-side up, on a rack in a roasting pan. ALLRECIPES / ANA CADENA
- Loosely fill turkey cavity with stuffing. Rub skin with butter, then season with salt and pepper. ALLRECIPES / ANA CADENA
- Pour 2 cups of turkey stock into the roasting pan. ALLRECIPES / ANA CADENA
- Loosely tent turkey with aluminum foil, and roast turkey for 2 ½ hours, basting with pan juices every 30 minutes. When drippings evaporate, add remaining stock to the pan, 1 to 2 cups at a time. ALLRECIPES / ANA CADENA
- Remove foil and continue roasting until a meat thermometer inserted in thickest part of thigh reads 165 degrees F (75 degrees C), about 1 ½ hours more. ALLRECIPES / ANA CADENA
- Transfer turkey to a large serving platter. Let stand for 20 to 30 minutes before carving. ALLRECIPES / ANA CADENA
- Serve and enjoy! ALLRECIPES / ANA CADENA
Notes

5. Serving and Carving Effortlessly
It is easier to carve a spatchcocked turkey than to wrestle with a whole, upright bird. Begin by cutting off the legs, cutting through the joint where every thigh attaches to the breast. Cut off the drumstick from the thigh and place them both on a platter. Next, cut off the wings by cutting through their joints. With the dark meat cut off, then work on the breasts.
Carving and serving a spatchcocked turkey is straightforward and elegant. By slicing strategically and presenting golden cuts rather than a picked-over bird, you create a meal that feels celebratory and easy for guests to enjoy.
- Carving technique: Cut along both sides of the breastbone to remove two large pieces.
- Slice direction: Cut crosswise across the grain to keep meat tender.
- Presentation: Arrange slices on a platter for an inviting display of golden cuts.
- Guest-friendly portions: Dark meat lovers can take thighs, while white meat fans enjoy juicy breast slices.
- Leftover benefits: Even cooking keeps meat moist for up to four days when refrigerated.
- Storage: Wrap tightly; reheat with broth or foil to retain moisture.
- Creative uses: Perfect for soups, pot pies, sandwiches, or sliders.
This method not only makes serving stress-free but also ensures leftovers stay flavorful and versatile. The spatchcocked turkey continues to provide enjoyment well beyond the holiday table.

6. Beyond the Oven: Extra Possibilities
As much as roasting is the old way, spatchcocking also puts grilling and smoking on the agenda. Larger birds that won’t fit on a sheet pan can have a second chance on the grill, where smoky flavor infuses the meat. Some cooks even spatchcock two small turkeys side by side instead of one large bird, so they cook faster and there are twice as many bits of crispy skin to go around.
It’s a helpful approach that works with many kitchens and cooking habits. The carcass you threw away in the first place is another gem. Simmer it with giblets, onions, carrots, celery, and water, and you’ll be the foundation of the richest gravy that can be imagined. Homemade stock makes the meal far superior to the kind that can be purchased in a grocery store and ties the entire Thanksgiving dinner together. Every step along the spatchcocking is in the direction of efficiency, flavor, and wastage elimination.
For anyone who’s felt overwhelmed by the traditional approach to roasting turkey, this method is a breath of fresh air. It brings together time savings, even cooking, and incredible taste in one straightforward process. More importantly, it takes the intimidation out of the holiday centerpiece. Instead of dreading the turkey, you’ll find yourself looking forward to it confident that it will come out perfectly, every single time.

7. The New Tradition
Spatchcocking is less a technique than a reinvention of the Thanksgiving turkey. The technique is simple, efficient, and produces results that outshine decades of finicky brines or anxiety-ridden oven clocks. To me, it elevated a holiday chore into a flavor superstar, a way of cooking smarter without sacrificing tradition. Every slice reminded me that occasionally the most refined change flattening the bird, seasoning it delicately, roasting it with confidence can turn an entire holiday experience into something greater. After years of compromise, I finally discovered a method that gives equal prominence to both the dark and white meat.
Spatchcocking turns Thanksgiving into more than just a cooking method—it becomes a way to reclaim time, flavor, and joy. The bird emerges perfectly roasted, while the host gains hours to spend with family and friends.
- Result: Juicy, flavorful, golden-brown turkey.
- Time gained: More hours to enjoy with loved ones.
- Perspective: Not just a recipe, but a way to restore the holiday’s magic.
- Impact: A true game-changer that many never abandon once tried.
In the end, spatchcocking reshapes tradition by blending efficiency with celebration. It makes Thanksgiving less about stress in the kitchen and more about sharing a memorable feast with those who matter most.


")