")
")
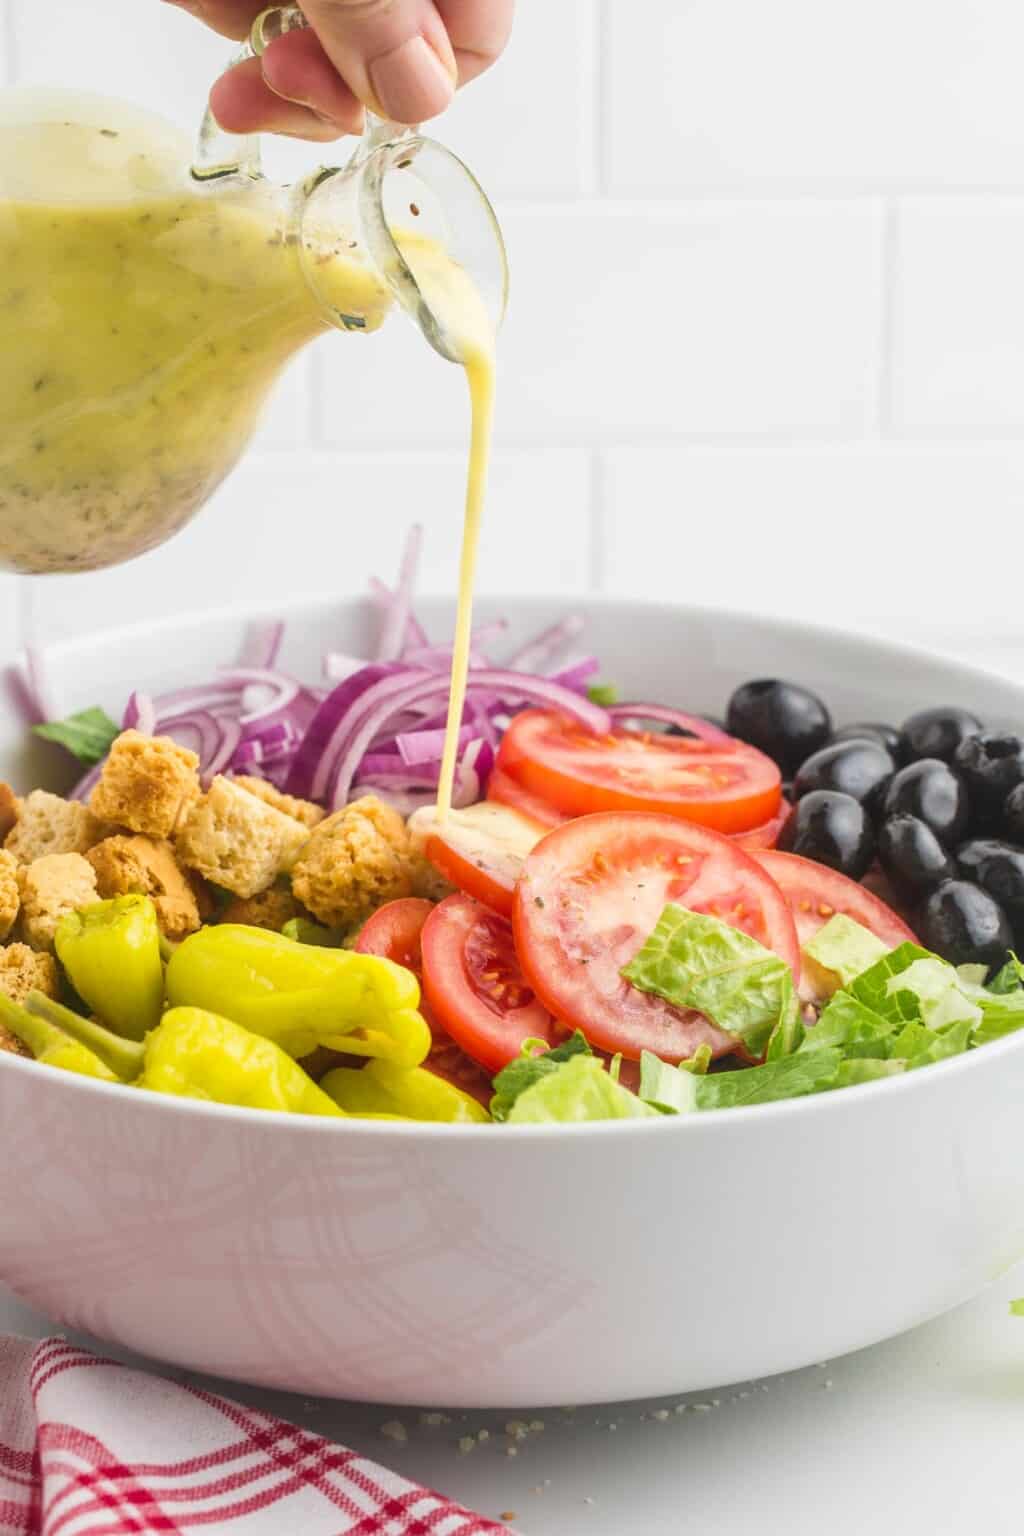
There’s a secret weapon in my kitchen, a culinary sidekick that has reliably turned run-of-the-mill meals into something truly remarkable for more than a decade. It’s not an expensive gadget or a rare spice, but an ordinary salad dressing home-made, straightforward, and bursting with taste.
I began making my own dressings because I had to. Bottled dressings, though convenient, too often arrived packaged with preservatives, sugars, and unpronounceable mystery ingredients. Too frequently, they were not bright enough and lacked balance. One day, I decided to whisk a few pantry staples together: olive oil, vinegar, mustard, and garlic and that uncomplicated combination transformed everything. It was fresh, bright, and endlessly adjustable.

Wild Rice Salad
Equipment
- 1 Medium Pot For cooking wild rice
- 1 Colander For draining cooked rice
- 1 Sharp Knife For peeling and sectioning oranges
- 1 Cutting Board For preparing oranges and grapes
- 1 Large Mixing Bowl For combining all ingredients
Ingredients
Main
- 1 cup long-grain wild rice 6 ounces
- Kosher salt
- 2 navel oranges
- 2 tablespoons good olive oil
- 2 tablespoons freshly squeezed orange juice
- 2 tablespoons raspberry vinegar
- 1/2 cup seedless green grapes cut in half
- 1/2 cup pecans toasted
- 1/4 cup dried cranberries
- 2 tablespoons scallions white and green parts, chopped
- 1/2 teaspoon freshly ground black pepper
Instructions
- Place the wild rice in a medium pot with 4 cups of water and 2 teaspoons of salt and bring to a boil. Simmer uncovered for 50 to 60 minutes, until the rice is very tender. Drain well and place the rice back in the pot. Cover and allow to steam for 10 minutes. While the rice is still warm, place it in a mixing bowl. Peel the oranges with a sharp knife, removing all the white pith. Cut between the membranes and add the orange sections to the bowl with the rice. Add the olive oil, orange juice, raspberry vinegar, grapes, pecans, cranberries, scallions, 1/2 teaspoon of salt, and the pepper. Allow to sit for 30 minutes for the flavors to blend. Taste for seasonings and serve at room temperature.
Notes
The Magic of Simplicity
The beauty of homemade salad dressing is its simplicity. You don’t require a culinary school diploma to make a vinaigrette. A simple ratio of three parts oil to one part acid (such as vinegar or lemon juice) is the foundation for most dressings. From there, it’s simply a matter of adding flavor: a spoonful of mustard to add depth, a dash of honey to make it sweet, a pinch of salt, some freshly ground pepper, maybe a minced shallot or a clove of garlic.
The process of preparing dressing itself is strangely rewarding. It ties you to your ingredients in a kinesthetic sense. Whisking in a bowl or shaking in a mason jar is earthy, nearly meditative. And there’s something special about tasting and fine-tuning, balancing the flavor to suit your mood or dish.
The Best Tuna Salad
Equipment
- 1 Mixing Bowl Medium size
- 1 Fork For flaking tuna
- 1 Chef's knife For mincing vegetables and herbs
- 1 Cutting Board
- 1 Measuring Spoons For measuring mayonnaise and mustard
Ingredients
Main
- Two 6-ounce cans white meat tuna packed in water drained
- 2 tablespoons minced celery
- 2 tablespoons minced red onion soaked in cold water for 5 minutes and drained
- 1 teaspoon minced flat-leaf parsley
- 1/3 cup prepared mayonnaise
- 1 tablespoon whole-grain mustard
- Freshly ground black pepper
- Freshly squeezed lemon juice optional
Instructions
- In a small mixing bowl break up the tuna with a fork. Toss with the celery, onion and parsley. Add the mayonnaise, mustard and season with pepper, to taste. Stir to combine. Add lemon juice, to taste, if using.
Notes
Creativity that Invites Versatility
Homemade dressings are so versatile. A simple vinaigrette can have a thousand different personalities based on the oil and acid you use. Replace olive oil with walnut oil, red wine vinegar with rice vinegar. Add some herbs, citrus zest, a spoonful of tahini. The possibilities are limitless.
For example, a creamy dressing doesn’t have to rely on mayo or dairy. A blend of tahini, lemon juice, garlic, and water creates a luscious texture and tangy flavor that works beautifully on greens, grain bowls, or roasted vegetables. A miso-based dressing can bring umami richness to a slaw. Avocado blended with lime juice, cilantro, and a splash of olive oil yields a creamy, vibrant green sauce that works as both dressing and dip.
This freedom to play is where homemade dressings excel. Once you’ve got the foundation down, the kitchen is your playground.

Gone Bananas
Equipment
- 1 Cutting Board
- 1 Chef's knife
- 2 Mixing Bowls One for fruit, one for dressing
- 1 Measuring Cups and Spoons
Ingredients
Main
- 1/2 medium honeydew
- 2 cup blackberries
- 2 cup grapes
- 2 medium banana
- 1/2 cup Greek yogurt vanilla
- 2 tablespoon honey
- 1 tablespoon lemon juice
- 1/4 teaspoon nutmeg
Instructions
- Wash all fruits thoroughly under cool water.
- Cut the honeydew in half, scoop out the seeds, and cut the flesh into bite-sized cubes.
- Stem and rinse the blackberries.
- Stem and rinse the grapes, cutting larger ones in half if desired.
- In a large mixing bowl, gently combine the prepared honeydew, blackberries, and grapes.
- In a separate medium bowl, whisk together the Greek yogurt, honey, lemon juice, and nutmeg until smooth.
- Just before serving, peel and slice the bananas, adding them to the bowl with the other fruits.
- Pour the prepared yogurt dressing over the fruit mixture.
- Gently toss the fruit and dressing until the fruit is evenly coated.
- Serve immediately.
Notes
Taking the Ordinary Salad to a New Level
Salads too commonly get shortchanged as an afterthought, a handful of greens tossed as a concession to health. But a stellar dressing turns the humble salad into something you actually crave. When your dressing is loaded with flavor, it takes the salad from lifeless to lively.
A peppery arugula salad, shaved Parmesan, and lemon vinaigrette is the equal of any main course. A combination of roasted beets, goat cheese, walnuts, and a balsamic glaze becomes a paean to texture and contrast. Even plain old chopped cucumbers and tomatoes become elevated by a garlicky red wine vinaigrette.
Dressing also adds unity. It ties together disparate components on the plate as a cohesive dish. And since homemade dressing is adjustable, it is simple to adapt it to the taste of the meal spicy, sweet, tangy, rich, or light.

Roast Chicken with Vegetables
Equipment
- 1 Roasting pan
- 1 Large Mixing Bowl
- 1 Whisk For emulsifying the marinade
- 1 Cutting Board
- 1 Chef's knife
Ingredients
Main
- 1 whole chicken
- 150 ml FOS 1704 Extra Virgin Olive Oil
- 1 tsp. Mediterranean Mustard with Oregano & Thyme Kalamata Papadimitriou
- 2 lemons
- 2 cloves crushed garlic
- 3 tsp. chopped mixed herbs tarragon, thyme, parsley
- 4 tsp. Balsamic Cream Classic Kalamata Papadimitriou
- 2 onions & 4 carrots cut into thin slices
- 6 beets cut into quarters
- FOS Sea Salt Flakes & Pepper
Instructions
- Pat the whole chicken thoroughly dry with paper towels to promote crispy skin during roasting.
- In a large mixing bowl, whisk together the FOS 1704 Extra Virgin Olive Oil, Mediterranean Mustard with Oregano & Thyme, fresh lemon juice from 2 lemons, 2 cloves of crushed garlic, and 3 tsp. of chopped mixed herbs (tarragon, thyme, parsley).
- Season the chicken generously inside and out with FOS Sea Salt Flakes and Pepper, then rub the prepared marinade all over the chicken, ensuring it is well coated.
- Prepare the vegetables by slicing the 2 onions and 4 carrots thinly, and cutting the 6 beets into quarters.
- Place the marinated chicken in a large roasting pan. Arrange the sliced onions, carrots, and quartered beets around the chicken, tossing them lightly with any excess marinade or a drizzle of fresh olive oil.
- Preheat your oven to 400°F (200°C).
- Roast the chicken and vegetables for approximately 1 hour 30 minutes to 2 hours, or until a meat thermometer inserted into the thickest part of the thigh (without touching bone) reads 165°F (74°C) and the juices run clear.
- During roasting, baste the chicken and vegetables every 30-40 minutes with the pan drippings to keep them moist and enhance flavor.
- Once cooked, remove the roasting pan from the oven. Tent the chicken loosely with foil and let it rest for 10-15 minutes before carving to allow the juices to redistribute.
- Carve the chicken and serve immediately with the roasted vegetables. Optionally, drizzle with the Balsamic Cream Classic Kalamata Papadimitriou before serving for an extra layer of flavor.
Notes
Healthier Choices Without Sacrifice
One of the strongest arguments for home-made dressing is health. Store-bought versions contain added sugars, unhealthy oils, thickeners, and artificial flavorings. You get to control all the ingredients by making your own. You can utilize heart-healthy oils such as extra virgin olive oil or avocado oil, adjust the amount of sodium, omit the sugar altogether or replace with natural sweeteners such as honey or maple syrup.
If you’re counting calories, you can reduce the dressing by adding citrus juice, vinegar, or even a bit of water to cut oil without diluting the taste. You can add structure and a tangy taste with ingredients such as Greek yogurt, fruit purees, or mustard without additional fat.

Homemade Ranch Dressing
Equipment
- 1 Cutting Board
- 1 Chef's knife
- 1 Mixing Bowl Medium size
- 1 Whisk or fork
- 1 Measuring Spoons and Cups
Ingredients
Main
- 1 clove garlic
- 1/4 teaspoon kosher salt
- 1 cup real mayonnaise
- 1/2 cup sour cream
- 1/4 cup Italian flat-leaf parsley leaves minced
- 2 tablespoons fresh dill minced
- 1 tablespoon minced fresh chives
- 1 teaspoon Worcestershire sauce
- 1/2 teaspoon ground black pepper
- 1/2 teaspoon white vinegar
- 1/4 teaspoon paprika
- 1/8 teaspoon cayenne pepper
- Dash hot sauce
- 1/4 to 1/2 cup buttermilk as needed for desired consistency
Instructions
- Mince the garlic with a knife and then sprinkle on the salt and mash it into a paste with a fork.
- In a bowl, combine the garlic paste, mayonnaise, sour cream, parsley, dill, chives, Worcestershire sauce, black pepper, vinegar, paprika, cayenne and hot sauce. Add the buttermilk to desired consistency and mix to combine, tasting frequently and adjusting seasonings as needed. Chill for a couple of hours before serving, thinning with more buttermilk if needed.
Notes
Budget-Friendly and Environmentally Friendly
Having dressing at home is much more affordable than purchasing bottles. With simple pantry staples, you can make a week’s worth of dressing for pennies. No need to have a stash of half-full bottles in the refrigerator.
It’s also a waste-reducing win. No plastic container or packaging to dispose of. Use up leftover herbs or citrus in a dressing rather than wasting them. It’s a tiny, sustainable act, but one that’s satisfying.
Bonus: Beyond Salads
Salad dressing is not limited to greens. Any tangy vinaigrette can serve as a marinade for chicken or tofu. Any creamy dressing can also serve as a dip for raw vegetables or a drizzle over grain bowls. Roasted vegetables that were leftover are revitalized with a squeeze of lemony herb dressing. Even pasta salad, sandwiches, and pizzas can be improved with a great sauce.
One of my go-to discoveries was applying a mustard vinaigrette as a glaze to roasted Brussels sprouts. The heat caramelize the edges, and the acidic dressing gives it punch. It’s a testament that homemade dressing is an all-around flavor enhancer.

Garden Pasta Salad
Equipment
- 1 Large Pot
- 1 Colander
- 1 Large Mixing Bowl
- 1 Chef's knife
- 1 Cutting Board
Ingredients
Main
- 1 16 ounce package uncooked tri-color spiral pasta
- 1/2 cup thinly sliced carrots
- 2 stalks celery chopped
- 1/2 cup chopped green bell pepper
- 1/2 cup chopped red bell pepper
- 1/2 cup chopped yellow bell pepper
- 1 pint grape tomatoes halved
- 1/2 cup chopped green onion
- 1 16-ounce bottle Italian-style salad dressing
- 1/2 cup grated Parmesan
Instructions
- Cook pasta in large pot of boiling water until al dente. Rinse under cold water, and drain.
- Mix carrots, celery, peppers, tomatoes, and green onion together in large bowl. Add the cooled pasta and mix together. Pour the dressing over mixture, add the Parmesan and mix well.
- Chill before serving.
Notes
A Ritual Worth Keeping
Over time, preparing salad dressing has become a ritual that I hold dear. It’s one of the only kitchen tasks that seems more self-care than drudgery. It makes me slow down, to taste, to be present. And it always delivers something tasty.
If you’ve never home-made your own dressing, I urge you to give it a go. Keep it simple. Olive oil, vinegar, mustard, honey, salt, and pepper. Shake it up in a jar. Taste. Adjust. Make it your own. Before long, you might find yourself like me never wanting to revert back to store-bought, with a jar of magic in the fridge, ready to make the ordinary extraordinary.
The magic of homemade salad dressing isn’t necessarily in the improved taste or healthful ingredients, but in the connection it makes to your food, your kitchen, and to yourself. And that’s a secret to share.

Italian Dipping Sticks Recipe
Equipment
- 1 Baking Sheet
- 1 Small Mixing Bowl
- 1 Measuring spoons/cups
- 1 Small Saucepan (for warming pizza sauce)
- 1 Pastry Brush (optional, for olive oil)
Ingredients
Main
- 1 tube 11 oz refrigerated breadsticks
- 1/4 cup grated parmesan cheese
- 1/2 tsp italian seasoning
- 1 cup pizza sauce
- 1/4 cup shredded part-skim mozzarella cheese
Instructions
- Preheat your oven to the temperature specified on the refrigerated breadsticks package, typically around 375-400°F (190-200°C).
- Line a large baking sheet with parchment paper for easy cleanup and to prevent sticking.
- Unroll the tube of refrigerated breadsticks and carefully separate each stick, laying them out in a single layer on the prepared baking sheet, ensuring they are not touching.
- In a small mixing bowl, combine the grated Parmesan cheese and Italian seasoning, stirring well to create an even blend.
- Evenly sprinkle the Parmesan and Italian seasoning mixture over the breadsticks. For better adherence and crispness, you may lightly brush the sticks with olive oil beforehand (optional).
- Bake the breadsticks in the preheated oven for 10-12 minutes, or until they are golden brown and crisp to your liking. Cooking time may vary, so keep a watchful eye.
- While the breadsticks are baking, gently warm the pizza sauce in a small saucepan over low heat or in a microwave-safe bowl until just hot enough for dipping.
- Once baked, carefully remove the dipping sticks from the oven and transfer them to a serving platter.
- Serve the hot Italian dipping sticks immediately with the warmed pizza sauce on the side for dipping.
- Offer shredded part-skim mozzarella cheese as an optional sprinkle for guests to add to their sauce or sticks if desired.
")

