

Chocolate ganache is the home cook’s secret weapon, transforming dull desserts into showstoppers with its silky consistency and deep flavor. Ditch thick buttercream this two-ingredient wonder is easy to prepare, convenient, and makes cakes, truffles, and everything in between better.
Named thus because it was derived from a 19th-century French farce, ganache has been astonishing bakers since with its unlimited uses. This tutorial deconstructs 14 essential details of creating and working with ganache, ideal for beginners and experts. Be prepared to revolutionize your desserts using this rich treat!
Every section is filled with helpful tips on how to become proficient with ganache, from choosing ingredients to curing hiccups. Glazing a cake, cupcake filling, or making truffles: these tips will give your baking that special glaze. Let’s dive into the realm of ganache and let your pastry chef within shine.

1. What Is Chocolate Ganache?
Chocolate ganache is chocolate and cream magic, melted and combined into a rich, shiny mixture. Deceptively basic, it can be a glaze, a filling, a frosting, or a dip. In contrast to syrupy, scalding hot fudge, ganache will set when chilled, meeting the requirements of your dessert. It’s an essential that brings any treat to the next level of sophistication. Cakes, tarts, and more – ganache is easy to add rich flavor to.
This decadent blend revamps desserts with hardly any fuss, the secret dream of every home baker. Spread sparingly, it creates a glossy glaze that appears to have been freshly baked. Since 1869, it is inspired by the Dutch French play Les Ganaches. Use it to top brownies or cover fruit for a quick dessert. Your desserts will never be the same.
- Use high-quality chocolate for the best flavor.
- Mix slowly in order not to have air bubbles and to be level.
- Try other ratios for other textures and applications.

vanilla-crème filled chocolate cupcakes with bittersweet chocolate ganache
Equipment
- 2 Muffin/Cupcake Pans for 24 cupcakes
- 1 Electric Mixer (stand or hand-held)
- 3 Mixing Bowls various sizes
- 1 Piping Bag with Round Tip for filling cupcakes
- 1 Small Saucepan for ganache
Ingredients
Main
- chocolate cupcakes
- 192 grams 1 cup Golden Brown Sugar, packed
- 48 grams 1/4 cup Granulated White Sugar
- 1 teaspoon Kosher Salt
- 73 grams 1/2 cup plus 5 teaspoons Millet Flour
- 73 grams 1/2 cup plus 5 teaspoons Garbanzo Fava Flour
- 96 grams 1/2 cup Potato Starch
- 38 grams 1/4 cup plus 2 teaspoons Arrowroot Starch
- 3/4 teaspoon Xanthan Gum
- 2 teaspoons Baking Soda
- 2 teaspoons Instant Espresso Powder
- 60 grams 3/4 cup Unsweetened Dutch-process Cocoa Powder
- 4 ounces 1/2 cup or 113 grams Canola Oil
- 16 ounces 2 cups or 454 grams Buttermilk
- 2 large Eggs bring to room temperature
- 2 teaspoons 10 grams Vanilla Extract
- Unsalted Butter
- vanilla-crème filled chocolate cupcakes with bittersweet chocolate ganache
- 1 recipe Chocolate Cupcakes above
- 114 grams 8 tablespoons Unsalted Butter, softened
- 7.5 ounces jar 213 grams Marshmallow Fluff
- 1 1/2 teaspoons 7 grams Vanilla Extract
- 1 1/2 cups 180 grams Powdered Sugar, sift after measuring
- 6 ounces 3/4 cup or 170 grams Heavy Cream
- 6 ounces Bittersweet Chocolate not unsweetened²
- 2 ounces White Chocolate
Instructions
- Preheat oven to 350°F (175°C) and line 24 muffin cups with paper liners.
- In a large bowl, whisk together golden brown sugar, granulated sugar, salt, millet flour, garbanzo fava flour, potato starch, arrowroot starch, xanthan gum, baking soda, espresso powder, and Dutch-process cocoa powder.
- In a separate medium bowl, whisk together canola oil, buttermilk, room-temperature eggs, and vanilla extract until well combined.
- Gradually add the wet ingredients to the dry ingredients, mixing on low speed with an electric mixer until just combined. Do not overmix.
- Divide the batter evenly among the prepared muffin cups, filling each about two-thirds full. Bake for 18-22 minutes, or until a wooden skewer inserted into the center comes out clean. Let cool in the pan for a few minutes, then transfer to a wire rack to cool completely.
- In a bowl, cream softened unsalted butter and marshmallow fluff with an electric mixer until light and fluffy. Beat in vanilla extract, then gradually add sifted powdered sugar until smooth and well combined.
- Heat heavy cream in a small saucepan until simmering. Remove from heat and pour over bittersweet and white chocolates in a heatproof bowl. Let sit for 5 minutes, then whisk until smooth and glossy. Let cool until slightly thickened but still pourable.
- Using a cupcake corer or small knife, hollow out a small cavity from the center of each cooled cupcake. Fill each cavity with the prepared vanilla creme using a piping bag or spoon.
- Dip the top of each filled cupcake into the cooled bittersweet chocolate ganache, or spread it evenly with an offset spatula.
- Allow the ganache to set slightly before serving the vanilla-crème filled chocolate cupcakes.
Notes

2. The Essential Ingredients
Ganache’s best-kept secret is its simplicity: pure chocolate and heavy cream. Heavy cream, which is 36% fat or more, makes for a smooth, emulsified texture don’t substitute with milk or half-and-half since they won’t set. For dairy substitutes, canned coconut milk is perfect, providing a creamy base. Quality ingredients create an indulgent finish. They combine to make a rich, versatile base.
The chocolate you use determines the taste of the ganache. Semi-sweet (35-45% cacao) is ideal, adding depth with bittersweet or sweetness with milk. A 1:1 weight ratio (example: 226g chocolate to 240g cream) gives an all-purpose texture. Always use pure chocolate bars and not chips for the most uniform melt. Your ganache will be as good as your ingredients.
Good chocolate and cream are essential to taste and texture. Use full-fat versions to allow for good setting and richness. Look at labels in advance to note the fat content of cream. This simple combination proves that sometimes less is more. Your desserts will never be finer with this classic pairing.

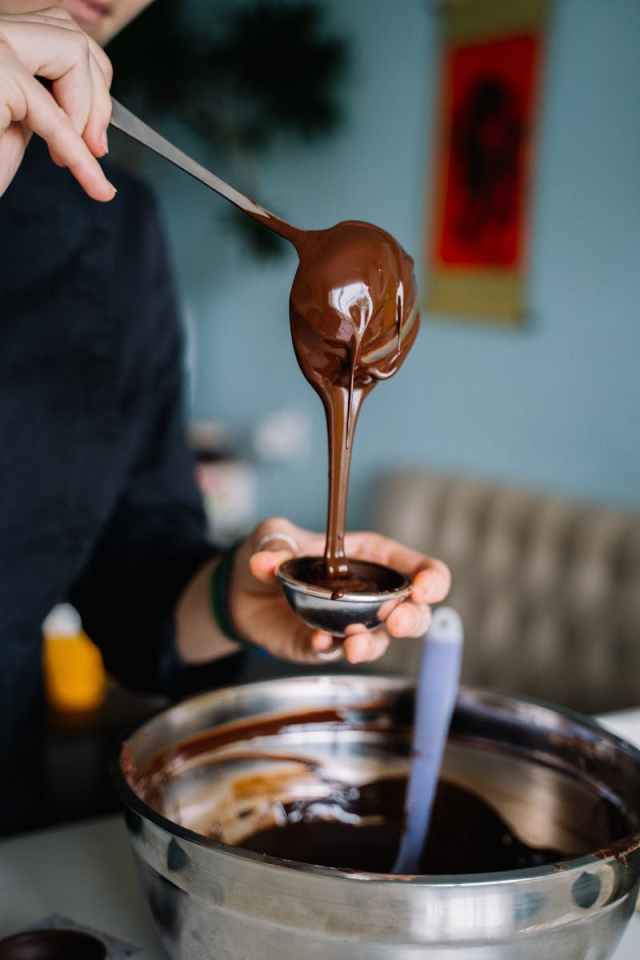
Photo by Tetiana Bykovets on Unsplash
3. Selecting the Right Chocolate
The secret to divine ganache is using an unsweetened chocolate baking bar, such as Bakers or Ghirardelli, which can be located in the baking section. They melt wonderfully, unlike chocolate chips, which have added stabilizers that cause the ganache to be grainy. Semi-sweet (35-45% cacao) is the best for even flavor. Use bittersweet for more intense flavor, and milk or white chocolate for sweeter tastes. Top-quality chocolate raises your ganache to such heights that are simply unforgettable.
Don’t use chocolate chips unless they are of premium quality, such as Ghirardelli or Guittard, since they won’t melt evenly. Chop bars finely to have instant, even melting when mixed with cream. This option yields a glossy, pro finish. The flavor of your ganache will depend on the chocolate. Use with careful selection for a universally appealing dessert.
- Semi-sweet baking bars yield a classic, do-everything ganache.
- Finely chop chocolate so that it will melt evenly.
- Do not use low-quality chips so that it won’t have a grainy or flat texture.

4. The Simple Process
Ganache preparation is wonderfully simple, beginning with high-quality finely chopped chocolate in a heatproof bowl. Simmer heavy cream over low heat to 190-200°F, not too forcefully since it can create separation. Pour the simmered cream over the chocolate and allow it to sit for several minutes to relax. The sitting time is what avoids an uneven melt from over-mixing. Stir gently with a spoon to create a shiny finish.
Too much boiling or premature stirring ruins the texture, so be patient. Warm the cream in a metal or glass bowl, not plastic, which takes away shine. A rubber spatula is better than a whisk, which adds air and results in graininess. Careful attention makes the process foolproof. Your ganache will be silky smooth and ready to roll.
The slow stir creates a seamless emulsion, perfect for any dessert. If lumps remain, gently warm the mixture over a double boiler. This method ensures a lump-free, professional result every time. Master this technique, and you’ll have a go-to for all your baking needs. Your desserts will look and taste incredible.

5. Pourable Ganache for Glazing
To create a glossy glaze, thin a 1:2 chocolate and cream mixture to a pourable, thin ganache. This drizzles gorgeous on cakes for an elegant, professional finish. Chill it slightly (85-90°F) for 5-10 minutes and then set just up enough to coat without running off. This is the perfect consistency to create both taste and appearance. Dress up plain desserts with it.
Position your cake on a cooling rack over a sheet pan to catch drips. Pour ganache from the center, allow it to flow freely, and spread lightly with an offset spatula. Timing is everything too warm, and it melts the cake; too cool, and it does not spread evenly. This method results in a show-stopping, bakery-quality appearance. Your party guests will be impressed.
- Chill ganache to 85-90°F for optimal pourable consistency.
- Use controlled pouring from a measuring cup.
- Spread quickly with an offset spatula for a high-gloss finish.

6. Spreadable Ganache for Fillings
A 1:1 ratio of cream to chocolate produces a spreadable ganache, perfect for topiping cupcakes or filling cakes. Let it come to room temperature (68-72°F) 1½-2 hours before thickening and becoming pliable. Spreads well without collapsing fragile cake layers. Perfect also for dipping cookies or fruit. So convenient, it’s a baker’s dream come true.
This stability is ideal for cake or pastry topping, with strong chocolate taste. Spread using a spatula to create a smooth coat, a professional touch. Retains its shape while being creamy and dense. Top with berries for an indulgent dessert. Your desserts will have gourmet dessert taste.
Spreadable ganache is easy to work with and elevates any recipe. Store it in an airtight container to maintain its texture for later use. Reheat gently if it firms up too much. This texture is a go-to for countless sweet projects. You’ll love its creamy, rich results.

7. Whipped Ganache for Frosting
Whipped ganache is a light, mousse-like frosting less sweet than buttercream. Chill a 1:1 ratio ganache until cold (1-3 hours) and then whip with an electric mixer 4 minutes on medium-high. That makes it a light, rich texture that’s perfect for cakes or cupcakes. It’s rich without being too rich. Your treats will be decadent and light.
The consistency of the light keeps its shape to pipe basic designs, such as swirls or rosettes. Work with star tips like Wilton 1M for the most favorable outcomes. The frosting creates sophistication without overdoing sweetness, and everyone adores it. It is perfect for layer cake or classy pastries. Your cakes will be distinct using this method.
- Whip only once ganache is cooled down thoroughly to prevent curdling.
- Apply medium-high speed for light, airy consistency.
- Pipe with basic directions for elegant, stable designs.

8. Piping Ganache for Ornaments
For piping elegant borders or rosettes, use the firm ganache consisting of a 2:1 chocolate-to-cream ratio. Chill it for 2½-3 hours at room temperature until thick but not too stiff to pipe. This consistency supports dainty shapes without crumbling. It’s ideal to create professional touches on cakes or cupcakes. Your desserts will be bakery-grade.
Plain star tips, such as Wilton 1M or Ateco 844, make beautiful swirls and patterns. Pipe slowly for accuracy to create clean, crisp designs. This firmer ganache is perfect for dramatic design pieces. Practice on parchment initially before piping onto dessert. Your creations will be showstoppers.
The key is patience during cooling to achieve the right texture. If too soft, chill briefly; if too firm, warm slightly. This technique elevates your decorating game effortlessly. Your piped designs will add a wow factor. You’ll feel like a pro with every swirl.

9. Troubleshooting Ganache Issues
Even professionals have hurdles with ganache, but the overwhelming majority of problems can be resolved. When chocolate refuses to melt, most likely it wasn’t cut fine enough or cream was too cold. Chop chocolate into tiny bits and warm cream just barely simmering. Heat in a double boiler to remedy finicky lumps, always stirring. This provides a silky, shiny finish.
Seized ganache, turning gritty from water exposure, is a common hiccup. Keep all tools dry to prevent this. If ganache turns greasy or grainy, avoid cheap chocolate chips with stabilizers and use a spoon, not a whisk, to stir. These tips save your ganache from disaster. You’ll master it in no time.
- Chop chocolate finely for even melting.
- Keep tools dry to avoid seizing.
- Stir with a spoon to prevent graininess.

10. Multifunctional Uses for Ganache
Ganache is the culinary chameleon. It’s ideal as a topping, filling, or dip. Drizzle over cupcakes, cheesecakes, or ice cream to add a glossy sheen. Use it as a filling in layer cakes, trifles, or pies, to add rich depth of taste. It’s also a rich dip for strawberries or cookies. This multifunctional use of ganache elevates it to superfood status.
Ganache is perfect for testing cupcakes for a chocolate surprise or in tart shells for an indulgent richness. Swirl it through ice cream for a marbled look that is irresistible. Ganache falls over even the humblest desserts with ease. Play around with all sorts of uses and discover your own favorite. Your treats will be remembered.
Ganache’s practicality means that it is a staple in any household for any dessert. Store leftover ganache for impromptu baking escapades. Reheat cautiously to reconstitute its fluidity. From drizzles to fillings, ganache is the ultimate do-it-all. You’ll be wondering how you managed without it.

11. Storing Ganache Properly
Ganache is best kept, making your baking versatile. Chill it in a covered jar for a week. To use, allow it to reach room temperature or heat it in warm water in a bowl, not touching water. It’s ready to use in any dessert project. Your ganache remains ideal for days.
For longer storage, freeze ganache for up to three months in small containers. Thaw in the fridge for 24 hours before use to preserve texture. If too firm, microwave in 10-second bursts, stirring between. This makes batch baking a breeze. You’ll always have ganache on hand.
- Store in airtight containers to prevent flavor absorption.
- Freeze in small portions for easy thawing.
- Re-whip after thawing for a fluffy frosting texture.
12. Adding Flavor Twists
Straight ganache is wonderful, but flavoring puts it on a pedestal. Experiment with the addition of a drizzle of dark rum or Kahlua for a punch, folding in after it’s been blended. Mix in a sprinkle of cinnamon and chili powder for a Mexican chocolate taste sensation. These innovations take your ganache to a new height. Half the enjoyment is experimenting.
A sprinkle of vanilla or salt adds depth to chocolate, offsetting sweetness. Whisk spice into warm cream prior to combining to ensure even flavor. These details turn ganache into a signature dessert. Raspberry liqueur offers a sweet way to impart your desserts with a distinctive flavor.
Flavor combinations allow you to adjust ganache to any recipe. Try in small amounts to get your ideal combination. Don’t add too much or the rich texture of chocolate is lost. This invention adds surprise to every bite. You will enjoy the intense flavor combinations you have made.

13. Insider Tips for Success
Ganache is simple to make with a few insider tips. Chop chocolate finely so it will melt quickly and evenly lumps form with big chunks. Use a serrated knife to cut for clean, quick cuts to save prep time. This prep trick is the key to a smooth finish. Your ganache will be perfect every time.
Let the cream and chocolate sit for a few minutes after combining before stirring. This resting period lets the cream soften the chocolate, reducing the need for overmixing. Over-stirring can add air, making ganache grainy. This simple pause ensures a silky texture. You’ll nail ganache with minimal effort.
- Chop chocolate finely to speed up melting.
- Let cream and chocolate rest before stirring to meld flavors.
- Combine gently with a spatula so as not to form air bubbles.

14. Decadent Truffles Preparation
Ganache is the rich filling for chocolate truffles, with an 8 oz firmer chocolate to 2/3 cup cream consistency. Chill until firm, then scoop into balls with a melon baller. Coat in cocoa powder, nuts, or coconut for a professional-looking finish. Bite size, they are excellent gifts. Your truffles will be a hit.
Once they’ve formed, refrigerate truffles 25 minutes to set. Coat with tempered chocolate for a crunchy shell or keep it basic with powdered sugar. This rich ganache is stable. It’s a pleasure to turn ganache into confections. Your home will be like a chocolatier’s shop.
Truffles are surprisingly easy with this method. Store them in the fridge for up to a week for freshness. Serve at room temperature for the best flavor. This technique opens a new world of dessert possibilities. You’ll love the decadent results.
")

