

Alright, foodies and busy bees, gather ’round! We all know that feeling: the clock’s ticking, hunger’s growling, and your usual dinner rotation just isn’t cutting it anymore. You scroll through endless feeds, hoping for a spark, a culinary revelation, something that screams ‘Eat me now!’ Well, good news, because your search for dinner inspiration officially ends here. Get ready to have your taste buds absolutely blown away!
We’ve rounded up a collection of recipes that are not just ‘good,’ they’re ‘drop everything and run to the kitchen’ good. These aren’t your average, yawn-inducing meals that just fill a void. Oh no, these are the heavy-hitters, the true game-changers, the dishes that will make you rethink your entire dinner strategy and possibly even some of your life choices – but only in the most deliciously satisfying way, of course!
From creamy, comforting classics that hug you from the inside out, to smoky, spicy sensations that ignite your palate with vibrant zest, we’ve got something for every craving and every skill level. Prepare to embark on a thrilling culinary adventure that promises big, bold flavors, incredibly smart shortcuts, and meals so satisfying, you’ll be declaring them instant family legends.

1. **Mom’s Chicken Pot Pie**Is there anything more utterly comforting, more profoundly soul-soothing, than a warm, flaky, golden-brown chicken pot pie? It’s more than just a meal; it’s like a warm hug in a bowl, a culinary security blanket that has the incredible power to transport you straight back to your happiest childhood memories. This specific family recipe for chicken pot pie is an absolute testament to creamy, cozy perfection, delivering all those cherished nostalgic feels with every single, delightful bite.
The true genius, the undeniable secret sauce, if you will, that elevates this recipe into a true weeknight warrior is its brilliant and utterly sensible use of a store-bought pie crust. Forget the fuss, the inevitable flour explosions, and the hours of meticulous pastry work; this smart shortcut means you can achieve that delectable, crisp, and beautifully golden crust without any of the usual time-consuming effort. It streamlines the entire cooking process, making this heartwarming and deeply satisfying dish incredibly accessible, even on your most hectic and demanding evenings when time is a precious commodity.
Imagine, for a moment, sinking your fork through that perfectly bronzed, flaky crust, then breaking into a rich, savory filling that’s absolutely packed with tender, succulent chicken and a medley of garden-fresh vegetables. Everything swims harmoniously in a luxuriously velvety, perfectly seasoned sauce that binds all the incredible flavors together. It’s the kind of wholesome, hearty meal that doesn’t just fill your stomach but promises genuine warmth, profound satisfaction, and a sense of well-being, proving once and for all that sometimes, the simplest and most cherished traditions are indeed the most profound.
This isn’t just a recipe; it’s an invitation to create lasting memories around your dinner table. The ease of preparation, combined with its universally loved flavors, makes it an absolute must-add to your regular dinner rotation. Your family, your friends, and even your own inner child will undoubtedly thank you profusely for bringing such cozy, comforting deliciousness into their lives, again and again. Get ready for a standing ovation!
Mom’s Chicken Pot Pie
Equipment
- 1 Large Skillet Preferably oven-safe for versatility, though not strictly required by this recipe.
- 1 9-inch Deep-Dish Pie Pan
- 1 Baking Sheet For catching drips and ensuring even bottom crust cooking.
- 1 Whisk or Spatula Essential for smooth roux development and stirring.
- 1 Measuring Cups and Spoons For accurate ingredient portions.
Ingredients
Main
- ⅓ cup butter
- ⅓ cup chopped onion
- ⅓ cup all-purpose flour
- ½ teaspoon salt
- ¼ teaspoon ground black pepper
- 1 ¾ cups chicken broth
- ⅔ cup milk
- 2 cups chopped cooked chicken
- 1 14.5 ounce can peas and carrots
- ½ 15 ounce can whole new potatoes, drained
- 1 14.1 ounce package double-crust pie pastry, thawed
Instructions
- Preheat the oven to 425 degrees F (220 degrees C).
- Melt butter in a large skillet over medium heat. Cook and stir onion, flour, salt, and pepper in hot butter until onion is translucent, about 5 minutes.
- Pour in broth and milk; bring to a boil and cook until slightly thickened, about 1 minute. Remove the skillet from heat and stir in chicken, peas and carrots, and potatoes.
- Press 1 pie pastry into the bottom of a 9-inch, deep-dish pie pan. Pour chicken mixture into pie pastry. Top with remaining pastry and press edges together to seal. Cut several slits in top pastry. Place pie on a baking sheet.
- Bake in the preheated oven until crust is golden brown, about 30 minutes. Let pie cool and filling thicken at room temperature for 15 to 20 minutes before cutting.
Notes

2. **World’s Best Lasagna**Now, when a recipe proudly proclaims itself the ‘World’s Best Lasagna’ and then backs it up by garnering an astonishing more than 19,000 ratings and 20,000 reviews, you know with absolute certainty that it’s not just good – it’s something truly legendary! This isn’t merely *a* lasagna; it’s *the* lasagna, a culinary masterpiece that has captivated taste buds and earned its well-deserved 5-star status from countless home cooks across the globe. Prepare yourself for a dish that will redefine your expectations of Italian comfort food.
The real, deeply cherished secret behind this lasagna’s incredible and widespread popularity lies squarely in two paramount components: an exquisitely delectable, patiently slow-simmering meat sauce and a generous, dreamy trio of glorious cheeses. The meat sauce, a cornerstone of its flavor, isn’t rushed; instead, it’s given the respectful time it truly deserves to simmer gently, allowing all those robust, savory, and complex flavors to fully bloom and meticulously meld into something truly extraordinary. This commitment to patience and depth of flavor is precisely what elevates it from being merely good to an absolutely unforgettable, show-stopping creation.
While it’s undeniably a perfect recipe to enthusiastically tackle on a leisurely weekend, particularly when you have the luxurious gift of time to let that magnificent sauce develop its full, rich potential, the ultimate payoff is simply immense and utterly worth every moment. Each carefully constructed layer of perfectly cooked pasta, generously slathered with that rich, aromatic meat sauce, and then interspersed with copious amounts of gooey, bubbling cheese, comes together in an exquisite symphony of flavor and texture that will have everyone at your table eagerly reaching for seconds, and even thirds!
This isn’t just about preparing dinner; it’s about crafting an event, a magnificent culinary experience that speaks of passion and tradition. It’s a dish that invites lingering, encourages conversation, and guarantees a memorable meal. So, clear your schedule, gather your ingredients, and prepare to bring a true culinary masterpiece to life in your very own kitchen. This lasagna isn’t just a meal; it’s a celebration of flavor, a beacon of comfort, and a guaranteed crowd-pleaser that will solidify your reputation as a kitchen wizard.
World’s Best Lasagna
Equipment
- 1 Dutch Oven For simmering the meat sauce
- 1 Large Pot For boiling lasagna noodles
- 1 Mixing Bowl For preparing the ricotta mixture
- 1 9×13 inch Baking Dish For assembling and baking the lasagna
- 1 Spatula or wooden spoon For cooking and stirring ingredients
Ingredients
Main
- 1 pound sweet Italian sausage
- ¾ pound lean ground beef
- ½ cup minced onion
- 2 cloves garlic crushed
- 1 28 ounce can crushed tomatoes
- 2 6.5 ounce cans canned tomato sauce
- 2 6 ounce cans tomato paste
- ½ cup water
- 2 tablespoons white sugar
- 4 tablespoons chopped fresh parsley divided
- 1 ½ teaspoons dried basil leaves
- 1 ½ teaspoons salt divided, or to taste
- 1 teaspoon Italian seasoning
- ½ teaspoon fennel seeds
- ¼ teaspoon ground black pepper
- 12 lasagna noodles
- 16 ounces ricotta cheese
- 1 egg
- ¾ pound mozzarella cheese sliced
- ¾ cup grated Parmesan cheese
Instructions
- Gather all your ingredients. Dotdash Meredith Food Studios
- Cook sausage, ground beef, onion, and garlic in a Dutch oven over medium heat until well browned. Dotdash Meredith Food Studios
- Stir in crushed tomatoes, tomato sauce, tomato paste, and water. Season with sugar, 2 tablespoons parsley, basil, 1 teaspoon salt, Italian seasoning, fennel seeds, and pepper. Simmer, covered, for about 1 ½ hours, stirring occasionally. Dotdash Meredith Food Studios
- Bring a large pot of lightly salted water to a boil. Cook lasagna noodles in boiling water for 8 to 10 minutes. Drain noodles, and rinse with cold water. Dotdash Meredith Food Studios
- In a mixing bowl, combine ricotta cheese with egg, remaining 2 tablespoons parsley, and 1/2 teaspoon salt. Dotdash Meredith Food Studios
- Preheat the oven to 375 degrees F (190 degrees C).
- To assemble, spread 1 ½ cups of meat sauce in the bottom of a 9×13-inch baking dish. Arrange 6 noodles lengthwise over meat sauce, overlapping slightly. Spread with 1/2 of the ricotta cheese mixture. Top with 1/3 of the mozzarella cheese slices. Spoon 1 ½ cups meat sauce over mozzarella, and sprinkle with 1/4 cup Parmesan cheese. Dotdash Meredith Food Studios
- Repeat layers, and top with remaining mozzarella and Parmesan cheese. Cover with foil: to prevent sticking, either spray foil with cooking spray or make sure the foil does not touch the cheese. Dotdash Meredith Food Studios
- Bake in the preheated oven for 25 minutes. Remove the foil and bake for an additional 25 minutes. Dotdash Meredith Food Studios
- Rest lasagna for 15 minutes before serving. Dotdash Meredith Food Studios
Notes

3. **Scott Hibb’s Amazing Whisky Grilled Baby Back Ribs**Calling all dedicated barbecue aficionados, grilling enthusiasts, and serious meat lovers! Get ready for an unparalleled treat that will send your taste buds into an absolute frenzy of delight. Scott Hibb’s amazing whisky grilled baby back ribs are far more than just ordinary ribs; they are an extraordinary culinary experience, promising a truly mouthwatering adventure with every single, glorious bite. If your goal is to profoundly impress your guests, or simply treat your family to something truly spectacular, then make no mistake – this is unequivocally the recipe you need in your life.
The inherent magic, the very essence of what makes these ribs so utterly sensational, lies deeply in their incredible tenderness and an unparalleled juiciness that defies expectation. We’re not merely talking about well-cooked meat; we’re talking about pork so perfectly rendered, so exquisitely prepared, that it effortlessly slides right off the bone with graceful ease. There’s no struggling, no wrestling with stubborn meat – just pure, unadulterated, melt-in-your-mouth goodness that will leave you in a state of blissful culinary surrender. The strategic infusion of whisky adds a unique, complex depth of flavor, bestowing upon these ribs an edge and sophistication that will undeniably set them apart from any you’ve had before, making them truly unforgettable.
Now, picture this enticing scene: a sizzling grill, gently wafting curls of smoky aroma mingling with the enticing scent of whisky-infused ribs, all permeating the air. The anticipation is palpable, building steadily as these beautiful cuts of meat achieve their perfect, caramelized char and tender perfection. This isn’t just cooking; it’s an art form. Your guests will undoubtedly be raving about these ribs for weeks, your family will be tirelessly begging for the secret recipe, and you, my friend, will officially be crowned the undisputed BBQ champion of your domain. This is truly a recipe that not only demands but unequivocally earns a coveted, permanent spot in your grilling hall of fame.
Beyond the sheer deliciousness, there’s a certain joy in the ritual of grilling, the outdoor experience, and the communal pleasure of sharing such a fantastic meal. These ribs are perfect for summer gatherings, game days, or any occasion where you want to serve something truly special that speaks volumes about your culinary prowess. Get ready to create some seriously delicious memories and hear a chorus of delighted sighs as everyone savors every last bit of this tender, juicy, and flavor-packed masterpiece.
Scott Hibb’s Amazing Whisky Grilled Baby Back Ribs
Equipment
- 1 Roasting pan For baking ribs in the oven.
- 1 Heavy-duty aluminum foil Essential for wrapping ribs to tenderize during baking.
- 1 Medium Saucepan For simmering the homemade BBQ sauce.
- 1 Outdoor Grill For finishing the ribs with a smoky char.
- 1 Basting Brush For applying sauce during grilling.
Ingredients
Main
- 2 2 pound slabs baby back pork ribs
- salt and coarsely ground black pepper to taste
- 1 1/2 tablespoons ground red chile pepper divided
- 2 ¼ tablespoons vegetable oil
- ½ cup minced onion
- 1 ½ cups water
- ½ cup tomato paste
- ½ cup white vinegar
- ½ cup brown sugar
- 2 ½ tablespoons honey
- 2 tablespoons Worcestershire sauce
- 1 tablespoon dark molasses
- 2 teaspoons salt
- 2 teaspoons garlic powder
- 2 teaspoons whisky
- 1 ¼ teaspoons liquid smoke flavoring
- ½ teaspoon onion powder
- ¼ teaspoon paprika
- ¼ teaspoon coarsely ground black pepper
Instructions
- Preheat the oven to 300 degrees F (150 degrees C).
- Cut each full rack of ribs in half to make 4 half racks. Season with salt and black pepper (more black pepper than salt); sprinkle 1 tablespoon ground chile pepper over meat. Dotdash Meredith Food Studios
- Wrap each half rack in aluminum foil. Bake in the preheated oven for 2 hours and 30 minutes. Dotdash Meredith Food Studios
- Meanwhile, heat oil in a medium saucepan over medium heat. Cook and stir onion in hot oil for 5 minutes. Stir in water, tomato paste, vinegar, brown sugar, honey, and Worcestershire sauce. Add molasses, 2 teaspoons salt, garlic powder, whisky, remaining 1/2 tablespoon ground chile pepper, liquid smoke, onion powder, paprika, and 1/4 teaspoon black pepper. Bring to a boil, then reduce heat. Simmer uncovered until sauce thickens, about 1 hour and 15 minutes. Remove from heat and set sauce aside. Dotdash Meredith Food Studios
- Preheat an outdoor grill for high heat and lightly oil the grates.
- Remove wrapped ribs from the oven. Let stand for 10 minutes, then remove ribs from the foil.
- Cook ribs on the preheated grill for 3 to 4 minutes on each side. Brush sauce on ribs while grilling, just before you serve them (adding sauce too early will burn ribs). Dotdash Meredith Food Studios
Notes

4. **Cajun Seafood Pasta**Are you absolutely ready to dial up the heat and inject some serious sizzle into your kitchen? This Cajun seafood pasta recipe isn’t just a dish; it’s a bona fide ‘hot one,’ and we mean that in the most exhilarating and delicious sense of the word! Prepare your palate for an explosion of bold, audacious flavors, a vibrant and rhythmic dance of robust spices that will awaken every single one of your taste buds and leave you enthusiastically craving more. This particular dish is tailor-made for those adventurous eaters who are not afraid to add a thrilling, zesty kick to their dinner routine.
One of the most appealing and incredibly practical aspects of this fantastic recipe is its remarkable adaptability. Are you a true heat-seeker, someone who thrives on a fiery, palate-tingling sensation? Then feel free to go all out and embrace the spices with gusto! Or perhaps you prefer a more gentle, comforting warmth that merely tickles the senses? No problem at all! You can effortlessly adjust the heat level to perfectly suit your individual taste and comfort zone. This incredible flexibility means that everyone at your table, regardless of their spice preference, can truly enjoy a bowl tailored just for them, making it an absolutely fantastic and universally appealing crowd-pleaser for any gathering or family meal.
Whether you make the quick and efficient decision to prepare it rapidly in a single skillet, which is perfect for those busy weeknights, or you choose to transform it into a bubbling, golden-brown casserole dish, majestically finished under the broiler until its top achieves a gorgeous, inviting sheen, the end result is consistently and reliably delicious. The harmonious combination of succulent, tender seafood – imagine plump shrimp, delicate scallops, or flaky white fish – expertly mingled with a symphony of robust Cajun seasonings, creates a dish that is at once wonderfully indulgent, exhilaratingly exciting, and deeply satisfying. This isn’t just pasta; it’s a flavor fiesta that’ll undoubtedly have you eagerly reaching for generous seconds, and quite possibly even thirds, before you know it!
This recipe is your ticket to a quick trip to the bayou, right from your own dining room. The aromatic spices fill your home with an intoxicating fragrance, building anticipation for the vibrant meal to come. It’s a dish that delivers complex restaurant-quality flavor with surprising ease, proving that you don’t need a culinary degree to create something truly spectacular and memorable for your loved ones. Get ready to spice up your life, one delicious forkful at a time!
Cajun Seafood Pasta
Equipment
- 1 Large Pot For cooking pasta
- 1 Large Skillet For preparing the sauce
- 1 Colander For draining pasta
- 1 Whisk or stirring spoon For continuous stirring of the sauce
- 1 Measuring Cups and Spoons For precise ingredient measurements
Ingredients
Main
- 1 pound dry fettuccine pasta
- 2 cups heavy whipping cream
- 1 cup chopped green onions
- 1 cup chopped parsley
- 1 tablespoon chopped fresh basil
- 1 tablespoon chopped fresh thyme
- 2 teaspoons salt
- 2 teaspoons ground black pepper or to taste
- 1 ½ teaspoons crushed red pepper flakes or to taste
- 1 teaspoon ground white pepper or to taste
- ½ pound shrimp peeled and deveined
- ½ pound scallops
- ½ cup shredded Swiss cheese
- ½ cup grated Parmesan cheese
Instructions
- Fill a large pot with lightly salted water and bring to a rolling boil. Cook fettuccine at a boil until tender yet firm to the bite, about 8 minutes; drain pasta.
- Meanwhile, pour cream into a large skillet. Cook over medium heat, stirring constantly, until just about boiling. Reduce heat and add green onions, parsley, basil, thyme, salt, black pepper, red pepper flakes, and white pepper. Simmer until thickened, 7 to 8 minutes.
- Stir in shrimp and scallops. Cook until shrimp is no longer translucent. Dotdash Meredith Food Studios
- Stir in cheeses, blending well. Dotdash Meredith Food Studios
- Serve sauce over pasta. Dotdash Meredith Food Studios
- Serve hot and enjoy! DOTDASH MEREDITH FOOD STUDIOS
Notes

5. **Garlic-Brown Sugar Chicken Thighs**If you’re currently on an enthusiastic hunt for a chicken dish that is both delightfully simple to execute yet sensationally, almost unbelievably, flavorful, then you’ve absolutely *got* to try these magnificent garlic-brown sugar chicken thighs. This recipe is an undisputed masterclass in the art of creating incredible, unforgettable taste with truly minimal fuss, brilliantly proving that sometimes, the most profound and memorable meals are born from the most straightforward and humble of ingredient combinations. Prepare to be utterly amazed by how much flavor can come from so little effort!
The winning combination at the heart of this dish is so undeniable, so perfectly balanced, it’s almost poetic: a layer of irresistibly crunchy, perfectly crisped chicken skin beautifully paired with a rich, deeply savory, and exquisitely balanced slightly sweet brown sugar pan sauce. The chicken skin, rendered to golden perfection, crisps up beautifully, offering that incredibly satisfying textural contrast that we all crave, while the pan sauce meticulously develops into a lusciously thick, glossy glaze that lovingly coats every single inch of the tender, juicy chicken. This creates a truly harmonious and multi-layered flavor profile that dances delightfully on your palate.
This dish isn’t just another chicken recipe; it’s the kind of reliable, weeknight hero you’ll undoubtedly find yourself eagerly returning to, again and again, cementing its place in your culinary repertoire. It’s profoundly comforting, spectacularly flavorful, and incredibly versatile, making it the perfect partner for almost any side dish you can imagine – from fluffy, steamed rice that soaks up every drop of that amazing sauce, to vibrant, roasted seasonal vegetables, or even a simple, fresh green salad. Its adaptability makes it a perfect fit for any meal.
So, bid farewell to boring chicken nights forever! Get ready for a chicken dish that is anything but mundane, delivering generously on both robust taste and delightful texture. It’s guaranteed to become a new, celebrated family favorite, a dish requested time and time again, and a testament to the power of a few simple ingredients combined with brilliant technique. Prepare for accolades and empty plates – it’s that good, and that easy!
Garlic-Brown Sugar Chicken Thighs
Equipment
- 1 Oven-Proof Skillet Preferably cast iron for excellent heat retention and browning.
- 1 Tongs For safe and efficient handling of hot chicken.
- 1 Instant-Read Thermometer Essential for accurate doneness and food safety.
- 1 Small Mixing Bowl For combining sauce ingredients.
- 1 Whisk or Heat-Resistant Spatula For stirring and incorporating sauce ingredients.
Ingredients
Main
- 8 5 ounce bone-in, skin-on chicken thighs
- salt and ground black pepper to taste
- 3 tablespoons unsalted butter divided
- 4 cloves garlic minced
- ¼ cup packed brown sugar
- 1 tablespoon honey
- ½ teaspoon dried oregano
- ¼ teaspoon dried thyme
- ¼ teaspoon dried basil
Instructions
- Gather all ingredients. Dotdash Meredith Food Studios
- Preheat the oven to 400 degrees F (200 degrees C).
- Season chicken thighs with salt and pepper. Dotdash Meredith Food Studios
- Melt 2 tablespoons butter in a large oven-proof skillet over medium-high heat. Add chicken, skin-side down, and sear until just browned, 2 to 3 minutes per side. Remove chicken to a plate. Dotdash Meredith Food Studios Dotdash Meredith Food Studios
- Melt remaining 1 tablespoon butter in the skillet, stirring to loosen any browned bits on the bottom. Add garlic; cook and stir until fragrant, about 30 seconds. Stir in brown sugar, honey, oregano, thyme, and basil until well combined. Turn off the heat and return chicken to the skillet, skin-side down. Dotdash Meredith Food Studios
- Roast in the preheated oven until chicken is no longer pink at the bone and the juices run clear, 20 to 25 minutes. An instant-read thermometer inserted near the bone should read 165 degrees F (74 degrees C). Dotdash Meredith Food Studios
- Drizzle pan sauce over chicken thighs when serving. DOTDASH MEREDITH FOOD STUDIOS
Notes

6. **Amazing Spicy Grilled Shrimp**Prepare to elevate your summer cookouts, or simply transform a quick, flavorful weeknight meal into something truly extraordinary! This recipe for amazing spicy grilled shrimp isn’t just a suggestion; it’s a promise, delivering on its commitment to provide simple, incredibly easy, and utterly delicious seafood that will have everyone clamoring for more. If you’re a devoted fan of succulent shrimp, the smoky allure of grilling, and a tantalizing touch of invigorating heat, then prepare to fall head over heels in love with this dish.
The undeniable magic and profound deliciousness of this recipe truly lies within its superb marinade – it’s nothing short of super flavorful, masterfully hitting all the right notes with an exquisite, perfect balance of invigorating spice, a delicate touch of underlying sweetness, and the bright, refreshing zestiness of fresh lemon. This meticulously crafted blend of ingredients effortlessly infuses the plump shrimp with an incredible depth of taste, ensuring that every single bite is not just savory but superbly satisfying and utterly memorable. It’s the kind of versatile, flavor-packed marinade that you’ll undoubtedly want to keep on hand in your culinary arsenal, ready to be deployed for a multitude of other dishes!
Grilling these marinated beauties adds a wonderful, coveted char and an irresistible smoky flavor that perfectly complements and enhances the vibrant, complex marinade. The high heat of the grill ensures the shrimp cook quickly, staying tender and juicy on the inside while developing that desirable exterior. Whether you’re enthusiastically hosting a lively backyard bash, eagerly seeking a speedy, incredibly healthy, and unbelievably tasty dinner option for the family, or simply craving a burst of sunshine-filled flavor, these amazing grilled shrimp are an absolute, surefire hit.
They’re quick to cook, packed with a zesty punch, and guaranteed to disappear from the plate almost as quickly as they’re served, leaving only satisfied smiles and lingering desires for more. This dish is a testament to the fact that great flavor doesn’t always require hours in the kitchen, making it perfect for those spontaneous gatherings or when you just need a delicious meal in a flash. Get ready for an explosion of taste that will make your regular dinner plans feel incredibly drab by comparison!
Amazing Spicy Grilled Shrimp
Equipment
- 1 Mixing Bowl For preparing the marinade
- 1 Whisk To thoroughly combine marinade ingredients
- 1 Resealable Plastic Bag For marinating the shrimp efficiently
- 1 Outdoor Grill For high-heat grilling
- 1 Basting Brush For applying reserved marinade
Ingredients
Main
- ⅓ cup olive oil
- ¼ cup sesame oil
- ¼ cup chopped fresh parsley
- 2 tablespoons hot sauce
- 2 tablespoons minced garlic
- 1 tablespoon ketchup
- 1 tablespoon Asian chile paste
- 1 teaspoon salt
- 1 teaspoon black pepper
- 3 tablespoons lemon juice
- 2 pounds large shrimp peeled and deveined
- 12 wooden skewers soaked in water
Instructions
- Whisk together the olive oil, sesame oil, parsley, hot sauce, minced garlic, ketchup, chile sauce, salt, pepper, and lemon juice in a mixing bowl. Set aside about 1/3 of this marinade to use while grilling.
- Place the shrimp in a large, resealable plastic bag. Pour in the remaining marinade and seal the bag. Refrigerate for 2 hours.
- Preheat an outdoor grill for high heat. Thread shrimp onto skewers, piercing once near the tail and once near the head. Discard marinade.
- Lightly oil grill grate. Cook shrimp for 2 minutes per side until opaque, basting frequently with reserved marinade. Sherri
Notes

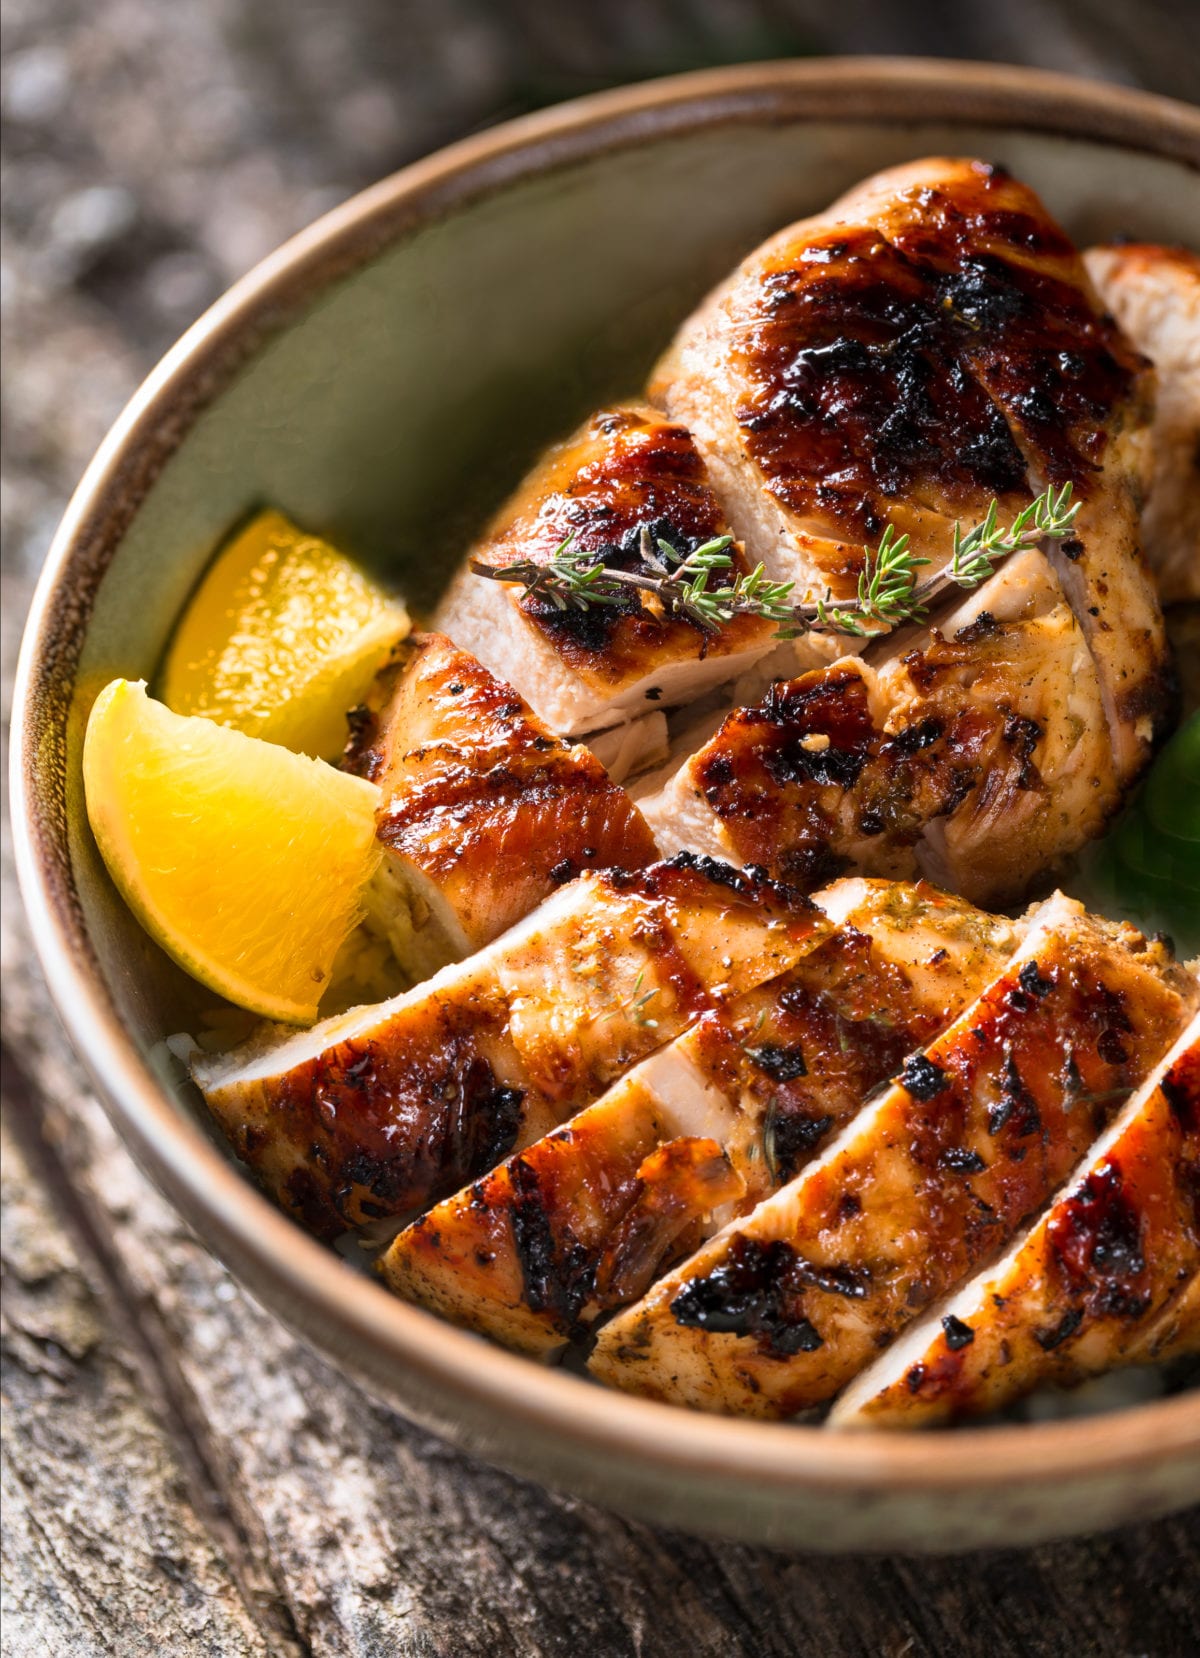
7. **My Chicken Parmesan**Chicken Parmesan holds a revered status as a classic for a multitude of excellent reasons: it’s inherently hearty, generously cheesy, and unequivocally, utterly delicious. It’s a dish that resonates with comfort and familiarity. However, this particular recipe, affectionately dubbed ‘My Chicken Parmesan,’ takes an already beloved and widely adored dish and brilliantly elevates it to nothing short of epic status. Prepare yourself for a rendition that is truly one for the books, promising a dinner experience that feels both deeply familiar and yet incredibly special, a true highlight on any menu.
The ingenious and wonderfully practical twist at the heart of this elevated version involves the clever use of chicken tenders instead of the more traditional, larger chicken breasts. This simple yet effective swap is a game-changer, as it brilliantly ensures perfect, uniformly sized portion sizes every single time, making the dish significantly easier to serve and enjoy without the usual hassle of cutting larger pieces at the table. Furthermore, chicken tenders, with their inherently smaller size and quicker cooking time, cook up beautifully and consistently, retaining their supreme tenderness and expertly absorbing all the glorious, rich flavors that surround them.
This dish, however, isn’t just singularly about the chicken; it is a meticulously crafted, complete culinary picture, a harmonious symphony of ingredients. Imagine it: perfectly breaded and seasoned chicken tenders, baked to golden perfection, artfully nestled over a generous bed of perfectly cooked, tomato-coated angel hair pasta. To crown this masterpiece, a luscious blanket of ooey-gooey, melted cheese cascades over the top, creating an irresistible vision. It’s a symphony of textures – crispy, tender, soft – and a delightful medley of tastes that sing together in perfect unison. Every element contributes to a deeply satisfying and balanced meal that truly captivates the senses.
To truly complete this magnificent culinary experience, be sure to serve it alongside some crusty, warm garlic bread. This isn’t just an accompaniment; it’s a crucial tool for mopping up every last, precious drop of that savory, delectable sauce, ensuring no flavor goes to waste. Prepare yourself and your diners for a meal that will not only earn enthusiastic rave reviews and appreciative nods but is also destined to become a cherished and frequently requested family tradition. This ‘My Chicken Parmesan’ is an undeniable triumph, a dish that will quickly become synonymous with delicious, comforting perfection in your home, forever changing your perspective on what a weeknight meal can be.
Okay, food lovers and curious cooks, section one brought you some seriously cozy classics, but now? Now we’re cranking up the adventure dial! Get ready to explore a whirlwind of global flavors and ingenious weeknight wonders that are about to revolutionize your dinner routine. We’re talking exciting international delights and clever shortcuts that transform gourmet meals from “someday” into “tonight!” Buckle up, because these next recipes are pure magic.

Meatball Casserole
Equipment
- 1 Casserole Dish 13×9-inch or similar large baking dish
- 1 Large Pot For cooking pasta and mixing ingredients
- 1 Whisk For combining liquids and seasonings
- 1 Measuring Cups/Spoons For precise ingredient portions
- 1 Chef’s knife For chopping fresh basil
Ingredients
Main
- Cooking spray
- 1 16-oz. package frozen fully-cooked meatballs, thawed
- 1 16-oz. package uncooked fusilli pasta
- 1 24-oz. jar marinara sauce
- 2 cups chicken broth
- 1 cup whole milk
- 3 Tbsp. chopped fresh basil divided
- 1/2 tsp. kosher salt
- 1/4 teaspoon freshly ground black pepper
- 2 cups shredded mozzarella cheese
- 1/2 cup shredded Parmesan cheese
Instructions
- Preheat your oven to 375°F (190°C). Lightly coat a 13×9-inch baking dish with cooking spray.
- Cook the fusilli pasta according to package directions until it is al dente; drain the pasta thoroughly.
- In a large pot or mixing bowl, combine the thawed fully-cooked meatballs, marinara sauce, chicken broth, whole milk, 2 tablespoons of chopped fresh basil, kosher salt, and freshly ground black pepper. Stir until well combined.
- Add the drained al dente fusilli pasta to the meatball and sauce mixture, tossing gently to ensure all ingredients are evenly coated.
- Transfer the entire pasta and meatball mixture into the prepared baking dish, spreading it out into an even layer.
- Evenly sprinkle the 2 cups of shredded mozzarella cheese over the top of the casserole mixture.
- Next, sprinkle the 1/2 cup of shredded Parmesan cheese over the mozzarella layer.
- Bake for 25-30 minutes, or until the casserole is bubbly around the edges and the cheese on top is melted and lightly golden brown.
- Remove the casserole from the oven and let it stand for 5-10 minutes before serving. This allows the dish to set and makes for easier serving.
- Garnish the baked casserole with the remaining 1 tablespoon of fresh basil before serving.
Notes

8. **Creamy Herbed Pork Chops**Say hello to your new weeknight superstar! If you’re looking for a dish that feels utterly fancy without actually *being* complicated, these creamy herbed pork chops are about to blow your mind and totally redefine your dinner expectations. Imagine tender, juicy pork chops, pan-fried to a beautiful golden perfection, luxuriating in a rich, velvety pan sauce absolutely bursting with savory herbs. This isn’t just dinner; it’s a culinary hug that whispers, “You totally deserve something amazing tonight, and guess what? It was shockingly easy to make!”
The magic here truly lies in the beautiful simplicity and the incredible, utterly satisfying flavor payoff. You’re going to expertly pan-fry these beautiful cuts of meat in a generous swirl of butter, alongside a symphony of perfectly chosen savory spices. That delightful sizzling sound filling your kitchen, the intoxicating aroma wafting through the air – it’s all part of the immersive experience that gets your taste buds tingling even before the first bite! This smart cooking method expertly locks in all the precious juices, ensuring every single morsel of pork is supremely tender, incredibly moist, and absolutely packed with an unforgettable flavor. Forget those sad, dry, and bland chops you might have encountered before; these are succulent, deeply satisfying, and seriously, undeniably delicious from start to finish.
But wait, there’s even more culinary brilliance! The true, undeniable showstopper of this dish is that luscious, velvety, and utterly irresistible creamy pan sauce. It effortlessly comes together right in the very same skillet you used for the chops, ingeniously soaking up all those incredible browned bits and flavorful drippings. This creates an astonishing depth of flavor that’s just *chef’s kiss*, binding all the components into a harmonious, rich, and truly decadent experience. This sauce elevates simple pork chops into a truly unforgettable meal, making it absolutely perfect for impressing your most discerning guests or simply treating yourself to something spectacularly special after an incredibly long, demanding day.
To truly round out this dreamy meal, we highly recommend pairing these sensational pork chops with some fluffy mashed potatoes, which are practically begging to soak up every last, precious drop of that amazing sauce. Alternatively, a quick side of vibrant, roasted asparagus or a fresh green salad would also be absolutely perfect for a complete, well-balanced meal. You’ll be adding this gem to your “frequent flyer” list of dinner recipes faster than you can say “delicious,” and your taste buds will send you thank-you notes for days!
Creamy Herbed Pork Chops
Equipment
- 1 Large Skillet Essential for browning pork chops and preparing the creamy sauce
- 1 Small Bowl For mixing dry seasonings and the flour-herb blend
- 1 Instant-Read Thermometer Crucial for ensuring pork is cooked to a safe internal temperature of 145°F (63°C) without overcooking
- 1 Whisk Necessary for gradually incorporating milk into the roux to create a smooth, lump-free sauce
- 1 Plate For resting pork chops after searing, allowing juices to redistribute
Ingredients
Main
- 4 thick-cut boneless pork chops
- 1 teaspoon Montreal steak seasoning or to taste
- 2 ½ tablespoons all-purpose flour or as needed
- 1 tablespoon dried basil
- 1 teaspoon instant beef bouillon granules
- 5 tablespoons butter divided, or as needed
- 1 teaspoon freshly ground black pepper
- 2 cups milk
Instructions
- Season pork chops on all sides with steak seasoning. Mix flour, basil, and bouillon granules together in a small bowl.
- Melt 2 tablespoons butter in a large skillet over medium heat. Add seasoned chops and cook until browned and only slightly pink in the center, 7 to 10 minutes per side. An instant-read thermometer inserted into the center should read at least 145 degrees F (63 degrees C). Transfer chops to a plate.
- Add remaining butter to the skillet as needed so that about 3 tablespoons pan drippings remain. Stir pepper into pan drippings and cook for 1 minute. Add flour mixture and cook, stirring constantly, until browned, about 2 minutes. Gradually whisk in milk and bring to a simmer over medium heat; cook, stirring constantly, until thick and bubbly, 4 to 6 minutes.
- Serve hot sauce over pork chops. kioluv
Notes

9. **Bacon-Ranch Chicken Enchiladas**Alright, let’s dive headfirst into a culinary fusion masterpiece that might not claim to be strictly authentic, but unequivocally *does* claim to be outrageously, undeniably delicious: Bacon-Ranch Chicken Enchiladas! If you’re a devoted fan of those classic, creamy, cheesy enchilada vibes but also secretly harbor a wish for a little extra weeknight wizardry and a flavor explosion, then clear your dinner schedule immediately. This incredibly inventive recipe is about to become your new best friend, brilliantly combining all your favorite comfort flavors into one seriously satisfying, smile-inducing dish that everyone will adore.
The sheer genius of this recipe truly lies in its incredibly zesty, unexpected twist. We’re talking about taking traditional, beloved enchiladas and infusing them with the irresistible, savory crunch and smoky goodness of bacon, perfectly complemented by the tangy, herbaceous, and utterly addictive deliciousness of ranch seasoning. It’s a flavor combination that just intuitively *works*, creating an explosion of taste that manages to be both delightfully familiar and wonderfully, excitingly unexpected. This isn’t your abuela’s enchilada recipe (unless your abuela was secretly a cutting-edge flavor innovator, in which case, abuela, we salute you and your culinary foresight!).
These enchiladas aren’t just good; they’re the ultimate weeknight dinner solution because they’re designed for pure, unadulterated deliciousness with minimal fuss and maximum flavor impact. They’re hearty, they’re gloriously cheesy, and they bring that undeniable “OMG, I absolutely *need* another bite right now” factor to your dinner table, ensuring utter delight with every single forkful. The harmonious blend of perfectly seasoned, tender chicken, those delectable crispy bacon bits, and the luscious, creamy ranch sauce, all lovingly wrapped in soft, pliable tortillas and then baked until beautifully bubbly and perfectly golden-brown, is pure culinary bliss. It’s comfort food expertly dialed up to eleven, guaranteeing satisfied sighs and happy bellies all around.
So, if you’re absolutely ready to inject some fun, flavor, and an undeniably tasty, crowd-pleasing dish into your regular cooking rotation, then seriously, look no further. These Bacon-Ranch Chicken Enchiladas are more than just a meal; they’re a joyous culinary event waiting to happen. They’re perfect for a lively family dinner, a casual and cozy get-together with your favorite friends, or even a well-deserved solo treat when you simply need something incredibly comforting and satisfying. Prepare for pristine, empty plates and a flurry of enthusiastic requests for the recipe – you have been deliciously warned!
Bacon-Ranch Chicken Enchiladas
Equipment
- 1 Baking Dish 9×12-inch brownie pan or similar
- 1 Large Skillet
- 1 Small Mixing Bowl For ranch/sour cream mixture
- 1 Spoon For filling tortillas
Ingredients
Main
- cooking spray
- 2 tablespoons olive oil
- ¼ cup chopped yellow onion
- ½ leftover rotisserie chicken chopped
- ¼ cup crumbled cooked bacon
- 2 tablespoons roasted garlic
- ½ teaspoon salt
- ½ teaspoon ground black pepper
- ½ teaspoon garlic powder
- 1 bunch green onions chopped
- 2 tablespoons ranch dressing
- 2 tablespoons sour cream
- 15 6 inch corn tortillas, or more to taste
- 2 cups shredded Cheddar-Monterey Jack cheese blend
- 1 cup mild enchilada sauce
Instructions
- Preheat the oven to 450 degrees F (230 degrees C). Spray a 9×12-inch brownie pan with cooking spray.
- Heat olive oil in a large skillet over medium heat. Add onion and cook until soft, about 5 minutes. Stir in chicken, bacon, and roasted garlic. Season with salt, pepper, and garlic powder. Stir in green onions.
- Mix ranch dressing and sour cream together in a small bowl. Remove chicken mixture from heat and stir just enough ranch mixture into the skillet to barely coat chicken.
- Hold 1 tortilla and spoon 2 tablespoons chicken mixture across the middle. Sprinkle 1 tablespoon Cheddar-Monterey Jack cheese blend over chicken and roll tortilla up. Place filled tortilla, seam-side down, against the short end of the pan so it does not unroll. Repeat with remaining tortillas and filling until pan is jammed full of enchiladas.
- Pour enchilada sauce on top of filled tortillas to cover without drowning them. Sprinkle remaining Cheddar-Monterey Jack cheese blend generously on top of everything.
- Bake in the preheated oven until bubbly on top, about 15 minutes.
Notes

10. **Black Pepper Beef and Cabbage Stir-Fry**Ready for a dinner that’s absolutely bursting with vibrant flavor, incredibly quick to whip up, and actually, legitimately, surprisingly good for you? Then prepare to make a new best friend in the kitchen: the Black Pepper Beef and Cabbage Stir-Fry! This fantastic dish is your ultimate ticket to a vibrant, savory, and deeply satisfying meal that literally comes together in a flash, making it an absolute lifesaver for those notoriously busy weeknights when you still crave something homemade, wholesome, and spectacularly tasty. It’s a culinary triumph that brilliantly proves healthy eating can be incredibly exciting and totally delicious!
The inherent beauty and brilliance of this stir-fry truly lies in its elegant yet powerful combination of fresh, simple ingredients. Imagine succulent, tender strips of beef, perfectly cooked, mingling with crisp-tender, vibrant cabbage and bright, refreshing red bell pepper. This trio comes together in a harmonious dance of textures and tastes, creating a dynamic and engaging eating experience. But the undisputed star of this show, the element that truly elevates it, is the magnificently potent sauce: a masterful blend of rich, savory soy sauce and intensely aromatic garlic, all beautifully punctuated and brought to life by the invigorating zing of freshly ground black pepper. It’s a timeless, classic combination that consistently delivers, generously coating every single ingredient in a glossy, irresistible, and utterly delectable glaze.
What’s truly fantastic and universally appealing about stir-fries, and this recipe in particular, is their inherent simplicity and lightning-fast speed. This isn’t a laborious dish that demands hours of meticulous simmering or complex, intimidating techniques. Instead, it’s all about quick, high-heat cooking that magically keeps the vegetables perfectly crisp-tender and the beef wonderfully succulent and juicy. You will be utterly amazed at just how quickly you can transform a few fresh, humble ingredients into a meal that tastes like it was expertly crafted at your favorite gourmet takeout spot, but with all the undeniable goodness, control, and love that only home cooking can provide. It’s a culinary superpower!
To truly complete this culinary delight and soak up every last drop of that incredible peppery, garlicky sauce, simply serve your Black Pepper Beef and Cabbage Stir-Fry over a fluffy, warm bed of steamed rice. The rice acts as the perfect, humble canvas, eagerly absorbing all those magnificent flavors and making every single bite a pure, unadulterated joy. This stir-fry isn’t just a meal; it’s a fresh, flavorful, and fantastically fast way to get an unbelievably delicious and wholesome dinner on the table, brilliantly proving once and for all that quick doesn’t ever have to mean compromising on spectacular taste!
Black Pepper Beef and Cabbage Stir Fry
Equipment
- 1 Wok or Large Skillet Essential for proper stir-frying at high heat.
- 1 Chef’s knife For chopping and shredding ingredients efficiently.
- 1 Cutting Board
- 1 Spatula or Stir-Fry Tool To continuously move ingredients in the hot wok.
- 1 Small Mixing Bowl For preparing the cornstarch slurry.
Ingredients
Main
- 2 tablespoons vegetable oil
- 4 cloves garlic chopped
- ½ pound ground beef
- ½ small head cabbage shredded
- 1 red bell pepper cut into strips
- 2 tablespoons soy sauce
- 1 teaspoon cornstarch
- ½ cup cold water
- 1 teaspoon ground black pepper or to taste
- 1 pinch salt to taste
Instructions
- Gather ingredients. Dotdash Meredith Food Studios
- Heat a wok or large skillet over medium-high heat, and add oil. Saute garlic for about 5 seconds, then add ground beef. Stir-fry until beef is evenly brown, 5 to 7 minutes; drain excess fat. Dotdash Meredith Food Studios
- Stir in cabbage and pepper, and cook until vegetables are tender and beef is fully cooked. Stir in soy sauce. Dotdash Meredith Food Studios
- Mix together cornstarch and water, and stir in. Season with pepper; add salt to taste. Cook, stirring, until sauce has thickened. Dotdash Meredith Food Studios
- Serve hot and enjoy! DOTDASH MEREDITH FOOD STUDIOS
Notes

11. **Pistachio-Crusted Rack of Lamb**Okay, deep breath. We know what you’re thinking: “Lamb? Rack of lamb? Intimidating? Pricey? Maybe not exactly a ‘weeknight wonder’ for my Tuesday evening dinner plans!” But hold that thought and hear us out for just a moment! If you’ve been secretly yearning to unleash your inner gourmet chef, impress someone truly special (or simply treat yourself, because let’s be real, you absolutely *are* worth it!), then the Pistachio-Crusted Rack of Lamb is your undeniable, shining moment to step into the spotlight. This isn’t just a meal; it’s an unforgettable experience, a sophisticated showstopper that confidently proclaims, “Yes, I absolutely *do* know what I’m doing in the kitchen!” – all without requiring an actual, intimidating culinary degree.
Yes, preparing lamb, especially a rack, can certainly feel a bit daunting, and we won’t sugarcoat it, racks of lamb do come with a certain, well, *elegance-level* price tag. However, the ultimate payoff for this particular recipe is absolutely immense and profoundly rewarding. This exquisite dish is meticulously designed to utterly please a crowd and leave a lasting, delicious impression, brilliantly proving that sometimes, investing a little extra time and (yes, a slightly fancier cut of meat) is totally, unequivocally worth every single moment. It effortlessly transforms any special occasion, from an intimate anniversary to a festive holiday gathering, into an unforgettable, gourmet feast, and honestly, mastering the art of cooking lamb is a kitchen flex that feels incredibly, deeply satisfying and impressive.
The true, undeniable secret to this lamb’s incredible allure and profound deliciousness lies squarely within its magnificent, perfectly crafted crust. Imagine a vibrant, beautifully crunchy, and exquisitely textured coating, meticulously made from a sophisticated blend of pungent, zesty Dijon mustard, intensely aromatic herbs de Provence, and finely chopped, nutty pistachios. This incredible blend isn’t just a mere topping; it’s a multi-sensory flavor and texture sensation that completely elevates the inherently tender, succulent lamb to new gastronomic heights. The delightful crunch of the pistachios, the complex savory notes of the herbs, the sharp, bright kick of the mustard – it all comes together in an exquisite symphony that will undoubtedly have everyone at your table eagerly asking for your secret recipe, and probably your autograph too!
So, if you’re truly ready to confidently step up your culinary game and tackle something truly, undeniably special, this Pistachio-Crusted Rack of Lamb is your perfect, most rewarding challenge. It’s a guaranteed crowd-pleaser, a magnificent dish that will have your guests raving about your cooking prowess for weeks, and your own confidence soaring higher than a culinary hot air balloon! Don’t let the initial “fancy” label scare you away; this recipe provides a clear, incredibly helpful, and surprisingly approachable path to gourmet success right in your own kitchen. Get ready to serve a meal that looks and tastes like it came straight from a five-star restaurant, all crafted by your very own hands, right there in your dining room!
Pistachio-Crusted Rack of Lamb
Equipment
- 1 Baking Sheet
- 1 Large Skillet
- 1 Small Bowl For mixing crust
- 1 Instant-Read Thermometer Crucial for precise doneness
- 1 Aluminum Foil For lining baking sheet
Ingredients
Main
- 2 racks of lamb trimmed
- 1 teaspoon herbes de Provence
- salt and ground black pepper to taste
- 1 tablespoon vegetable oil
- ⅔ cup chopped pistachio nuts
- 2 tablespoons dry bread crumbs
- 1 tablespoon melted butter
- 1 teaspoon olive oil
- 3 tablespoons Dijon mustard
Instructions
- Preheat the oven to 400 degrees F (200 degrees C). Line a baking sheet with aluminum foil.
- Generously season each rack of lamb with herbes de Provence, salt, and pepper.
- Heat vegetable oil in a large skillet over high heat. Place lamb into the skillet and cook until browned on all sides, 6 to 8 minutes. Transfer to the prepared baking sheet.
- Stir pistachios, bread crumbs, melted butter, and olive oil together in a small bowl; season with salt and pepper. Spread mustard over the fatty side of lamb, then press pistachio mixture into mustard.
- Bake in the preheated oven until crust is golden and lamb is pink in the center, 20 to 25 minutes. An instant-read thermometer inserted into the center should read at least 130 degrees F (54 degrees C) for medium doneness.
- Transfer lamb to a plate and let rest for 10 minutes before slicing.
Notes

12. **Curry Stand Chicken Tikka Masala Sauce**Who else, raise your hand, *adores* ordering Chicken Tikka Masala from their absolute favorite Indian restaurant but secretly, in the quiet corners of their culinary heart, wishes they could recreate that magical, aromatic deliciousness at home without, you know, actually *moving* to India to apprentice with a master chef for a decade? Well, prepare yourself for an epic mic drop moment, because this Curry Stand Chicken Tikka Masala Sauce recipe is about to make those spicy, creamy, dreamy culinary aspirations come gloriously true! According to the enthusiastic community member Stephicus, it “tastes just like the Tikka Masala from our favorite Indian restaurant, we are in love.” Get ready to fall deeply, madly, deliciously in love yourself!
Now, deep breaths, and whatever you do, please, please don’t let the initial ingredient list intimidate you into thinking this is too complex. We totally get it – Indian recipes can sometimes look like a vibrant spice rack accidentally exploded all over the page, which might initially seem a bit daunting or overwhelming to the eager novice cook. But here’s the truly brilliant, reassuring part: the directions for this recipe are so “simple and direct that it should be no problem,” as Stephicus so confidently assures us. It’s one of those amazing culinary illusions where the incredibly complex, rich, and deeply satisfying flavors emerge from a surprisingly straightforward and approachable process, making it absolutely perfect for both adventurous beginners and seasoned kitchen wizards alike.
The profound beauty and sheer joy of crafting your very own Chicken Tikka Masala sauce at home is the incredible depth of authentic flavor you can precisely achieve. This isn’t just a quick, throw-together curry; it’s a slow, enchanting dance of wonderfully aromatic spices, luscious, creamy tomato goodness, and perfectly tender chicken (which you’ll, of course, add to this magnificent sauce to simmer and absorb all that flavor!). You’re meticulously building layer upon layer of exquisite taste that will magically transport your palate straight to the bustling, vibrant streets of India, all from the glorious comfort of your very own kitchen. It’s an exciting adventure for your taste buds, offering an exotic escape without ever needing to dust off your passport.
This recipe is truly your golden ticket to confidently mastering a beloved Indian classic, brilliantly proving that restaurant-quality, mind-blowing flavors are not only totally within your reach but also surprisingly easy to achieve! It’s hearty, it’s bursting with flavor, and it’s absolutely guaranteed to become a new, celebrated obsession in your dinner rotation. Serve it generously with fluffy basmati rice to perfectly soak up every single, precious drop of that incredible, complex sauce, and don’t forget warm, soft naan bread for scooping. Get ready for a delighted chorus of happy sighs and enthusiastic declarations around your dinner table. This is more than just dinner; it’s a truly memorable flavor journey you’ll eagerly want to embark on again and again!
Curry Stand Chicken Tikka Masala Sauce
Equipment
- 1 Large Skillet For preparing the sauce base
- 1 Medium Skillet For searing the chicken
- 1 Wooden Spoon or Spatula For stirring and sautéing
- 1 Chef’s Knife and Cutting Board For preparing aromatics and chicken
- 1 Measuring Spoons and Cups For precise ingredient measurements
Ingredients
Main
- 2 tablespoons ghee clarified butter
- 1 onion finely chopped
- 4 cloves garlic minced
- 1 tablespoon ground cumin
- 1 teaspoon salt or more to taste (Optional)
- 1 teaspoon ground ginger
- 1 teaspoon cayenne pepper
- ½ teaspoon ground cinnamon
- ¼ teaspoon ground turmeric
- 1 14 ounce can tomato sauce
- 1 cup heavy whipping cream
- 1 tablespoon white sugar or more to taste (Optional)
- 2 teaspoons paprika
- 1 tablespoon vegetable oil
- 4 skinless boneless chicken breast halves, cut into bite-size pieces
- ½ teaspoon curry powder
Instructions
- Gather all ingredients. Dotdash Meredith Food Studios
- Heat ghee in a large skillet over medium heat. Add onion; cook and stir until translucent, about 5 minutes. Dotdash Meredith Food Studios
- Stir in garlic; cook and stir just until fragrant, about 1 minute. Stir cumin, 1 teaspoon salt, ginger, cayenne pepper, cinnamon, and turmeric into onion mixture; fry until fragrant, about 2 minutes. Dotdash Meredith Food Studios
- Stir tomato sauce into onion and spice mixture; bring to a boil and reduce heat to low. Dotdash Meredith Food Studios
- Simmer sauce for 10 minutes, then mix in cream, 1 tablespoon sugar, and paprika. Bring sauce back to a simmer and cook, stirring often, until sauce is thickened, 10 to 15 minutes. Dotdash Meredith Food Studios
- Heat vegetable oil in a separate skillet over medium heat. Stir chicken into hot oil; add curry powder. Sear chicken until lightly browned but still pink inside, about 3 minutes; stir often. Dotdash Meredith Food Studios
- Transfer chicken and any pan juices into sauce. Simmer chicken in sauce until no longer pink, about 30 minutes; adjust sugar and salt to taste. Dotdash Meredith Food Studios
Notes
13. **Grilled Beef Tenderloin with Herb-Garlic-Pepper Coating**If the mere thought of grilling a magnificent beef tenderloin makes your palms just a *little* bit sweaty, but your discerning heart absolutely yearns for that perfectly cooked, impossibly tender, and utterly decadent steakhouse-quality experience right in the comfort of your own home, then listen up! You absolutely, unequivocally *need* this recipe in your culinary life! Get ready to confidently channel your inner grill master and impress everyone with the Grilled Beef Tenderloin with Herb-Garlic-Pepper Coating, a dish so exquisitely impressive, yet so incredibly straightforward to execute, it’ll make you wonder why you ever bothered paying premium prices at a fancy, white-tablecloth restaurant. Seriously, this is game-changing.
Community member MaryD raves with palpable enthusiasm, “Thanks for this awesome recipe… The wet rub is fabulous and came out wonderfully.” And honestly, folks, that wet rub? That’s precisely where the undeniable magic truly begins! It’s a powerful, aromatic, and deeply flavorful coating, meticulously packed with a vibrant medley of fresh herbs, pungent garlic, and zesty pepper. This incredible blend infuses the tenderloin with an astonishing depth of savory flavor from the outside in, simultaneously creating a crust that’s both deliciously caramelized and visually stunning. This isn’t just basic seasoning; it’s a meticulously crafted flavor armor that ensures every single, glorious bite is magnificent, complex, and utterly unforgettable.
But here’s the real game-changer, the profound secret sauce that expertly takes all the fear and guesswork out of confidently grilling this prime, often intimidating cut of meat: the “fool-proof grilling directions.” MaryD specifically highlights these instructions with genuine appreciation, stating, “Follow them precisely and you will not be disappointed.” This recipe ingeniously takes all the guesswork and anxiety out of achieving that perfect, coveted medium-rare (or however you personally prefer your tenderloin cooked!), giving you the ultimate confidence to grill a tenderloin that’s consistently juicy, bursting with flavor, and cooked exactly to your exacting liking. Say goodbye forever to overcooked disasters or those nerve-wracking undercooked worries – this recipe sets you up for absolute success!
So, whether you’re meticulously planning a truly special occasion like an anniversary, joyously celebrating a significant milestone, or simply want to treat your beloved family to an extraordinary, restaurant-quality dinner that they’ll talk about for ages, this Grilled Beef Tenderloin is your undisputed champion. It’s elegant, it’s bursting with complex, layered flavors, and it’s surprisingly accessible thanks to those brilliant, easy-to-follow, stress-reducing instructions. Prepare to receive a chorus of enthusiastic accolades and delighted sighs from everyone gathered around the table – you’re about to cement your reputation as a certified grilling legend!
Grilled Beef Tenderloin with Herb-Garlic-Pepper Coating
Equipment
- 1 Sharp Chef’s Knife Essential for trimming the tenderloin
- 1 Butcher’s Twine For tying the tenderloin to ensure even cooking
- 1 Small Mixing Bowl For preparing the herb rub
- 1 Grill Charcoal or gas, capable of two-zone cooking
- 1 Instant-Read Meat Thermometer Crucial for accurately checking internal temperature
Ingredients
Main
- 1 5 pound whole beef tenderloin
- 8 large garlic cloves minced
- 6 tablespoons olive oil
- 2 tablespoons minced fresh rosemary
- 2 tablespoons coarsely ground black pepper
- 1 tablespoon dried thyme leaves
- 1 tablespoon salt
Instructions
- Gather the ingredients. Dotdash Meredith Food Studios
- Use a sharp knife or scissors to remove silverskin and trim excess fat from tenderloin. Fold the thinner end under to approximate the thickness of the rest of the roast and tie with butcher’s twine to secure. Tie tenderloin in 1 1/2- to 2-inch intervals to help it keep its shape during cooking. Dotdash Meredith Food Studios
- Mix together garlic, oil, rosemary, pepper, thyme, and salt in a small bowl; rub over tenderloin to coat. Let sit while you preheat the grill. Dotdash Meredith Food Studios
- Light a charcoal fire in one half of a charcoal grill or preheat a gas grill to high for 10 minutes and lightly oil the grate.
- Place tenderloin on the hot grill and close the lid. Grill until well-seared, about 5 minutes. Flip and repeat on the other side. Dotdash Meredith Food Studios
- Move tenderloin to the cool side of the charcoal grill, or if using a gas grill, turn off the burner directly underneath the tenderloin and turn the remaining one or two burners (depending on grill style) to medium. Cook until rosy pink and a meat thermometer inserted in the thickest section registers 130 degrees F (54 degrees C), 45 to 60 minutes. Cook time will depend on tenderloin size and grill.
- Let tenderloin rest 15 minutes before carving. Dotdash Meredith Food Studios
Notes

14. **Chef John’s Baked Mushroom Risotto**Risotto. The very word itself often conjures images of endless, arm-cramping stirring, vigilant hovering over a bubbling pot, and a general air of culinary anxiety. It’s notoriously tricky, demanding constant attention and precision, right? Well, my fellow food lovers, prepare to have all your risotto-related anxieties completely evaporated, because Chef John’s Baked Mushroom Risotto is here to profoundly revolutionize your dinner plans and your perception of this classic! If you’ve always harbored a secret dream of gracefully making that ultra-creamy, profoundly comforting, and quintessentially Italian classic but felt utterly intimidated by the traditional, labor-intensive stovetop method, then this genius recipe is your golden, shimmering ticket to success.
This recipe is unequivocally “a great place to start” for anyone, regardless of their experience level, who is new to the magical world of risotto. Why? Precisely because it brilliantly ditches the constant, repetitive stirring without sacrificing *any* of that beloved, signature creamy texture and luxurious mouthfeel. Seriously, this is an absolute game-changer in the risotto universe! You get all the comforting, velvety goodness you’d passionately expect from a perfectly executed traditional risotto, but with an ingeniously hands-off baking approach that feels almost like pure culinary magic. It’s essentially like having a phantom sous chef diligently handle all the arduous stirring while you (the savvy head chef) can leisurely sip a well-deserved glass of wine, or, you know, effortlessly chase after the kids without a single culinary worry.
The flavor profile here is pure, unadulterated comfort, exquisitely elevated by the earthy, deeply savory notes of fresh mushrooms that become incredibly rich and wonderfully integrated when baked into the creamy rice. Every single spoonful is a harmonious symphony of perfectly cooked, al dente Arborio rice, lusciously coated in a rich, velvety sauce, with those delightful, tender mushroom bites adding incredible depth, umami, and a satisfying textural contrast. It truly, genuinely “tastes just like risotto made on the stovetop,” a magnificent testament to Chef John’s undeniable culinary genius in making traditionally complex, nuanced flavors remarkably achievable and accessible for absolutely everyone.
So, if you’re absolutely ready to confidently tackle a revered classic dish with a brilliant, stress-free shortcut that delivers spectacularly on all its promises of ultra-creamy, comforting deliciousness, then this Baked Mushroom Risotto is quite literally calling your name! It’s the perfect elegant yet surprisingly easy meal for a special dinner, a cozy and intimate night in, or simply when you want to impress yourself and your family with your newfound, effortless risotto prowess. Get ready for a deeply satisfying, profoundly comforting bowl of Italian culinary perfection that will quickly become your new, much-celebrated go-to recipe. Buon appetito!
Chef John’s Baked Mushroom Risotto
Equipment
- 1 Oven-Proof Skillet Large, heavy-bottomed
- 1 Wooden Spoon or Heat-Proof Spatula For stirring
- 1 Measuring Cups
- 1 Measuring Spoons
- 1 Cutting Board and Chef’s Knife For dicing and chopping ingredients
Ingredients
Main
- 3 tablespoons butter
- 3 cups diced mushrooms
- salt to taste
- ½ yellow onion diced
- ground black pepper to taste
- 1 pinch cayenne pepper
- 1 cup carnaroli rice
- 2 cups chicken broth divided
- ½ cup heavy whipping cream
- ½ cup chicken broth
- 2 tablespoons heavy whipping cream
- ½ cup finely grated Parmigiano-Reggiano cheese
- 2 tablespoons chopped fresh chives
Instructions
- Preheat oven to 400 degrees F (200 degrees C).
- Melt butter in large, oven-proof skillet over medium-high heat. Add mushrooms; season with salt, and cook and stir mushrooms until brown. They will begin browning after the moisture evaporates.
- Reduce heat to medium and stir in onion. Sprinkle with black pepper and cayenne pepper. Cook and stir until onions are translucent and soft.
- Pour rice into skillet and stir until each rice grain is coated with butter. Season with salt.
- Pour 1 cup chicken broth into the rice mixture. Raise heat to medium-high and cook, stirring rice until liquid is completely absorbed by the rice.
- Pour another cup chicken stock into the rice and stir until mixture comes to a simmer.
- Bake in preheated oven until grains are almost tender but still slightly firm, about 15 minutes. Transfer skillet to stovetop. Season with more salt, if necessary.
- Combine the remaining 1/2 cup chicken broth and cream; pour into the skillet. Cook on medium heat, stirring constantly until rice is tender, 1 or 2 minutes. Remove skillet from heat.
- Drizzle 2 tablespoons cream over rice. Add the grated Parmigiano-Reggiano and chives; stir. Serve immediately.
Notes
Phew! What an absolutely incredible, flavor-packed culinary journey we’ve embarked on together! From those heart-warming, cozy classics that lovingly wrap you in a delicious, edible hug, to vibrant international sensations that magically transport your taste buds around the globe, and brilliant, ingenious weeknight shortcuts that transform gourmet dinner dreams into a delightful reality – we sincerely hope your dinner plans are now officially, deliciously, and utterly rethought, reimagined, and ready for adventure! These recipes aren’t just about merely filling your plate; they’re fundamentally about sparking immense joy and creativity in your kitchen, fostering unforgettable moments and cherished conversations around your dining table, and profoundly proving that truly amazing, spectacularly flavorful meals are always, genuinely, within your creative reach. So go forth, dear food enthusiasts, cook with boundless confidence and an adventurous spirit, and prepare to unlock a whole new, exciting world of deliciousness.


")